How to Transplant Japanese thistle?
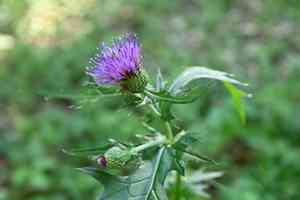
The most favorable period for relocating japanese thistle is in the spring, specifically from late spring through early summer, as moderate temperatures aid in root development. Select a bright spot with soil that drains effectively, and always remember that careful handling is crucial for japanese thistle's successful acclimation.
What Preparations are Needed Before Transplanting Japanese Thistle?
What is the Ideal Time for Transplanting Japanese Thistle?
The best period for relocating japanese thistle spans from late spring to early summer. This timeframe promotes vigorous development due to mild temperatures and stable weather, which are perfect for root integration. Moving japanese thistle during this season ensures the plant benefits from the forthcoming growing period's warmth and extended daylight, boosting photosynthesis and overall vitality. By transplanting japanese thistle at this opportune moment, the risk of transplant shock is minimized, and the plant has ample chance to flourish before more challenging seasons arrive.
How Much Space Should You Leave Between Japanese Thistle Plants?
When getting ready to plant your japanese thistle, aim to provide them with adequate room to grow. Position each plant approximately 18-24 inches (45-60 cm) apart. This ensures they have sufficient space to develop and prevents overcrowding, which can lead to restricted growth and poor health.
What is the Best Soil Mix for Japanese Thistle Transplanting?
For your japanese thistle, choose soil that drains well and is rich in organic material. A foundational fertilizer, such as a balanced 10-10-10 blend (suitable for most general garden uses), will enrich the soil. Incorporate it a few weeks prior to planting to allow nutrients to blend with the earth.
Where Should You Relocate Your Japanese Thistle?
Find a sunny spot in your garden that receives at least 6 hours of direct sunlight daily for your japanese thistle. If you observe the area gets partial shade, that's acceptable, as these plants can tolerate some protection from the intense afternoon sun.
What Equipments Should You Prepare Before Transplantation Japanese Thistle?
Gardening Gloves
To safeguard your hands while handling soil and plants.
Shovel or Spade
To excavate the root ball of japanese thistle when removing it from its original spot.
Garden Fork
To loosen the soil around the plant's root system without causing excessive harm.
Watering Can or Garden Hose
For hydrating japanese thistle before and after its relocation.
Pruning Shears
To trim any damaged roots or foliage prior to transplanting.
Wheelbarrow or Garden Cart
To move the plant and soil without straining your back.
Mulch
To help retain moisture and regulate soil temperature post-transplant.
How Do You Remove Japanese Thistle from the Soil?
How Do You Remove Japanese Thistle from the Soil?
From Ground: First, water the japanese thistle plant to soften the earth. Dig a wide circle around the plant with a shovel or spade, ensuring to include most of the root ball.From Pot: Water japanese thistle thoroughly before beginning. Turn the pot sideways and gently tap it to loosen the soil and root ball. Carefully ease the plant out by pulling the base of the stem, taking care not to harm the plant.From Seedling Tray: Water the seedling tray to make the soil damp and easier to work with. Use a garden fork or hand tool to gently lift the japanese thistle plant from its cell, preserving as much of the root ball as possible.
Step-by-Step Guide for Transplanting Japanese Thistle
Preparation
Water the japanese thistle thoroughly before moving it to reduce transplant shock and facilitate its removal.
Digging the New Hole
Excavate a hole twice as wide as the root ball and of the same depth to ensure the japanese thistle sits at the identical level it was previously growing.
Placement
Position the japanese thistle in the center of the new hole, gently spreading out its roots. Ensure the plant is upright and at the correct depth.
Filling the Hole
Backfill the hole with soil around the root ball of the japanese thistle, gently pressing down the soil to eliminate air pockets.
Watering
Water the japanese thistle generously after transplanting to settle the soil and hydrate its roots.
Staking (if Necessary)
If the japanese thistle is tall or in a windy location, stake the plant to provide support until it is well established.
How Do You Care For Japanese Thistle After Transplanting?
Pruning
Trim any broken or damaged stems to direct the japanese thistle's energy towards establishing new roots instead of repairing injured tissue.
Regular Watering
Water the japanese thistle consistently to ensure the soil remains moist as the plant adjusts to its new location. Adjust your watering schedule based on weather conditions to prevent overwatering.
Mulching
Apply a layer of mulch around the base of the japanese thistle to conserve moisture, suppress weeds, and help regulate temperature.
Monitoring
Keep a close watch on the japanese thistle for signs of stress, such as wilting or discolored leaves, and take appropriate action as needed.
Staking
Check and adjust any support stakes to ensure they are effectively stabilizing the plant without causing damage to the stem.
Troubleshooting Common Issues with Japanese Thistle Transplantation.
When is the best time to transplant japanese thistle?
The ideal time for transplanting japanese thistle is from late spring to early summer for optimal root establishment.
What spacing is needed between japanese thistle plants?
Allow each japanese thistle approximately 18-24 inches (45-60 cm) of space to permit adequate growth and air circulation.
How do I prepare the soil for japanese thistle transplant?
Ensure the soil is rich, well-draining, and loosened to a depth of 12 inches (30 cm) before transplanting.
How much should I water japanese thistle after transplanting?
Water generously immediately after transplanting, then maintain consistent moisture without overwatering during the initial establishment phase.
Can japanese thistle handle full sun after transplanting?
Yes, japanese thistle thrives in full sun but requires protection from intense afternoon heat for a few days post-transplant.
Why are my transplanted japanese thistle wilting?
Wilting may indicate shock or insufficient watering. Keep the soil moist and provide shade if necessary during the initial stages.
How deep should I plant japanese thistle's root ball?
The top of the root ball should be level with the surrounding soil to prevent stem rot or drying out.
What should I do if japanese thistle leaves turn yellow post-transplant?
Yellowing leaves can signal over-watering or poor drainage. Check moisture levels and drainage, then adjust as needed.
How can I protect japanese thistle from pests after transplanting?
Monitor for pests, use suitable organic deterrents, and maintain plant health to ward off infestations.
Should I apply fertilizer to japanese thistle after transplanting?
Wait a few weeks before fertilizing to avoid damaging delicate new roots; then use a balanced, slow-release fertilizer.



