How to Transplant Geraldton waxflower?
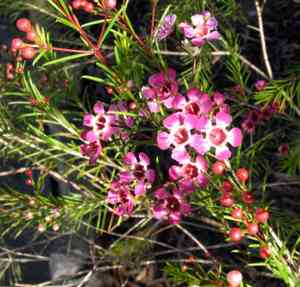
For geraldton waxflower, a pathway to thriving growth is achieved by relocating it during the rejuvenating period of early to mid-spring. Choose a bright spot with soil that drains effectively. Should room be limited, do not worry, geraldton waxflower can adapt, but ensure adequate space for its development.
What Preparations are Needed Before Transplanting Geraldton Waxflower?
What is the Ideal Time for Transplanting Geraldton Waxflower?
The most favorable period for relocating geraldton waxflower is the beginning of early to mid-spring. This timing allows geraldton waxflower to establish its root system prior to the summer heat. Moving geraldton waxflower during this window fosters resilience against the stress of warmer months, ensuring vigorous development. Your geraldton waxflower will benefit from the mild weather and the increasing daylight hours that aid recovery and root growth after transplant.
How Much Space Should You Leave Between Geraldton Waxflower Plants?
Aim for a spacing of approximately 1-2 feet (30-60 cm) between each geraldton waxflower plant during transplantation. This provides ample room for healthy development, helping to prevent competition for nutrients and sunlight.
What is the Best Soil Mix for Geraldton Waxflower Transplanting?
Prepare your soil, ideally a well-draining sandy or loamy base, before moving geraldton waxflower. Incorporate an all-purpose fertilizer during preparation to enrich the soil and boost plant growth.
Where Should You Relocate Your Geraldton Waxflower?
Select a site that receives full sunlight for your geraldton waxflower transplant. This species thrives in bright light conditions and will flourish when exposed to abundant sun!
What Equipments Should You Prepare Before Transplantation Geraldton Waxflower?
Gardening Gloves
Safety first! These will shield your hands when handling soil and the geraldton waxflower plant.
Trowel
It's a useful tool for excavating a new hole, shifting some earth, and generally settling your geraldton waxflower into its new spot.
Spade or Shovel
If you're dealing with a larger geraldton waxflower plant, it's advisable to use a bigger implement like a spade or shovel.
Pruning Shears
It's quite advantageous to trim the geraldton waxflower plant before relocation. This will help the plant redirect its energy towards developing new roots.
Watering Can or Hose
Your newly transplanted geraldton waxflower will require thorough hydration after being moved.
Mulch
After watering, apply mulch around the base to retain soil moisture and to hinder weed growth.
Garden Cart or Wheelbarrow (Optional)
It can be helpful as an aid to transport the geraldton waxflower, especially if it's a sizable plant or if you're moving it a considerable distance.
How Do You Remove Geraldton Waxflower from the Soil?
How Do You Remove Geraldton Waxflower from the Soil?
From Ground: Initially, moisten the soil by watering the geraldton waxflower plant. Afterward, dig a trench around the plant using a spade or shovel, being careful to keep the root ball intact. Gently work the spade beneath the root ball to lift the plant from its original position. Raise the plant slowly and avoid damaging the main root structure.From Pot: If the geraldton waxflower plant is in a container, simply invert the pot while supporting the plant at its base with your hand. Lightly tap the bottom and slide the plant and root ball out. If it's stuck, you might need to compress the sides of the pot to loosen the soil and roots.From Seedling Tray: If your geraldton waxflower is still in a seedling tray, gently push from the bottom of the cell or use a tool like a spoon to lift it out, ensuring minimal root disturbance.
Step-by-Step Guide for Transplanting Geraldton Waxflower
Preparation
Review the natural habitat of geraldton waxflower, and consider the overall size of the plant when selecting the new site. Remember, plants need space between themselves and other plants to flourish.
Digging
Excavate a hole that is twice as wide and as deep as the current root ball of your geraldton waxflower. Loose and broken-up soil on the hole sides will encourage root expansion.
Placing
Position the geraldton waxflower in the hole, ensuring that the top of the root ball is level with the surface of the surrounding soil. Backfill the hole, filling in around the plant with soil. Firm it gently but do not compact it. Ensure there are no air pockets.
Watering
Please water the geraldton waxflower immediately after transplanting. Make sure to saturate the soil around the plant to help it settle into its new location.
How Do You Care For Geraldton Waxflower After Transplanting?
Pruning
Minor trimming to remove dead or dying foliage helps to lessen stress and water loss from your geraldton waxflower.
Watering
Keep the geraldton waxflower well hydrated during the initial few weeks and during any dry periods thereafter. Do not overwater, however, as waterlogged soil could suffocate your plant or lead to root disease.
Monitoring
Keep a close watch on your geraldton waxflower and look for indications of transplant shock such as wilting or yellowing leaves. If these persist, consult an experienced gardener or horticulturist.
Troubleshooting Common Issues with Geraldton Waxflower Transplantation.
When is the best time to transplant geraldton waxflower?
The optimal time to transplant geraldton waxflower is between seasons 1 and 2 ('S1-S2'). This period offers ideal conditions for root establishment and plant development.
How far apart should I plant individual geraldton waxflower?
Geraldton waxflower should ideally be spaced 1-2 feet (30-60 cm) apart. This provides each plant ample growing room and promotes optimal health.
What type of soil should be used for transplanting geraldton waxflower?
Geraldton waxflower prefers well-drained soil with a pH balance between 6.0 and 7.5. If your soil is heavy clay or sandy, enrich it with compost to improve its texture and nutrients.
How can I prevent transplant shock in geraldton waxflower?
To prevent transplant shock, ensure the root ball is handled carefully during transplanting. Also, water the plant thoroughly after transplanting and shield it from direct sunlight for a couple of days.
What's the best way to water geraldton waxflower after transplanting?
After transplanting, water geraldton waxflower generously to settle the soil around its roots. Afterward, water regularly but ensure the soil never becomes waterlogged, as geraldton waxflower doesn't tolerate overly wet conditions.
How deep should I plant geraldton waxflower?
The hole should be as deep as the root ball and twice as wide. This allows the roots room to spread and ensures the plant is planted at the same depth it was in its previous location.
How much sunlight does geraldton waxflower need after transplanting?
Geraldton waxflower thrives in full sun to partial shade. Ensure the new transplantation spot receives at least 6 hours of direct sunlight daily for optimal growth.
Should I fertilise geraldton waxflower after transplanting?
Yes, geraldton waxflower benefits from a light application of slow-release fertilizer after transplanting. However, avoid over-fertilizing to prevent potential harm to the plant.
How to protect geraldton waxflower from weeds and pests after transplanting?
A couple of inches (5 cm) of organic mulch around geraldton waxflower helps suppress weed growth and attract beneficial insects. If pests like aphids appear, applying an insecticidal soap can help.
When will I see growth after transplanting geraldton waxflower?
You may start to observe signs of new growth in geraldton waxflower within 2-4 weeks post transplantation. Remember, patience is key as every plant has its own pace of growth.