How to Prune Geraldton waxflower?
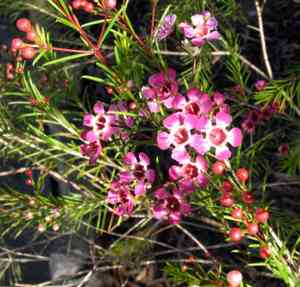
This perennial bush, celebrated for its vivid blooms and slender leaves, flourishes with appropriate upkeep. Essential methods for geraldton waxflower involve judicious trimming to enhance air movement and removing faded flowers to stimulate additional flowering. Trimming is best carried out in the colder months, following the blooming period, which facilitates the preservation of its form and fosters robust development. Meticulous pruning aids geraldton waxflower by diminishing the likelihood of illness and improving both its visual appeal and the quantity of flowers produced.
Advantages of Trimming Geraldton Waxflower
Advantages of Trimming Geraldton Waxflower
Trimming geraldton waxflower encourages fresh development, resulting in a more vigorous and dense specimen. Consistent shaping helps maintain an attractive form, preventing geraldton waxflower from becoming sparse or overgrown.
Optimal Period for Pruning Geraldton Waxflower
Optimal Period for Pruning Geraldton Waxflower
Pruning geraldton waxflower in late winter to early spring, just prior to its active growth phase, is ideal since the plant is still somewhat dormant, minimizing stress and sap loss. This timing allows for more efficient wound healing and directs energy towards new growth as temperatures rise. Furthermore, pruning after the frost risk has passed prevents potential harm to new shoots. Trimming at this stage also shapes the plant and prepares it for a robust flowering season, as geraldton waxflower blooms on the current year's growth.
Tools Required for Pruning Geraldton Waxflower
Bypass Pruners
Perfect for making clean cuts on geraldton waxflower, bypass pruners inflict less damage to plant tissues, fostering healthier regeneration.
Pruning Saw
For removing larger stems or branches too thick for pruners, a pruning saw ensures clean cuts without tearing.
Long-Handled Loppers
When reaching higher or deeper branches of geraldton waxflower, the extended handles offer leverage and accessibility without strain.
Hand Shears
For shaping geraldton waxflower and managing its size, hand shears allow for quick snips of smaller stems, perfect for maintaining a desired form.
Gloves
Hand protection from the waxy foliage and potential irritants when pruning geraldton waxflower.
Disinfectant
To prevent disease transmission when cutting geraldton waxflower, tools should be sanitized with disinfectant before and after use.
How to Prune Geraldton Waxflower
Tool Sanitation
Before beginning, ensure all pruning tools are clean and sharp to prevent disease spread and to make clean cuts that geraldton waxflower can heal quickly from.
Remove Dead Material
Identify and eliminate any withered leaves and dead branches from geraldton waxflower, being careful to cut back to the base of the dead material without harming healthy stems.
Cut Diseased Branches
Carefully inspect geraldton waxflower for any diseased branches. Make cuts on diseased branches well below the affected area to ensure all of the disease is removed and disinfect tools after each cut to prevent spread.
Shape Plant
Thin out crowded areas to maintain good airflow, which helps prevent the spread of diseases. Also, lightly shape geraldton waxflower to maintain the desired size and form, taking care not to cut into old wood that doesn't have leaves, as this can reduce flowering.
Post Prune Care
After pruning, clear away all removed material from around geraldton waxflower to prevent potential reinfestation of pests or diseases. Water the plant if necessary and apply a light layer of mulch to help with water retention and root protection.
Common Pruning Errors with Geraldton Waxflower
Excessive Pruning
Removing too much foliage can stress geraldton waxflower, leading to poor growth and reduced flowering. It is a common mistake to cut back the plant too harshly in an attempt to encourage new growth.
Cutting Old Wood
Pruning into old, woody stems can prevent new flowers as geraldton waxflower blooms on new wood. Gardeners should focus on light pruning and shaping rather than cutting into old growth.
Incorrect Tools
Using dull or dirty tools can damage the stems of geraldton waxflower and introduce diseases. Always use sharp, clean pruning shears or scissors.
Shearing
Attempting to shape geraldton waxflower like a formal hedge with shearing can result in uneven blooms and an unnatural appearance. Geraldton waxflower benefits from selective pruning rather than shearing.
Neglecting Health Checks
Not removing dead, diseased, or damaged wood can lead to unhealthy plant growth. It is vital for the gardener to regularly check and remove such material.
General Pruning Advice for Geraldton Waxflower
Selective Pruning
Target just the tips of the stems to encourage bushy growth and more blooms. Cutting back the stems by about one-third after flowering supports new growth where the flowers develop.
Clean Cuts
Make precise, clean cuts at a 45-degree angle just above a leaf node or bud to promote healthy regrowth. This allows for quick healing and reduces the risk of disease.
Thinning
Thin out crowded areas by removing select stems at their base to improve air circulation and sunlight penetration throughout geraldton waxflower, which promotes healthier growth.
Stagger Pruning
Instead of pruning all stems at the same height, cut at varying lengths to create a more natural, aesthetically pleasing shape and to stagger the flowering times.
Immediate Deadheading
Regularly remove spent blooms by deadheading to encourage further blooming throughout the growing season. Snip off the old flower heads just below where they attach to the stem.