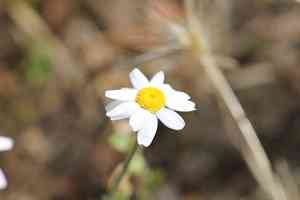
How to Transplant Roman chamomile?
The most favorable period for relocating roman chamomile is in the revitalizing phase from early to mid-spring, as environmental factors encourage root development. Select a site that receives full sun to partial shade and possesses good drainage. Carefully managing the roots and preserving the surrounding soil structure is advantageous.
What Preparations are Necessary Before Relocating Roman Chamomile?
What is the Optimal Period for Moving Roman Chamomile?
The perfect time for relocating roman chamomile falls in mid to late spring. This timing allows roman chamomile to establish its root system in mild temperatures, promoting robust development. Choosing this season for transplanting roman chamomile offers the benefit of a well-rooted plant that can flourish throughout the summer and become strong before the colder months. By transplanting during this gentle season, roman chamomile gets a head start, ensuring a lush, fragrant display that is both pleasing and advantageous. This proactive measure is crucial for the success of roman chamomile.
How Much Space Should You Provide Between Roman Chamomile Plants?
When relocating roman chamomile, ensure each plant is spaced approximately 1-2 feet (30-60 cm) apart. This provides ample room for growth and spreading without competing for nutrients. It might appear generous initially, but they will quickly fill the area.
What is the Best Soil Mixture for Roman Chamomile Relocation?
Ensure your soil drains well and is enriched with organic matter. A suitable foundational fertilizer for roman chamomile is one rich in potassium and phosphorus. Distribute it evenly over the soil before planting your roman chamomile. This will provide them with an initial nutrient boost.
Where Should You Replant Your Roman Chamomile?
Roman chamomile thrives in a location that receives full sun to partial shade. Therefore, select a spot in your garden that gets about 6-8 hours of sunlight daily. However, if your region experiences extreme heat, some afternoon shade will not be detrimental.
What Tools Should You Prepare Before Relocating Roman Chamomile?
Gardening Gloves
To keep your hands clean and protected from any sharp objects while handling soil and roman chamomile.
Garden Trowel
This tool will be used to carefully excavate the roman chamomile from its current spot, whether it's from the ground, a pot, or a seedling tray.
Garden Spade
To dig the hole in the new location where roman chamomile will be replanted.
Garden Fork
To gently separate the roots of the roman chamomile, which encourages better root development after relocation.
Watering Can
To hydrate the roman chamomile after transplanting and during its initial growth phase.
Mulch
This material is used to regulate soil temperature and moisture levels following transplantation.
How Do You Extract Roman Chamomile from the Soil?
How Do You Extract Roman Chamomile from the Soil?
From Ground: Begin by watering the roman chamomile plant to moisten the soil, which facilitates easier removal without harming the roots. Use a garden fork to loosen the soil around the roman chamomile, ensuring a wide enough radius to keep the root system intact. Then, use a garden trowel to carefully dig up the plant, again taking care not to damage the roots.From Pot: For potted roman chamomile, water it gently and then turn the pot sideways while holding the plant at its base. If the roman chamomile doesn't come out, tap the sides and bottom of the pot to loosen it. Once the plant is out, gently untangle the roots with your fingers or a fork.From Seedling Tray: Ensure the roman chamomile seedling is well-hydrated before you begin. Use a small tool or a popsicle stick to gently lift the seedlings by pushing up from the bottom. Try to handle the seedlings by their leaves and not their stems, which are delicate and can be easily damaged.
Step-by-Step Guide for Relocating Roman Chamomile
Preparing the new site
Dig a hole as deep and twice as wide as the roman chamomile root ball in the new location. If the soil there is compacted, break it up with a garden fork.
Positioning the plant
Place the roman chamomile in the new hole, ensuring that the top of the root ball is level with the ground. Carefully spread the roots out in the hole.
Backfilling
Refill the hole with soil, gently firming it down as you go to eliminate any air pockets. Make sure you do not bury the roman chamomile deeper than it was in its previous spot.
Watering
Water the roman chamomile immediately after transplanting. Ensure water penetrates deeply into the soil to reach the entire root system.
Mulching
Apply mulch around the plant without touching the stem. Mulch will help retain soil moisture and control weeds.
How Do You Care For Roman Chamomile After Relocation?
Watering
Roman chamomile prefers moist but not waterlogged soil, so water it regularly and confirm that drainage is effective.
Pruning
Trim the roman chamomile regularly to encourage dense growth.
Protection
Monitor for pests and diseases that might affect roman chamomile, especially after its defenses have been weakened by transplanting.
Frost care
Roman chamomile can be sensitive to frost. Provide frost protection to your plant if temperatures drop significantly after transplanting. A frost cloth or blanket will work, or you can construct a barrier around the plant using straw bales.
Troubleshooting Common Issues with Roman Chamomile Relocation.
When is the best time to move roman chamomile?
The ideal times for relocating roman chamomile are late spring to early summer (S2-S3). The plant will have the best opportunity to establish itself during this warmer period.
What is the optimal spacing for roman chamomile after replanting?
After replanting, roman chamomile should be spaced approximately 1-2 feet (30-60 cm) apart. This allows ample room for growth without unnecessary competition for nutrients and space.
What type of soil is most suitable for relocating roman chamomile?
Roman chamomile thrives in well-drained soil with a pH range of 5.6 to 7.5. Therefore, ensure the transplant area has such soil for the plant to flourish effectively.
Should roman chamomile be watered immediately after being replanted?
Yes, roman chamomile should be watered thoroughly right after transplanting to help the roots settle and recover from the transplant shock.
Can roman chamomile be replanted in containers?
Absolutely! Roman chamomile grows well in pots, just ensure the container has well-drained soil and sufficient space for the plant to fully mature.
Why is my replanted roman chamomile wilting?
Wilting could be due to environmental stress, insufficient watering, or transplant shock. Ensure roman chamomile receives enough water and is properly established in its new environment.
Should the entire root ball of roman chamomile be replanted?
Yes, the complete root ball of roman chamomile should be transplanted. This prevents stress to the plant and helps it establish quickly in its new location.
Will roman chamomile survive if the leaves get damaged during replanting?
Don't worry, even if a few leaves get damaged, roman chamomile will recover. In fact, thinning out a few leaves can assist the transplant process, making it less stressful for the plant.
Is it necessary to add fertilizer during roman chamomile relocation?
While not strictly essential, adding a slow-release, balanced fertilizer can promote healthy growth in roman chamomile after transplanting.
Is pruning required before relocating roman chamomile?
Pruning is not mandatory but can be beneficial. Removing excessive foliage can reduce the plant's water demand and thus lessen the potential transplant shock.


