How to Transplant Karanda?
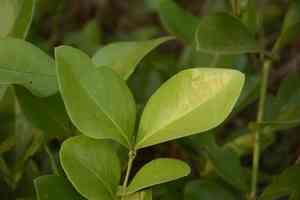
The most favorable period for transplanting karanda is in the vigorous early to mid-spring. Select a bright spot with soil that drains effectively. A helpful reminder: confirm that the root system is well-established prior to the onset of summer's warmth.
Essential Preparations Before Relocating Karanda
Optimal Period for Karanda Relocation?
The most favorable time for moving karanda is during the onset of early spring or the peak of mid-spring. This aligns with karanda's natural growth cycle, ensuring smooth adjustment and vigorous development. Transplanting at this time allows karanda to establish roots in mild conditions, leveraging the upcoming warm months for peak growth.
Required Spacing Between Karanda Plants?
When moving karanda, ensure each plant is positioned approximately 4-5 feet (1.2-1.5 meters) apart. This provides ample room for individual growth without competition. It's a simple method to encourage healthy development, even for novices!
Best Soil Mixture for Karanda Transplanting?
For karanda, opt for well-draining soil, enriched with organic material. Before planting, amend the soil by incorporating a foundational fertilizer such as compost or manure. This step will nourish your plant and foster optimal growth. Cultivation demands both patience and care.
Preferred Location for Your Karanda?
Select a sunny spot for your karanda's new home. These plants flourish in full to partial sunlight. Therefore, choose a site where your plant will receive at least 6 hours of daily sun exposure. Remember, sunlight is crucial for them to produce their beautiful fruits!
Tools Required Before Karanda Transplantation?
Gardening Gloves
To safeguard your hands while handling soil and the karanda plant.
Shovel or Spade
For carefully excavating the karanda plant from the ground while preserving its root ball.
Gardening Fork
Utilize this for loosening the soil where the plant will be re-planted.
Pruning Shears
To trim any damaged or excessively long roots prior to transplanting.
Watering Can
For hydrating the karanda plant both before and after the relocation process.
Mulch and Compost
Necessary to enrich the new soil location, promoting the karanda plant's growth after transplant.
Method for Extracting Karanda from Soil?
Method for Extracting Karanda from Soil?
From The Ground: First, ensure the karanda plant is watered to dampen the surrounding soil. Next, using your shovel or spade, carefully dig around the plant, making sure to keep the root ball intact. Once a sufficient trench is formed, work the spade beneath the root ball to lift the plant.From A Pot: When the karanda plant is in a pot, begin by watering it. Then, tilt the pot sideways, gently tapping it to help the plant and its root ball slide out. Be cautious to avoid harming the root system.From A Seedling Tray: For karanda plants in a seedling tray, lightly water the tray. Subsequently, carefully remove the plant, including its roots, using a small trowel or your fingers. Do this by loosening the soil at the base and gently lifting it out, ensuring not to damage the delicate young roots.
Step-by-Step Guide for Karanda Transplanting
Preparation
Begin by meticulously preparing the new site for the karanda plant. This involves loosening the soil with a garden fork. Enrich it with some compost and excavate a hole wide and deep enough for the karanda's root ball.
Insertion
Gently place the karanda plant into the prepared hole. Ensure the top of the root ball is level with the surrounding ground. Backfill the remaining area around the root ball using the excavated soil.
Watering
Once your karanda plant is relocated, water it using a watering can. Be sure to thoroughly moisten the soil, but avoid waterlogging.
Mulching
Apply a layer of mulch around the plant's base, but keep it clear of the karanda's stem to prevent rot.
Pruning
If needed, prune your karanda using pruning shears to remove damaged or broken parts and encourage new growth.
Post-Transplant Care for Karanda?
Watering
The karanda plant requires frequent watering after relocation to support new root development. However, prevent overwatering, which can lead to root rot.
Fertilizing
After a few weeks, consider applying a balanced fertilizer to supply essential nutrients and promote vigorous growth.
Examine
Regularly inspect your transplanted plant for signs of shock or distress, such as wilting or discolored leaves, and address any issues promptly.
Staking
Be aware that your karanda plant might require staking after transplant to provide support and aid its establishment in the new location.
Patience
Remember, karanda is a relatively slow-growing plant, and it may take time for it to fully establish and flourish in its new environment.
Resolving Common Karanda Transplantation Issues.
When is the best time to move my karanda?
The optimal period to transplant your karanda is during seasons S1 and S2, when conditions are most favorable for relocation and strong root establishment.
What's the ideal planting depth for my karanda during transplanting?
Karanda should be planted at a depth where its crown is even with or slightly below the surrounding soil. This ensures proper anchoring and nutrient access.
What's the recommended spacing between two karanda plants during transplanting?
When relocating karanda, ensure a 4-5 feet (1.22-1.52 meters) distance between plants, providing ample room for them to grow and thrive.
Why is my transplanted karanda wilting?
Post-transplant wilting typically indicates water stress. Ensure your karanda receives adequate, but not excessive, water. Maintaining a balanced watering routine is crucial.
Do I need to prune my karanda before transplanting?
Pre-transplant pruning isn't mandatory, but it can help your karanda direct energy towards root development. Removing about one-third of the plant can often be beneficial.
What should I do if the leaves of my transplanted karanda are turning yellow?
Yellow leaves often signal overwatering or nutrient deficiencies. Review your irrigation practices, and consider a balanced slow-release fertilizer to address nutrient needs.
How often should I water my karanda post-transplant?
Generally, your newly transplanted karanda needs thorough watering for the initial few weeks to prevent drying out. Afterward, reduce watering to when the soil surface becomes dry.
What type of soil is best for transplanting karanda?
For karanda, well-drained soil rich in organic matter is ideal. This will accommodate roots, retain moisture, and provide nourishment for your plant to flourish.
Why is my transplanted karanda not producing fruits?
If your relocated karanda isn't bearing fruit, it might be too young, lack pollination, or receive insufficient light. Patience, bees, and sunny locations are key factors here.
What's the ideal pot size for transplanting karanda?
Choose a pot large enough to accommodate karanda's root system and allow for growth, typically one about 18-24 inches (45-60 cm) in diameter would be suitable.



