How to Transplant Northern single-spike sedge?
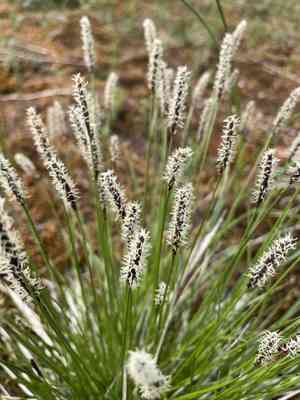
Northern single-spike sedge flourishes when relocated in the initial to middle summer months, enabling the plant to develop its root system in consistently warm earth. Select a site offering ample to moderate sunlight and soil that drains effectively and is mildly acidic for optimal growth.
What Preparations are Needed Before Transplanting Northern Single-spike Sedge?
What is the Ideal Time for Transplanting Northern Single-spike Sedge?
The best time to move northern single-spike sedge, a perennial, is from early to mid-summer. Relocating it then ensures warm soil and active growth, aiding root establishment. This timing minimizes transplant shock and boosts nutrient absorption, improving the plant's hardiness and survival.
How Much Space Should You Leave Between Northern Single-spike Sedge Plants?
When transplanting northern single-spike sedge, ideally position each plant 12-18 inches (30-45 cm) apart. This spacing provides ample room for development and guarantees sufficient air circulation and nutrients for every plant.
What is the Best Soil Mix for Northern Single-spike Sedge Transplanting?
Northern single-spike sedge thrives in soil that drains well, ranging from sandy to loamy. Prepare the soil by incorporating organic compost and a balanced base fertilizer, such as a 10-10-10 (NPK) blend, to supply vital nutrients for robust growth.
Where Should You Relocate Your Northern Single-spike Sedge?
Select a site that receives full to partial sunlight, meaning at least 4-6 hours of sun daily. Sufficient sunlight helps northern single-spike sedge flourish and encourages more abundant flowering.
What Equipments Should You Prepare Before Transplantation Northern Single-spike Sedge?
Gardening Gloves
To safeguard your hands while handling soil and plants.
Shovel or Spade
For excavating around the plant and its new spot.
Trowel
Useful for more precise digging and managing small root systems.
Watering Can or Hose
To maintain soil moisture during the transplanting process.
Pruning Shears
To remove any damaged or dead roots and foliage.
Bucket or Container
For moving the plant if you are relocating it from one place to another.
How Do You Remove Northern Single-spike Sedge from the Soil?
How Do You Remove Northern Single-spike Sedge from the Soil?
From Ground: First, hydrate the northern single-spike sedge plant to moisten the soil. Then, use a shovel or spade to dig a wide trench around the plant, ensuring its root ball stays intact. Carefully work the spade beneath the root ball to lift the plant from its original spot.From Pot: Thoroughly water the northern single-spike sedge plant before removal. Turn the pot on its side and gently tap it to loosen the soil. Carefully slide the plant out, making sure the root ball remains whole.From Seedling Tray: Water the northern single-spike sedge seedlings first. Use a trowel to carefully lift each seedling, taking care not to harm the roots.
Step-by-Step Guide for Transplanting Northern Single-spike Sedge
Prepare the New Location
Dig a hole large enough to accommodate the root ball of your northern single-spike sedge plant. Ensure the hole is twice as wide and equally deep as the root ball.
Examine the Root Ball
Inspect the root ball of the northern single-spike sedge plant. Trim any damaged or excessively long roots using pruning shears.
Transplant the Plant
Place the northern single-spike sedge plant into the prepared hole, ensuring it sits at the same depth as it was in its previous location. Fill the hole with soil, gently pressing it down to remove air pockets.
Water the Plant
Water the northern single-spike sedge plant immediately after transplanting to help the soil settle and reduce transplant shock.
How Do You Care For Northern Single-spike Sedge After Transplanting?
Watering
Keep the soil around the northern single-spike sedge consistently moist, but not waterlogged, for the initial weeks post-transplant to aid in strong root development.
Mulching
Apply a layer of mulch around the base of the northern single-spike sedge plant to help retain moisture and regulate soil temperature.
Monitoring
Regularly check the northern single-spike sedge plant for indications of stress, such as wilting or yellowing leaves, and adjust care as needed.
Troubleshooting Common Issues with Northern Single-spike Sedge Transplantation.
When is the best time to transplant northern single-spike sedge?
The optimal period to transplant northern single-spike sedge is early to mid-summer for peak growth.
How far apart should I space northern single-spike sedge plants?
Space northern single-spike sedge plants 12-18 inches (30-45 cm) apart to ensure proper development.
What should I do if northern single-spike sedge wilts after transplanting?
Ensure the soil remains moist but not saturated. Wilting can be alleviated by appropriate watering.
Should I fertilize northern single-spike sedge after transplanting?
Yes, apply a balanced, slow-release fertilizer to promote root establishment and growth.
How deep should I plant northern single-spike sedge?
Replant northern single-spike sedge at its original growing depth to prevent stress.
What type of soil is ideal for northern single-spike sedge?
Northern single-spike sedge prefers well-draining soil with organic matter for healthy root development.
How often should I water northern single-spike sedge after transplanting?
Water northern single-spike sedge regularly to keep the soil consistently moist, especially during the first few weeks.
Can I transplant northern single-spike sedge in full sun?
Northern single-spike sedge thrives best in partial shade to full sun, but initially avoid intense midday sun.
Why are the leaves turning yellow after transplanting northern single-spike sedge?
Yellowing leaves may indicate overwatering or inadequate drainage. Adjust watering and improve soil drainage.
Do I need to prune northern single-spike sedge before transplanting?
No, but trim any damaged or dead leaves to encourage healthy regrowth after transplanting.



