How to Transplant Cedar sedge?
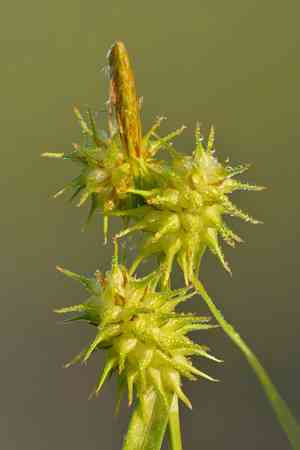
The most suitable period for relocating cedar sedge is during the initial to middle stages of spring, as the plant emerges from its dormant state. Select a spot that receives partial shade and possesses soil with good drainage. Verify that the new environment closely resembles its native setting to facilitate a smooth adjustment.
Essential Preparations Before Moving Cedar Sedge?
Optimal Timing for Relocating Cedar Sedge?
The best time to move cedar sedge is in early or mid-spring. This period offers mild temperatures and increased moisture, which helps minimize transplant shock and encourages root development. Moving cedar sedge during these months ensures vigorous growth and a strong start to its growing cycle.
Recommended Spacing Between Cedar Sedge Plants?
When relocating cedar sedge, ensure a separation of 12-18 inches (30-45 cm) between plants. This spacing allows ample room for growth and healthy development.
Ideal Soil Mixture for Cedar Sedge Relocation?
For cedar sedge, utilize well-draining soil enriched with organic matter. Enhance the soil with a foundational fertilizer such as compost or a balanced 10-10-10 (NPK) blend to support plant vitality.
Preferred Location for Your Cedar Sedge?
Cedar sedge thrives in sunny spots but can endure partial shade. Aim for a minimum of 4-6 hours of daily sunlight for optimal growth.
Necessary Equipment for Cedar Sedge Transplantation?
Gardening Gloves
To safeguard your hands while handling soil and plants.
Hand Trowel
For excavating small holes when planting cedar sedge in the ground.
Shovel or Spade
To dig a broad trench and lift plants from their original spot.
Wheelbarrow
To move cedar sedge from one place to another, especially for larger specimens.
Watering Can or Hose
For hydrating the plant before and after its relocation.
Mulch
To assist in retaining soil moisture and safeguarding roots after transplant.
Method for Extracting Cedar Sedge from Soil?
Method for Extracting Cedar Sedge from Soil?
From Ground: First, moisten the cedar sedge plant to damp the soil. Next, use a shovel or spade to dig a wide trench around the plant, ensuring the root ball remains intact. Carefully work the spade beneath the root ball to lift the plant from its initial position.From Pot: Thoroughly water the cedar sedge plant. Gently tip the pot sideways and carefully squeeze the sides to loosen the root ball. Slide the plant out while supporting the root ball with your hand.From Seedling Tray: Water the seedlings and gently press the bottom of the tray cells to release the cedar sedge, holding the plant by its base to prevent damage to the stem or roots.
Detailed Steps for Transplanting Cedar Sedge
Location Preparation
Confirm the chosen spot meets cedar sedge's specific requirements, such as sunlight and soil conditions. Clear the area of weeds and debris.
Hole Excavation
Dig a hole that is wider and slightly deeper than the cedar sedge's root ball. This allows roots to spread easily.
Plant Preparation
Examine the root ball and trim any damaged or excessively long roots. This encourages new growth.
Plant Placement
Position cedar sedge in the center of the hole, ensuring the top of the root ball is level with the ground surface. Backfill with soil, gently pressing to remove air pockets.
Watering
After planting, thoroughly water cedar sedge to help settle the soil around its roots. Ensure the soil is uniformly moist.
Post-Transplantation Care for Cedar Sedge?
Watering
Maintain consistent moisture in the soil around cedar sedge, avoiding sogginess, for the initial weeks after transplanting to aid in strong root establishment.
Mulching
Apply a layer of mulch around the plant's base to conserve moisture, regulate soil temperature, and suppress weed growth.
Monitoring
Regularly inspect cedar sedge for signs of stress like wilting or yellowing leaves. Address issues promptly to help the plant establish successfully.
Pruning
Trim any damaged or dead foliage to promote healthier growth and reduce plant stress.
Resolving Common Issues with Cedar Sedge Transplantation.
When is the best time to transplant cedar sedge?
Early to mid-spring is ideal for relocating cedar sedge to ensure optimal growth and success.
How far apart should I space cedar sedge when transplanting?
Space cedar sedge 12-18 inches (30-45 cm) apart to provide ample growth room and air circulation.
What should I do if cedar sedge is wilting after transplanting?
Ensure cedar sedge is well-hydrated and shielded from direct sunlight initially to lessen transplant shock.
How can I prepare the soil for transplanting cedar sedge?
Amend the soil with compost to enhance drainage and nutrient content before relocating cedar sedge.
What should I do if leaves turn yellow after transplanting cedar sedge?
Check for excessive watering or root damage; reduce irrigation and ensure the soil drains properly.
How deep should I plant cedar sedge?
Plant cedar sedge at the same depth it was previously growing to prevent root stress.
What type of soil is best for transplanting cedar sedge?
Cedar sedge prefers well-draining soil, ideally a sandy or loamy mix to prevent waterlogging.
How much water does cedar sedge need immediately after transplanting?
Water cedar sedge thoroughly after transplanting to help settle the soil and reduce transplant shock.
Should I prune cedar sedge before transplanting?
Prune damaged or dead leaves of cedar sedge to encourage healthier growth post-transplant.
How can I protect cedar sedge from transplant shock?
Acclimate cedar sedge gradually to its new location, providing shade and avoiding extreme temperatures initially.



