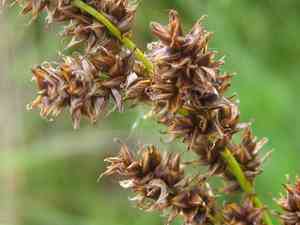
How to Transplant Greater tussock sedge?
For optimal outcomes, relocate greater tussock sedge during its peak growth period, spanning from early spring's awakening to the onset of summer's heat. Select a damp, shaded location that mirrors its native wetland environments. A thoughtful approach involves providing sufficient room for its expansion.
What Preparations are Needed Before Transplanting Greater Tussock Sedge?
What is the Ideal Time for Transplanting Greater Tussock Sedge?
The optimal period for relocating greater tussock sedge spans from early spring's awakening to the increasing warmth of late spring. This timeframe is perfect as it allows greater tussock sedge's root system to establish in mild temperatures and benefit from extended daylight. Moving greater tussock sedge during this growth-promoting phase ensures better root development and minimal plant stress, setting a strong foundation for robust health and lush growth throughout the year. Shifting greater tussock sedge at this point maximizes the seasonal cycle, aiding smooth acclimatization to its new spot before summer's intensity.
How Much Space Should You Leave Between Greater Tussock Sedge Plants?
When planning to rehome your greater tussock sedge, aim for ample room. Each greater tussock sedge should have approximately 1-2 feet (30-60 cm) of clearance from adjacent plants. This provides sufficient space for each plant to thrive without overcrowding.
What is the Best Soil Mix for Greater Tussock Sedge Transplanting?
Your greater tussock sedge will flourish in soil that is consistently moist yet drains effectively. Enhance the ground with some organic compost to give greater tussock sedge a healthy beginning. A balanced, slow-release fertilizer can also prepare the site for vigorous growth.
Where Should You Relocate Your Greater Tussock Sedge?
Select a location for greater tussock sedge that receives partial to full sun exposure. This means a spot where gentle morning light can reach them, but they are also shaded during the intense midday heat. This balance will ensure your greater tussock sedge remains vibrant and healthy.
What Equipments Should You Prepare Before Transplantation Greater Tussock Sedge?
Gardening Gloves
To safeguard your hands while handling soil and plants.
Shovel or Spade
For excavating the plant and preparing the new planting site.
Trowel
To assist with precise digging or adjusting soil around the root ball.
Watering Can or Hose
To thoroughly hydrate the plant before and after its relocation.
Wheelbarrow
To transport the plant and soil, especially if they are large or heavy.
Secateurs or Pruning Shears
For trimming any damaged roots or foliage.
Mulch
To help retain soil moisture around the newly planted area.
How Do You Remove Greater Tussock Sedge from the Soil?
How Do You Remove Greater Tussock Sedge from the Soil?
From Ground: First, moisten the greater tussock sedge plant's soil. Dig a wide trench around the plant using a shovel or spade, ensuring the root ball stays intact. Gently work the spade beneath the root ball to lift the plant from its spot.From Pot: Tilt the container sideways and tap the bottom to loosen the soil. Carefully grasp the base of the greater tussock sedge and pull the plant out, preserving the root ball's shape.From Seedling Tray: Use a trowel or your fingers to carefully lift the greater tussock sedge from its compartment, taking care not to harm the delicate roots.
Step-by-Step Guide for Transplanting Greater Tussock Sedge
Digging the Hole
Excavate a hole in the ground that is twice the root ball's width and of equal depth to ensure the greater tussock sedge sits at the same level as its original position.
Placing the Plant
Position the greater tussock sedge into the hole, ensuring it is upright. Partially backfill the hole with soil and firm it around the base to provide stability.
Filling the Hole
Complete filling the hole, gently tamping the soil down without over-compacting it to allow for proper root penetration.
Watering
Deeply water the greater tussock sedge to settle the soil around its roots and eliminate any air pockets.
Mulching
Spread a layer of mulch around the base of the greater tussock sedge, keeping it away from the stem, to help maintain soil moisture.
How Do You Care For Greater Tussock Sedge After Transplanting?
Monitoring
Regularly inspect the plant for indications of stress or pest issues and address any problems promptly to ensure healthy development.
Trimming
Remove any dead or damaged foliage to encourage new growth and maintain a neat appearance.
Mulching
Replenish the mulch layer as needed, typically once per season, to maintain its effectiveness.
Supporting
If the greater tussock sedge is particularly tall or top-heavy, consider staking or providing a support structure to help it withstand wind and rain.
Troubleshooting Common Issues with Greater Tussock Sedge Transplantation.
What's the best time to transplant greater tussock sedge?
Aim for a transplant window when nature awakens, typically early to late spring.
How far apart should greater tussock sedge be spaced when transplanting?
Give each greater tussock sedge room to flourish, spacing them about 1-2 feet (30-60 cm) apart.
Why is my greater tussock sedge wilting after transplanting?
Wilting could indicate shock or dehydration. Ensure gentle handling and sufficient water after moving.
Should I amend the soil when transplanting greater tussock sedge?
Enrich the new site with organic matter to nourish greater tussock sedge and encourage root growth.
How deep should the hole be for transplanting greater tussock sedge?
Craft a hole double the root ball's width and equal in depth, for a snug fit.
Can I transplant greater tussock sedge on a hot, sunny day?
Avoid the heat. Choose a cool, overcast day to reduce transplant stress and evaporation.
Why are the leaves of greater tussock sedge turning brown post-transplant?
Browning may signal root damage or drying out. Keep roots intact and soil moist.
How much should I water greater tussock sedge after transplanting?
Quench its roots with a thorough soaking to settle the soil and eliminate air pockets.
Is it necessary to prune greater tussock sedge before transplanting?
Trimming is not essential, but removing damaged parts can focus growth on healthy roots.
How can I tell if greater tussock sedge has successfully established post-transplant?
New growth and green, perky leaves are harbingers of greater tussock sedge's successful new start.


