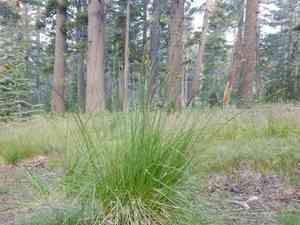
How to Transplant Chamisso sedge?
Chamisso sedge flourishes optimally when relocated between the beginning and end of summer, allowing it to settle prior to colder periods. Select a site receiving full sun to partial shade, featuring soil that drains effectively. Provide regular hydration, yet prevent the soil from becoming saturated.
Essential Preparations Before Moving Chamisso Sedge
Optimal Timing for Relocating Chamisso Sedge?
The best period for moving chamisso sedge spans from early to late summer. This timeframe allows the plant to establish its root system prior to the onset of cooler autumn conditions, promoting better development and survival. Transplanting during this window also leverages extended daylight and warmer soil temperatures, fostering robust root growth and overall plant vitality.
Recommended Spacing Between Chamisso Sedge Plants?
Position chamisso sedge approximately 12-18 inches (30-45 cm) apart to provide ample room for development. This spacing also ensures adequate air circulation and minimizes disease risk.
Ideal Soil Blend for Chamisso Sedge Relocation?
Chamisso sedge thrives in soil that drains well and is rich in organic material. Incorporate compost into your garden soil to enhance its fertility. Chamisso sedge prefers a pH range that is slightly acidic to neutral, typically between 6.0 and 7.0.
Selecting a New Site for Your Chamisso Sedge?
Choose a spot that receives full to partial sun exposure. Chamisso sedge requires at least 4-6 hours of daily sunlight to grow healthily and luxuriantly.
Tools Required Before Moving Chamisso Sedge
Gardening Gloves
To safeguard your hands while handling soil and the plant.
Hand Trowel
For excavating the new planting hole and carefully extracting chamisso sedge from its container or tray.
Shovel or Spade
Necessary if you are extracting chamisso sedge directly from the ground.
Watering Can
To hydrate the plant during and after the relocation process.
Garden Fork
Useful for loosening the soil around the plant if it has been in the ground for an extended period.
Mulch
To aid in moisture retention and protect the roots post-transplantation.
How to Extract Chamisso Sedge from the Soil?
How to Extract Chamisso Sedge from the Soil?
From Ground: First, moisten the chamisso sedge plant to dampen the soil. Next, use a shovel or spade to dig a wide trench around the plant, ensuring the root ball remains intact. Carefully work the spade beneath the root ball to lift the plant from its original spot.From Pot: Water the pot thoroughly to facilitate removal. Gently compress the sides of a plastic pot to loosen the soil. If the chamisso sedge plant is still resistant, use a hand trowel to carefully loosen the soil along the pot's edges. Gently tip the plant out, supporting its base and root ball.From Seedling Tray: Water the seedling tray to moisten the soil. Use a hand trowel or your fingers to gently lift the chamisso sedge seedling, making sure to keep the root ball and as much soil as possible intact. Be gentle to avoid damaging the delicate roots.
Step-by-Step Guide for Relocating Chamisso Sedge
Preparation
Water the chamisso sedge in its current location the day before moving it to ensure the root ball stays cohesive.
Excavating the Hole
Select your new site, and dig a hole approximately twice the width and the same depth as the plant's root ball. This provides ample space for root expansion.
Soil Amendment
Incorporate some organic compost into the excavated soil to enhance its nutrient content and drainage capabilities.
Plant Placement
Gently position the extracted chamisso sedge plant into the center of the hole. Ensure the top of the root ball is level with or slightly above the surrounding soil surface.
Backfilling the Hole
Gradually refill the hole with the amended soil, gently pressing it down to eliminate air pockets. Be careful not to compact the soil too firmly.
Watering
Thoroughly water the newly planted chamisso sedge to settle the soil around its roots.
Post-Transplant Care for Chamisso Sedge
Watering
Maintain consistent moisture around the chamisso sedge, avoiding sogginess, for the initial few weeks after transplanting to encourage strong root development.
Mulching
Apply a layer of mulch around the plant to help retain soil moisture and suppress weed growth. Keep the mulch a few inches away from the stem to prevent rot.
Monitoring
Observe for signs of transplant shock, such as wilting or yellowing leaves, and address any issues promptly with appropriate watering and care.
Resolving Common Issues with Chamisso Sedge Relocation.
When is the best time to move chamisso sedge?
Relocate chamisso sedge from early summer to late summer for optimal outcomes.
How much space should I provide between chamisso sedge plants?
Space chamisso sedge plants 12-18 inches (30-45 cm) apart to ensure proper growth.
How should I prepare the soil for chamisso sedge relocation?
Ensure the soil drains well and is enriched with organic matter for healthy development.
How much water does chamisso sedge require after relocation?
Water chamisso sedge thoroughly after moving and keep the soil consistently moist but not waterlogged.
Should I fertilize chamisso sedge when relocating?
Apply a balanced, slow-release fertilizer when moving chamisso sedge to support initial growth.
What is the ideal temperature for relocating chamisso sedge?
Move chamisso sedge when temperatures are between 60-75°F (15-24°C) for best results.
How deep should I plant chamisso sedge in the ground?
Plant chamisso sedge at the same depth it was growing in its original container.
Do I need to trim chamisso sedge after relocating?
Trimming is not necessary, but remove any damaged or dead foliage during the relocation process.
How long until I see new growth after relocating chamisso sedge?
Anticipate new growth within 2-3 weeks after moving chamisso sedge, if cared for properly.
What common problems should I look for after relocating chamisso sedge?
Watch for signs of overwatering, under-watering, and transplant shock in newly relocated chamisso sedge.


