How to Transplant Bottlebrush sedge?
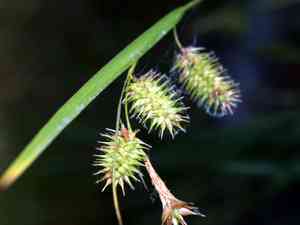
The ideal times for transplanting bottlebrush sedge are early spring and the beginning of summer, or from mid-autumn until its conclusion. Select a location featuring damp, adequately draining earth, providing shelter from strong gusts for robust development.
Essential Preparations Before Relocating Bottlebrush Sedge
Optimal Period for Moving Bottlebrush Sedge?
The ideal time for relocating bottlebrush sedge falls within the gentle transition from late spring to early summer, or the mild interval between mid-fall and late fall. These periods enable bottlebrush sedge to acclimate to its new spot without the stress of extreme heat or cold. Performing this during these favorable seasons ensures root establishment in moderate soil, promoting vigorous growth and a thriving presence in your garden.
Recommended Spacing Between Bottlebrush Sedge Plants?
When relocating your bottlebrush sedge, provide ample room for each plant to flourish. Aim for a separation of approximately 12-18 inches (30-45 cm). This distance will allow the plants to develop fully and densely without competing for vital resources.
Best Soil Blend for Bottlebrush Sedge Relocation?
Your bottlebrush sedge will thrive in soil rich in organic material with excellent drainage. Prior to relocation, incorporate compost or a balanced, slow-release fertilizer to give your plants a robust start. A soil pH of 5.5 to 6.5 is perfect for bottlebrush sedge.
Choosing the New Location for Your Bottlebrush Sedge?
Select a site for your bottlebrush sedge where it can receive full sun to partial shade. If possible, find a location that gets morning sun and afternoon shade, particularly in warmer climates, to shield your bottlebrush sedge from excessive intense sunlight.
Tools Required Before Moving Bottlebrush Sedge?
Gardening Gloves
To safeguard your hands while handling soil and plants.
Shovel or Spade
For excavating the plant and preparing the new planting site.
Gardening Trowel
For precise work around roots and smaller digging tasks.
Watering Can or Hose
To hydrate the plant before and after removal to facilitate the process.
Wheelbarrow or Garden Cart
To transport the plant and any necessary soil or amendments.
Pruning Shears
To trim any damaged roots or foliage prior to relocation.
Mulch
To help maintain soil moisture after relocation.
How to Extract Bottlebrush Sedge from the Ground?
How to Extract Bottlebrush Sedge from the Ground?
From Ground: First, moisten the bottlebrush sedge plant to soften the soil. Next, use a shovel or spade to dig a wide trench around the plant, ensuring sufficient distance to avoid harming the root ball. Gently work the tool beneath the root system to lift the plant from the ground.From Pot: Water the bottlebrush sedge thoroughly to help loosen the root ball. Invert the pot onto its side and gently tap to dislodge the soil. Carefully slide the plant out, supporting the base and roots to prevent damage.From Seedling Tray: Dampen the soil before attempting to remove young bottlebrush sedge plants. Gently separate the plants by the base of their stems or use a trowel to lift them, taking care to keep the delicate root system intact.
Step-by-Step Guide for Relocating Bottlebrush Sedge
Preparation
Ensure all necessary items are ready, including the bottlebrush sedge plant, your tools, and a bucket of water for hydrating the plant's roots if they are dry.
Root Ball Care
Handle the root ball with care to prevent damage. If entangled, gently separate the roots. Trim any broken or dead roots using pruning shears.
Hole Digging
Excavate a hole that is twice the width of the root ball and of equal depth to ensure the bottlebrush sedge can be planted at its original growing level.
Planting
Position the bottlebrush sedge in the center of the hole. Adjust the plant so it is upright and at the correct depth. Backfill around the plant with soil, gently tamping down to eliminate air pockets.
Watering
Thoroughly water the bottlebrush sedge immediately after planting to settle the soil around the roots and aid in recovery from relocation shock.
Mulching
Apply a layer of mulch around the base of the bottlebrush sedge to preserve soil moisture and regulate soil temperature.
Post-Relocation Care for Bottlebrush Sedge
Monitoring
Regularly check on the bottlebrush sedge to assess its condition and adjust care. This includes verifying that any supports are functional and that the plant shows no signs of stress.
Trimming
Remove any dead or yellowing leaves to encourage new growth and better direct the bottlebrush sedge's energy towards establishing a robust root system.
Pest Inspection
Watch for pests or diseases. Early detection can help address any issues before they become severe.
Resolving Common Issues with Bottlebrush Sedge Relocation.
What's the best time to move bottlebrush sedge?
The optimal period to move bottlebrush sedge is from late spring to early summer or from mid-autumn to late autumn, ensuring milder temperatures.
How much space does bottlebrush sedge require when being moved?
Allow 12-18 inches (30-45 cm) between each bottlebrush sedge to provide ample room for growth.
Why are my relocated bottlebrush sedge plants wilting?
Wilting after relocation might be due to insufficient water. Ensure proper hydration without over-saturating the soil to help bottlebrush sedge recover.
Should I trim bottlebrush sedge before moving it?
Lightly trimming bottlebrush sedge can lessen relocation shock, but avoid extensive cutting to maintain plant vitality.
What soil conditions does bottlebrush sedge prefer for relocation?
Relocate bottlebrush sedge into well-draining soil enriched with organic matter for optimal growth.
Can bottlebrush sedge be moved to full sun areas?
Yes, bottlebrush sedge can be moved to full sun, though they benefit from some afternoon shade in hotter climates.
How deep should the hole be when moving bottlebrush sedge?
The hole should be as deep as the root ball and twice as wide to promote root expansion.
How do I water bottlebrush sedge after moving?
Water thoroughly after moving and maintain consistent moisture, especially during the root establishment phase.
What if bottlebrush sedge shows no growth after moving?
Be patient. It can take time for bottlebrush sedge to establish. Continue providing proper care and look for signs of new growth.
Is it normal for bottlebrush sedge to have brown tips after moving?
Brown tips can result from relocation stress. If conditions are suitable, bottlebrush sedge should recover with time and appropriate care.



