How to Transplant Constance's bittercress?
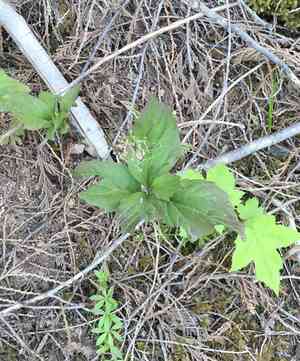
Cardamine constancei flourishes when relocated in the initial to middle part of spring, a period characterized by damp earth and moderate temperatures. Select a site offering dappled sunlight and fertile, adequately draining substrate for peak development. Ensure continuous hydration to facilitate proper rooting.
What Preparations are Needed Before Transplanting Constance's Bittercress?
What is the Ideal Time for Transplanting Constance's Bittercress?
Constance's bittercress, a perennial, thrives best when moved in early to mid-spring or early winter. These periods offer cooler temperatures, minimizing transplant shock. Early spring allows strong root development before summer, while early winter gives roots a head start for spring growth. Transplanting at these times ensures vigorous growth and survival.
How Much Space Should You Leave Between Constance's Bittercress Plants?
Ensure to space constance's bittercress approximately 12-18 inches (30-45 cm) apart in your garden. This provides each plant ample room to grow and flourish without nutrient competition.
What is the Best Soil Mix for Constance's Bittercress Transplanting?
For constance's bittercress, prepare well-draining, loamy soil enriched with organic compost. Incorporate a balanced, slow-release fertilizer to support robust growth.
Where Should You Relocate Your Constance's Bittercress?
Position constance's bittercress in an area receiving partial to full sunlight, ideally 4-6 hours of direct sun daily for optimal development.
What Equipments Should You Prepare Before Transplantation Constance's Bittercress?
Gardening Gloves
To safeguard your hands while handling soil and plants.
Trowel or Garden Spade
For excavating and lifting the plant from its initial spot.
Garden Fork
To gently loosen the soil surrounding the plant's root system.
Watering Can or Hose
For hydrating the plant both before and after relocation.
Wheelbarrow or Bucket
To move the plant if necessary.
How Do You Remove Constance's Bittercress from the Soil?
How Do You Remove Constance's Bittercress from the Soil?
From Ground: First, water the constance's bittercress plant to moisten the soil. Then, dig a wide trench around the plant using a trowel or garden spade, ensuring the plant's root ball remains intact. Carefully work the spade beneath the root ball to lift the plant from its original location.From Pot: Water the constance's bittercress plant thoroughly to make the soil easier to manage. Gently tap the pot's sides to loosen the soil and roots. Carefully tilt the pot and slide the plant out, supporting the root ball with your hand.From Seedling Tray: Water the seedlings lightly before removal. Use a small trowel or your fingers to carefully lift each seedling, ensuring you support the root system as much as possible during the process.
Step-by-Step Guide for Transplanting Constance's Bittercress
Site Preparation
Ensure the transplanting site is ready by loosening the soil and amending it according to the recommendations for constance's bittercress.
Digging the Hole
Excavate a hole twice as wide and equal in depth to the root ball of the constance's bittercress plant to allow roots to spread.
Placing the Plant
Carefully lower the plant into the hole, ensuring the top of the root ball is level with or slightly above the ground surface.
Backfilling and Firming
Backfill the hole with soil, gently firming it around the root ball to eliminate air pockets. Water the soil lightly to help it settle.
Mulching
Apply a layer of mulch around the plant's base. This aids in moisture retention and suppresses weed growth.
How Do You Care For Constance's Bittercress After Transplanting?
Watering
Keep the soil around the constance's bittercress consistently moist, but not waterlogged, for the initial weeks after transplanting to encourage strong root development.
Monitoring
Watch for any signs of transplant shock, such as wilting or yellowing leaves. Monitor the plant closely and adjust care as needed.
Pruning
If the plant shows signs of stress, consider lightly pruning any damaged or excessively long stems to reduce the plant's energy demands.
Troubleshooting Common Issues with Constance's Bittercress Transplantation.
What is the best time to transplant constance's bittercress?
The ideal time to transplant constance's bittercress is early spring, mid spring, or early winter.
How much space should you leave between plants?
Space constance's bittercress plants 12-18 inches (30-45 cm) apart for optimal growth.
What soil conditions are best for transplanting constance's bittercress?
Constance's bittercress prefers well-draining, moist soil with a slightly acidic to neutral pH.
Should constance's bittercress be watered immediately after transplanting?
Yes, water constance's bittercress thoroughly after transplanting to help settle the soil around the roots.
How do you prepare the ground for transplanting constance's bittercress?
Loosen the soil and mix in organic compost to enrich the planting area for constance's bittercress.
What should you do if constance's bittercress's leaves turn yellow after transplanting?
Yellow leaves may indicate over or under-watering; adjust as needed to keep the soil evenly moist.
How deep should constance's bittercress be planted?
Plant constance's bittercress at the same depth as it was in its original container.
Can you transplant constance's bittercress on a windy day?
Avoid transplanting constance's bittercress on windy days to prevent stress and damage to the young plants.
What's the best way to handle constance's bittercress's roots during transplanting?
Be gentle with constance's bittercress's roots, ensuring they are not damaged or overly disturbed during transplanting.
Should constance's bittercress be fertilized immediately after transplanting?
Wait a few weeks after transplanting constance's bittercress before fertilizing to avoid stressing the plant.



