How to Transplant Piedmont roseling?
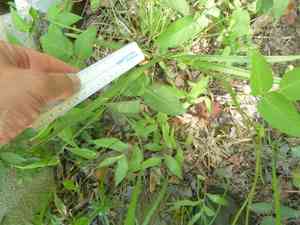
The optimal period for relocating piedmont roseling is during the vibrant phase of mid to late spring or the beginning of summer, since the warmer ground and extended daylight hours foster vigorous root development. Guarantee a sun-drenched spot with adequately draining earth for superior outcomes.
What Preparations are Needed Before Transplanting Piedmont Roseling?
What is the Ideal Time for Transplanting Piedmont Roseling?
Piedmont roseling is best moved in mid to late spring or early summer. This period allows the plant to establish roots in warm, fertile soil before the summer heat. Transplanting at this time promotes strong root development and ensures healthier, more robust growth, giving piedmont roseling the best chance to flourish in its new spot.
How Much Space Should You Leave Between Piedmont Roseling Plants?
For optimal growth, position piedmont roseling plants 12-18 inches (30-45 cm) apart. This spacing provides ample room for them to expand and thrive without competing for resources.
What is the Best Soil Mix for Piedmont Roseling Transplanting?
Prepare rich, well-draining soil for piedmont roseling. Incorporate a base fertilizer such as compost or aged manure to enrich the soil before transplanting.
Where Should You Relocate Your Piedmont Roseling?
Choose a sunny to partially shaded location for transplanting piedmont roseling. These plants flourish with at least 4-6 hours of daily sunlight, which supports vigorous growth.
What Equipments Should You Prepare Before Transplantation Piedmont Roseling?
Gardening Gloves
To shield your hands while handling soil and plants.
Trowel
For excavating holes and loosening earth.
Spade or Shovel
To dig a trench around the plant if removing it from the ground.
Watering Can or Hose
For hydrating the plant before and after relocation.
Pruning Shears
To trim any damaged or excessively long roots.
Wheelbarrow or Bucket
To move the plant if necessary.
How Do You Remove Piedmont Roseling from the Soil?
How Do You Remove Piedmont Roseling from the Soil?
From Ground: First, moisten the soil around the piedmont roseling. Then, dig a wide trench around the plant using a shovel or spade, ensuring the root ball remains intact. Carefully work the spade beneath the root ball to lift the plant from its original spot.From Pot: Water the piedmont roseling to loosen the soil. Gently turn the pot on its side and tap the bottom to release the plant. Carefully slide the plant out, supporting the root ball with your hands.From Seedling Tray: Water the piedmont roseling seedlings thoroughly. Use a trowel or your fingers to gently lift each seedling from the tray, being careful not to harm the roots.
Step-by-Step Guide for Transplanting Piedmont Roseling
Site Preparation
Prepare the transplant location by digging a hole that is twice the width and the same depth as the piedmont roseling's root ball.
Plant Inspection
Before transplanting, examine the piedmont roseling for any damaged roots or dead foliage and trim them with pruning shears.
Setting the Plant
Place the piedmont roseling into the hole, ensuring the top of the root ball is level with the surrounding soil. Backfill with soil, gently firming it around the roots to remove air pockets.
Watering
Water the piedmont roseling thoroughly after planting to settle the soil around the roots.
Mulching
Apply a layer of mulch around the base of the piedmont roseling to retain moisture and suppress weeds. Keep the mulch a few inches away from the stem to prevent rot.
How Do You Care For Piedmont Roseling After Transplanting?
Watering
Keep the soil around the piedmont roseling consistently moist, but not waterlogged, for the first few weeks after transplanting to help establish strong roots.
Monitoring
Regularly check the piedmont roseling for signs of stress, such as wilting or yellowing leaves, and take corrective actions as needed.
Protection
If the weather is particularly hot or windy, provide some temporary shade or a windbreak for the first few weeks.
Fertilizing
After about four weeks, you can begin feeding the piedmont roseling with a balanced, slow-release fertilizer to promote healthy growth.
Troubleshooting Common Issues with Piedmont Roseling Transplantation.
When is the best time to transplant piedmont roseling?
The ideal time to transplant piedmont roseling is mid to late spring or early summer.
What is the recommended spacing when transplanting piedmont roseling?
Space piedmont roseling plants 12 to 18 inches (30 to 45 cm) apart for optimal growth.
How should I prepare the new site for piedmont roseling?
Ensure the new site has well-draining soil and is free of weeds and debris.
How deeply should piedmont roseling be planted in the new location?
Plant piedmont roseling at the same depth it was growing previously to avoid stress.
Why are my transplanted piedmont roseling leaves yellowing?
Yellowing leaves may indicate overwatering or poor drainage. Adjust watering and check soil conditions.
What should I do if piedmont roseling wilts after transplanting?
Ensure piedmont roseling is watered thoroughly after transplanting and monitor moisture levels to prevent wilting.
How much water does piedmont roseling need after transplanting?
Water piedmont roseling deeply after transplanting and maintain consistent moisture without waterlogging the soil.
Should I fertilize piedmont roseling after transplanting?
Avoid immediate fertilization; wait a few weeks to allow piedmont roseling time to establish first.
Do I need to prune piedmont roseling before transplanting?
Prune any damaged or dead foliage before transplanting to maintain plant health.
How can I reduce transplant shock in piedmont roseling?
Keep the roots moist, transplant during cooler parts of the day, and water immediately after replanting.



