How to Propagate Piedmont roseling?
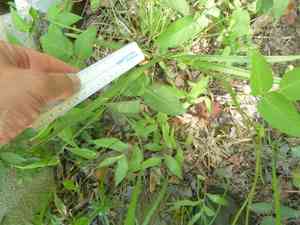
Piedmont roseling is a perennial herb recognized for its appealing leaves. Reproducing piedmont roseling is possible by planting seeds in a potting blend that drains effectively. Keep the growing medium uniformly damp, but prevent the seeds from becoming saturated. A thin covering of soil over the seeds can improve sprouting. Frequently check for emerging sprouts and supply sufficient light for vigorous development, honoring its need for dappled light.
What Is the Best Time To Propagate Piedmont Roseling?
Propagation Type
Sowing
Propagation Season
Spring
What Tools Are Used in Piedmont Roseling Propagation?
Seed Trays
Seed trays are vital for planting piedmont roseling seeds. They offer a controlled setting for germination, ensuring seeds have adequate space, moisture, and soil. Trays help monitor growth and simplify transplanting mature seedlings.
Seedling Heat Mats
Seedling heat mats provide consistent warmth from below, essential for piedmont roseling seed germination. By maintaining optimal soil temperature, these mats speed up germination and boost overall propagation success.
Humidity Domes
Humidity domes cover seed trays, creating a greenhouse effect. This maintains high humidity and moisture, crucial for piedmont roseling seed germination. The controlled environment reduces drying out and improves seedling survival.
Seed Starting Soil Mix
A quality seed starting soil mix is necessary for piedmont roseling propagation. This specialized mix is light, well-draining, and nutrient-rich, providing ideal conditions for germination and initial seedling growth. The right soil prevents issues like damping-off.
Fine Mist Spray Bottle
A fine mist spray bottle waters seeds and seedlings without disturbing soil or causing waterlogging. Gentle misting ensures delicate piedmont roseling seeds and young seedlings get enough moisture without being washed away or damaged.
Labels and Markers
Labels and markers are important for identifying different seed types and tracking planting dates. Proper labeling prevents confusion and helps monitor the progress and growth stages of piedmont roseling seedlings.
Propagation Station
A propagation station or rack helps keep all necessary tools and trays organized. A dedicated area for propagation streamlines the process and ensures piedmont roseling seedlings receive consistent care and monitoring.
How to Propagate Piedmont Roseling?
Propagation Type
Easy
How to Care for Your Newly Propagated Piedmont Roseling?
How to Care for Your Newly Propagated Piedmont Roseling?
Once piedmont roseling seedlings emerge and reach a manageable size, transfer them to individual pots with well-draining soil. Gradually expose them to direct sunlight. Water regularly, but allow the soil to dry slightly between waterings. Fertilize monthly with a balanced, diluted liquid fertilizer during active growth.
Common Mistakes to Avoid When Propagating Piedmont Roseling
Overwatering
This can cause root rot, which may kill the plant. Ensure soil drains well and only water when the top inch of soil feels dry.
Using the Wrong Soil
Heavy, non-aerated soil can hinder root development. Use a light, well-draining potting mix.
Insufficient Light
Lack of light can result in weak, leggy growth. Ensure the plant is in a location with bright, indirect sunlight.
Incorrect Cutting Technique
Improper cutting can lead to poor propagation success. Ensure stem cuttings are clean and taken from a healthy part of the plant.
Neglecting Humidity
Low humidity can cause the plant to dry out. Maintain a moderate to high humidity environment around the cuttings.
Tips For Propagating Piedmont Roseling
Proper Watering
Water the plant sparingly, allowing the soil to dry between waterings. Use well-draining soil to prevent water accumulation.
Soil Choice
Use a light, well-draining potting mix to encourage root growth and avoid water retention.
Light Requirements
Place the plant in bright, indirect sunlight to promote healthy growth.
Cutting Technique
Use sharp, sterilized scissors to take stem cuttings just below a node. Remove lower leaves and place the cutting in water or moist soil.
Maintain Humidity
Cover cuttings with a plastic bag or use a humidity dome to keep the environment humid until roots develop.



