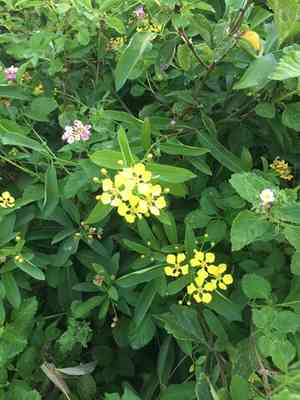
How to Transplant Hillyhock?
For hillyhock, the prime period for relocation extends from late spring into summer, providing ideal circumstances for development. Select a location bathed in sunlight with soil that drains effectively. Carefully transfer hillyhock to foster vigorous growth, preserving its lively appearance in your outdoor space.
What Preparations are Needed Before Transplanting Hillyhock?
What is the Ideal Time for Transplanting Hillyhock?
The best time to move hillyhock is at the start of summer, once the risk of frost has passed. This timing allows hillyhock to adjust before intense heat, promoting strong development. By transplanting during this favorable period, you enable hillyhock to develop a robust root system, increasing its resistance to summer's peak. Relocating at this point gives hillyhock the head start it needs to flourish, making the transition smoother for vibrant blooms.
How Much Space Should You Leave Between Hillyhock Plants?
When relocating hillyhock, you'll want to provide ample space for unhindered growth. An optimal distance is approximately 3-4 feet (0.9 - 1.2 meters) apart. This spacing will allow them to spread and thrive effectively!
What is the Best Soil Mix for Hillyhock Transplanting?
Your hillyhock will thrive in well-draining soil enriched with organic matter. To prepare, blend garden soil with aged compost for nutrients. A phosphorus-rich base fertilizer will aid root establishment. Always follow the manufacturer's guidelines and avoid over-application!
Where Should You Relocate Your Hillyhock?
Selecting a suitable spot for your hillyhock is crucial. They prefer sunlight, so choose an area that receives ample daylight. However, in very hot climates, some afternoon shade can be beneficial. A sunny border or flower bed would be excellent!
What Equipments Should You Prepare Before Transplantation Hillyhock?
Gardening Gloves
To safeguard your hands while handling soil and hillyhock.
Shovel or Spade
This tool will be used to excavate a hole for the hillyhock and to carefully extract the plant from its original spot.
Bucket or Tray
You'll need this to temporarily hold the hillyhock during the relocation process.
Watering Can or Hose
To ensure the hillyhock receives sufficient water before and after being moved.
Pruning Shear
This will be used to trim any dead or damaged roots and branches from the hillyhock.
How Do You Remove Hillyhock from the Soil?
How Do You Remove Hillyhock from the Soil?
From Ground: Start by moistening the soil around the hillyhock using a watering hose or can. With a shovel or spade, gently begin digging around the hillyhock, maintaining enough distance to prevent root damage. Once the roots are visible, try to position the spade underneath and lift the hillyhock, ensuring the root ball stays intact.From a Pot: Begin by adequately watering the hillyhock. Then, turn the pot sideways, carefully supporting the hillyhock at the stem base, and gently squeeze or tap the pot to loosen it. Afterward, slide the pot off without pulling on the hillyhock's stem.From a Seedling Tray: Water the seedlings first. Gently hold the hillyhock's stem and carefully loosen the soil around the roots. Once loose, lift the hillyhock, making sure all roots remain undamaged.
Step-by-Step Guide for Transplanting Hillyhock
Preparing the New Spot
Dig a hole at the new location that is deep and wide enough for the hillyhock's roots to fit comfortably. The hole's depth should allow the hillyhock to sit at the same level as it was previously.
Preparing the Plant
After removing hillyhock from its former spot, trim any damaged roots or leaves using pruning shears. If the plant has excessively long roots, they can be gently shortened for easier handling.
Planting
Place the hillyhock into the prepared hole. Spread its roots within the hole, then backfill with soil, ensuring the root collar is slightly above ground level.
Watering
Immediately water the hillyhock thoroughly after transplanting.
How Do You Care For Hillyhock After Transplanting?
Monitoring
Observe the hillyhock closely for a couple of weeks following transplantation. Watch for any signs of shock, such as wilting or browning leaves.
Pruning
Remove any brown or dying leaves to allow the hillyhock to direct its energy towards new growth.
Protection
Shield the hillyhock from harsh weather conditions like strong winds or frosts. Use a windbreak if necessary.
Regular Watering
For the initial few weeks, the hillyhock will require careful watering. Ensure it's sufficient and consistent, but remember not to over-water.
Troubleshooting Common Issues with Hillyhock Transplantation.
When is the best time to transplant hillyhock?
The ideal period for relocating hillyhock is during S3-S6. This ensures the plant's optimal growth and vigor.
How much space should I leave between hillyhock while transplanting them?
For healthy development, maintain a spacing of 3-4 feet (91-122 cm). This guarantees each plant has adequate room to grow.
What should I do if hillyhock leaves turn yellow after transplantation?
Yellow leaves might indicate overwatering or poor drainage. Ensure the plant's soil is moist but not waterlogged and drains properly.
My transplanted hillyhock is looking droopy. What might be the problem?
Hillyhock may be experiencing transplant shock. Ensure it receives the correct amount of water, and consider adding a root stimulator to its watering routine.
Is it necessary to prune hillyhock before transplanting?
Pruning isn't essential, but removing old or damaged parts helps the plant reallocate energy to new growth after relocation.
What kind of environment does hillyhock need after transplantation?
Hillyhock thrives in sunlight and well-drained soil. Keep it in a sunny location and ensure the soil is never waterlogged.
Why are there brown spots appearing on the leaves of my transplanted hillyhock?
Brown spots can indicate a fungal infection. Reduce overhead watering and ensure the plant has ample airflow to prevent fungal development.
Is it normal for hillyhock to not bloom immediately after transplant?
Yes, that's perfectly normal. Hillyhock needs time to recover from transplant shock and will likely bloom in the subsequent season.
Do I need to support hillyhock after transplanting it?
Hillyhock typically doesn't require staking unless it grew very large. However, temporary support after transplantation can help it stabilize.
What should I keep in mind while transplanting hillyhock?
Be mindful of transplant shock. Use high-quality soil, ensure proper spacing, and accurately adjust watering, sunlight, and airflow.


