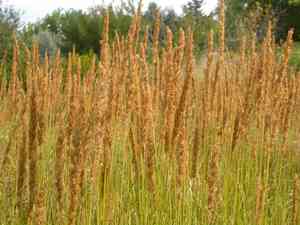
How to Transplant Narrow small-reed?
Calamagrostis 1 flourishes when relocated in the period spanning mid to late spring, facilitating robust root development. Select a site receiving full sun or partial shade, featuring soil that drains effectively. Exercise extreme care to prevent harm to the roots, which is crucial for a successful transfer.
Essential Preparations Before Relocating Narrow Small-reed?
Optimal Period for Relocating Narrow Small-reed?
Narrow small-reed is best moved in mid to late spring, as the ground warms and conditions become ideal for root development. Transplanting at this time ensures the plant establishes well before summer heat, enhancing its resilience and growth. This timing allows narrow small-reed to adapt gradually, minimizing transplant shock and fostering healthier progress.
Recommended Spacing Between Narrow Small-reed Specimens?
When relocating narrow small-reed, ensure each plant is positioned 24-36 inches (60-90 cm) apart. This spacing provides ample room for growth and expansion without competition for nutrients.
Ideal Soil Blend for Narrow Small-reed Relocation?
For narrow small-reed, utilize well-draining soil enriched with organic matter. Incorporating compost or a balanced base fertilizer prior to transplanting will give the roots a strong start.
Preferred New Location for Your Narrow Small-reed?
Narrow small-reed thrives in full sun to partial shade. Select a site that receives at least 6 hours of direct sunlight daily to ensure vigorous growth.
Necessary Tools for Narrow Small-reed Transplantation?
Gardening Gloves
To safeguard your hands while handling soil and the plant.
Shovel or Spade
For excavating the plant from the ground and preparing the new planting site.
Watering Can or Hose
To hydrate the plant before and after its relocation.
Trowel
To assist in gently extracting the plant from smaller containers or seedling trays.
Pruning Shears
To trim any damaged or excessively long roots.
Method for Extracting Narrow Small-reed from the Soil?
Method for Extracting Narrow Small-reed from the Soil?
From Ground: First, moisten the narrow small-reed plant to dampen the soil. Next, dig a wide trench around the plant using a shovel or spade, ensuring the plant's root ball remains intact. Carefully work the spade beneath the root ball to lift the plant from its original spot.From Pot: Thoroughly water the narrow small-reed plant before removal. Gently invert the pot while supporting the plant with your hands. Tap the pot's base to loosen the soil and roots until the plant slides out. If resistant, use a trowel along the edges to ease it out.From Seedling Tray: Gently water the seedlings. Use a trowel to carefully lift the seedlings from the tray, taking care not to harm the roots. If roots are intertwined, gently separate them, ensuring each transplant has a substantial root system.
Detailed Procedure for Relocating Narrow Small-reed
Prepare the New Site
Choose a location with adequate sunlight and space for your narrow small-reed plant to reach its full size. Dig a hole twice the width and the same depth as the root ball.
Acclimatize the Plant
Before relocation, allow your narrow small-reed plant to spend a few hours daily in its new environment for a week to aid acclimatization.
Remove the Plant
Refer to the specific instructions for extracting the plant from the ground, pot, or seedling tray as detailed above.
Planting
Position the narrow small-reed plant in the prepared hole, ensuring the top of the root ball is level with the surrounding soil. Backfill the hole with soil, gently pressing to eliminate air pockets.
Watering
Thoroughly water the plant after relocation to settle the soil and help it adapt to its new surroundings.
Mulching
Apply a layer of mulch around the base of the narrow small-reed plant to retain moisture and deter weeds.
Post-Transplantation Care for Narrow Small-reed?
Watering
Keep the soil around the narrow small-reed consistently moist, but not waterlogged, for the initial weeks after relocation to promote strong root establishment.
Monitoring
Regularly inspect the plant for indications of stress, such as wilting or yellowing foliage, and promptly address any issues.
Mulching Maintenance
Replenish the mulch as needed to maintain a consistent layer around the base of the narrow small-reed.
Pruning
Remove any dead or damaged leaves or stems to encourage healthy development.
Resolving Common Issues with Narrow Small-reed Relocation.
When is the best time to transplant narrow small-reed?
The optimal period to relocate narrow small-reed is during mid to late spring for peak growth.
How far apart should I space narrow small-reed plants?
Space narrow small-reed plants 24â36 inches (61â91 cm) apart to ensure adequate room for growth.
What soil type is best for transplanting narrow small-reed?
Utilize well-draining, fertile soil for superior results when relocating narrow small-reed.
How should I prepare the soil for narrow small-reed?
Loosen the soil to a depth of 10 inches (25 cm) and enrich it with compost.
What is the ideal water requirement after transplanting narrow small-reed?
Water narrow small-reed thoroughly after relocation and maintain consistently moist but not saturated soil.
How do I handle narrow small-reed roots during transplanting?
Handle roots gently to prevent damage. Position them carefully in the new hole.
When should I fertilize after transplanting narrow small-reed?
Fertilize lightly one month after relocating narrow small-reed to support healthy development.
What should I do if narrow small-reed shows signs of transplant shock?
Water narrow small-reed well, provide partial shade, and refrain from fertilizing until it recovers.
How do I protect narrow small-reed from pests after transplanting?
Regularly inspect for pests and use organic insecticides if necessary to safeguard narrow small-reed.
What's the first step to transplanting narrow small-reed?
The initial step is to select a sunny location and properly prepare the soil.


