How to Transplant Torchwood?
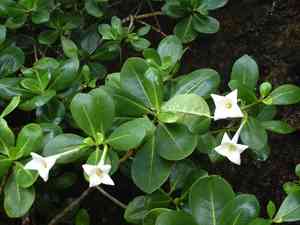
Torchwood flourishes when relocated between early and late spring, taking advantage of progressively warmer conditions. Select a bright spot with adequately draining earth for peak development. Be sure to carefully manage the root system during this procedure to lessen transplant stress.
Essential Preparations Before Relocating Torchwood?
Optimal Timing for Torchwood Relocation?
The best window for moving torchwood, a perennial, spans from early to late spring. This timeframe allows the plant to establish its root system before the demands of summer heat. Relocating during this season promotes superior root development and overall plant vitality, due to consistent moisture and milder temperatures, boosting its survival rate and growth potential.
Required Spacing Between Torchwood Plants?
For transplant spacing, aim to position torchwood approximately 36-48 inches (91-122 cm) apart. This provides sufficient room for growth without resource competition.
Ideal Soil Blend for Torchwood Relocation?
Prepare a well-draining soil mixture with added organic material. Incorporate a phosphorus-rich base fertilizer to ensure torchwood develops robust roots.
Where to Replant Your Torchwood?
Select a site that receives ample sunlight. Torchwood thrives with 6-8 hours of direct sun daily, encouraging vigorous growth and abundant blooms.
Equipment Needed Before Transplanting Torchwood?
Gardening Gloves
To safeguard your hands while handling soil and the plant.
Shovel or Spade
For digging a perimeter around the plant and creating the new planting hole.
Watering Can or Hose
To hydrate the plant before and after its move.
Garden Fork
To assist in loosening the soil around the plant if it's in the ground.
Pruning Shears
To trim any compromised roots during the transplant process.
Trowel
For managing smaller plants or young sprouts.
Bucket
To transport the relocated torchwood if necessary.
How to Extract Torchwood from its Current Location?
How to Extract Torchwood from its Current Location?
From Ground: First, moisten the torchwood plant's soil. Then, use a shovel or spade to dig a wide trench around the plant, ensuring the root ball remains intact. Carefully work the spade beneath the root ball to lift the plant from its original spot.From Pot: Start by gently watering the torchwood to loosen the soil. Next, tilt the pot sideways and tap its sides and bottom to aid in releasing the plant. Carefully slide the torchwood out of the pot, taking care not to harm the roots.From Seedling Tray: Water the seedlings to facilitate removal. Use a trowel to gently lift each torchwood seedling from the tray, aiming to keep as much soil around the roots as possible.
Step-by-Step Guide for Relocating Torchwood
Preparation
Before extracting your torchwood from its initial spot, ensure the new location is prepared and ready for the plant. This involves digging a hole slightly larger than the torchwood's root ball, providing ample room for root expansion.
Removal
Follow the appropriate extraction method based on whether your torchwood is in the ground, a container, or a seedling tray. Proceed gently and patiently to keep the roots undamaged.
Transport
If there's a considerable distance between the old and new sites, use a bucket to move the plant, ensuring the root ball stays intact and hydrated during transit.
Planting
Carefully place the torchwood into its new hole, making sure it sits at the same depth as it was previously. Backfill the hole with soil, gently pressing to eliminate any air pockets.
Watering
Thoroughly water the new site to help the soil settle around the roots. Ensure the soil is moist but not waterlogged.
Post-Transplant Care for Torchwood?
Watering
Maintain consistent moisture in the soil around the torchwood, avoiding sogginess, for the initial weeks after transplanting to encourage strong root development.
Mulching
Apply a layer of mulch around the base of the torchwood to help retain soil moisture and suppress weeds.
Protection
Shield the newly transplanted torchwood from strong winds or heavy rainfall for the first few weeks. Use stakes or a temporary cover if necessary.
Pruning
Trim any damaged or dead foliage to redirect the plant's energy towards establishing new roots.
Monitoring
Regularly inspect the plant for indications of transplant shock, such as wilting or yellowing leaves, and adjust care as needed.
Addressing Common Issues with Torchwood Relocation.
When is the best time to move torchwood?
The ideal period for successful transplanting is from early to late spring.
What is the optimal spacing for torchwood when relocating?
Ensure a distance of 36-48 inches (91-122 cm) between each plant for proper growth.
How should I prepare the soil for torchwood relocation?
Utilize well-draining, fertile soil. Enhance with compost or organic matter for improved results.
What if torchwood wilts after being moved?
Provide ample water and shade for a few days to aid its recovery from transplant shock.
How deep should I plant torchwood during relocation?
Plant at the same depth as its original location to prevent root stress.
Can I move torchwood during summer?
It's best to avoid summer relocation due to heat stress; early to late spring is preferable.
What should I consider regarding sun exposure when moving torchwood?
Choose a site with full sun to partial shade, depending on your climate and region.
How can I minimize transplant shock for torchwood?
Water thoroughly before and after transplanting, and disturb roots as little as possible.
Is pruning necessary before relocating torchwood?
Pruning isn't essential, but removing damaged or dead parts can aid plant recovery.
What if the leaves turn yellow after torchwood relocation?
Yellowing leaves might indicate overwatering or transplant shock. Check soil drainage and water appropriately.



