How to Propagate Torchwood?
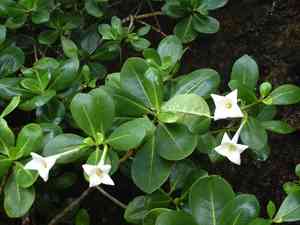
Torchwood is a lively botanical specimen prized for its decorative appeal. It flourishes in adequately draining substrate and demands little upkeep once rooted. For propagation, employ robust stem sections, making sure each segment possesses multiple nodes. Insert these cuttings into a damp, sandy blend and sustain elevated humidity. Keep the growing medium uniformly moist until root systems emerge, ensuring the cuttings are exposed to diffused illumination. The plant's hardiness renders it appropriate for diverse horticultural settings.
When Is the Optimal Time to Propagate Torchwood?
Propagation Method
Cutting
Propagation Period
Spring,Summer
What Equipment Is Used for Torchwood Propagation?
Pruning Shears
These are vital for severing healthy stem sections from torchwood. They must be sharp and clean to achieve precise cuts, minimizing infection risk and preventing damage to plant tissues.
Rooting Hormone
This compound stimulates root development on torchwood cuttings. Dipping the severed ends into the hormone powder or gel significantly boosts the likelihood of successful rooting.
Propagating Tray
A flat, shallow container is perfect for arranging multiple torchwood cuttings in a controlled setting. These trays facilitate proper drainage and efficient space management, which are crucial for the initial stages of root growth.
Mister/Spray Bottle
Maintaining elevated humidity levels around torchwood cuttings is crucial. A mister or spray bottle enables gentle hydration, preventing desiccation without overwatering.
Heating Mat
Utilized to provide consistent warmth from below, which accelerates root formation in torchwood. The heat mat ensures that soil temperatures remain ideal for root development.
Sharp Knife or Scalpel
For accurate, clean incisions when preparing torchwood cuttings. A sharp knife or scalpel minimizes tissue damage and prevents infections, which is essential for cuttings to heal and root effectively.
Transparent Plastic Cover or Propagation Dome
These are employed to create a miniature greenhouse effect, maintaining high humidity and warm temperatures around torchwood cuttings. This environment is conducive to rooting and prevents dehydration.
Sterilizing Solution
Used to sanitize pruning shears, knives, and scalpels before cutting torchwood. This helps prevent the transmission of diseases and fungal infections to the cuttings.
How to Propagate Torchwood?
Propagation Difficulty
Moderately Difficult
How to Care for Your Newly Propagated Torchwood?
How to Care for Your Newly Propagated Torchwood?
Once roots have formed and new growth emerges, gradually acclimatize torchwood to normal humidity levels by removing any covering. Replant it into a slightly larger container with well-draining soil, and position it in a spot with filtered light. Keep the soil consistently moist, but avoid overwatering. Fertilize every 4-6 weeks during the active growth period with a balanced, water-soluble fertilizer. Prune as needed to maintain shape and encourage denser growth.
Common Errors to Avoid When Propagating Torchwood
Improper soil mixture
Using dense, poorly draining soil can lead to root rot. Torchwood thrives in well-draining soil to prevent waterlogging.
Overwatering
Excessive moisture can cause fungal problems and root rot. Torchwood requires moderate watering, allowing the soil to dry out between waterings.
Insufficient light
Planting in too much shade can hinder growth. Torchwood needs ample sunlight to flourish.
Incorrect cutting technique
Improper cuts or damaged cuttings can lower the success rate. Clean cuts made with sterile tools are crucial.
Neglecting humidity
Lack of humidity can impede root development. Torchwood benefits from a humid environment during propagation.
Advice For Propagating Torchwood
Use well-draining soil
Choose a soil blend that promotes drainage to prevent waterlogging.
Maintain moderate watering
Ensure the soil is moist but not saturated, allowing it to dry out slightly between waterings.
Provide adequate sunlight
Place the cuttings or plant in a location that receives plenty of sunlight for optimal growth.
Make clean, precise cuts
Use sterile, sharp tools to take cuttings to avoid infection and promote better rooting.
Ensure high humidity
Create a humid environment around the cuttings by using a humidity dome or misting regularly.



