How to Transplant Crested philippine violet?
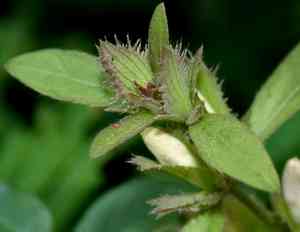
Relocate crested philippine violet during the mild temperatures of mid-to-late spring or the beginning of early summer for strong root establishment. Select a location bathed in sunlight with soil that drains effectively. A helpful suggestion: progressively introduce crested philippine violet to external environments to minimize the impact of transplanting.
What Preparations are Needed Before Transplanting Crested Philippine Violet?
What is the Ideal Time for Transplanting Crested Philippine Violet?
The optimal period to move crested philippine violet is during the peaceful start of mid-spring. This timeframe encourages robust development due to mild temperatures and sufficient rainfall. Relocating crested philippine violet in this season ensures roots establish well prior to summer's heat. This benefit is vital for a vibrant floral display. Furthermore, the early growth season allows the plant to recover from transplant shock under perfect growing conditions, setting the stage for a flourishing garden focal point.
How Much Space Should You Leave Between Crested Philippine Violet Plants?
Your crested philippine violet will require room to expand, so plan your arrangement accordingly. For optimal outcomes, aim to transplant your crested philippine violet plants 2-3 feet (60-90 cm) apart. This will provide ample space for the roots to spread and the plant to thrive.
What is the Best Soil Mix for Crested Philippine Violet Transplanting?
The crested philippine violet prefers soil that drains well, enriched with organic material. Prepare a base with a balanced plant food, such as a 10-10-10 blend, to give your plant a nutrient-rich beginning. If uncertain, your local garden center can offer guidance.
Where Should You Relocate Your Crested Philippine Violet?
Your crested philippine violet needs a good balance of sun exposure and shade. An ideal spot would receive morning sunlight but remain shaded during the hotter, late afternoon hours. If you have such a location in your garden, your crested philippine violet will absolutely flourish there.
What Equipments Should You Prepare Before Transplantation Crested Philippine Violet?
Gardening Gloves
To safeguard your hands while handling the plant and soil.
Shovel or Trowel
To excavate the crested philippine violet plant from its current spot and create a new cavity at the transplant site.
Pruning Shears
For tidying the plant and removing any dead or damaged sections.
Organic Compost
To enrich the new planting area and supply nutrients to the crested philippine violet.
Watering Can or Hose
For moistening the soil and hydrating the plant after relocation.
Mulch
To assist in retaining soil moisture following transplantation.
How Do You Remove Crested Philippine Violet from the Soil?
How Do You Remove Crested Philippine Violet from the Soil?
From Ground: Start by thoroughly watering the crested philippine violet in its current spot to soften the earth. Then, using a shovel or trowel, dig a wide circle around the plant to begin loosening the roots from the soil. Be careful not to harm the root ball. Once the root ball is fully exposed, gently slide the shovel beneath it and lift the plant from the ground.From Pot: Before extracting the crested philippine violet from its container, water it well to dampen the soil. Gently tilt the pot and tap it to loosen the root ball, sliding it out with your hands. If the plant is root-bound, carefully untangle the roots before transplanting.From Seedling Tray: Water the tray thoroughly and let it sit for a few minutes. Then, using a small trowel or spoon, carefully lift the crested philippine violet seedlings from the tray, trying not to damage the roots.
Step-by-Step Guide for Transplanting Crested Philippine Violet
Preparation
Before you start, put on your gardening gloves to protect your hands. Ensure your tools are clean and ready.
Hole Digging
Use your shovel or trowel to dig a hole in your chosen spot. It should be twice the width and the same depth as the current spread and depth of the root ball.
Soil Preparation
Mix some organic compost with the soil removed from the hole. This will provide the crested philippine violet with ample nutrients.
Planting
Position the crested philippine violet in the hole, spreading the roots out. The top of the root ball should be level with the soil surface. Backfill with the soil and compost mix, firming gently around the base of the crested philippine violet.
Watering
Thoroughly water the crested philippine violet plant after transplanting, using your watering can or hose. Water slowly to ensure the root ball and surrounding soil is properly moistened.
How Do You Care For Crested Philippine Violet After Transplanting?
Watering
For the initial couple of weeks post-transplant, crested philippine violet may require additional watering as it settles into its new location. This should be spaced out and depends on the weather; remember not to overwater it.
Pruning
It may benefit crested philippine violet to have a slight trim after transplanting, removing any damaged parts and encouraging bushier growth.
Mulching
Apply a layer of mulch around the base of the crested philippine violet to help retain soil moisture and suppress weeds. Avoid piling it against the stem to prevent rot.
Protection
Newly transplanted crested philippine violet may be sensitive to extreme weather; consider providing temporary shelter if a frost or heatwave is predicted.
Troubleshooting Common Issues with Crested Philippine Violet Transplantation.
What is the best time of year to transplant crested philippine violet?
The ideal time to transplant crested philippine violet is during the middle to the end of the year (S2-S4), when the weather is moderate.
How much space should be left between each crested philippine violet during transplantation?
Leave a space of about 2-3 feet (60-90cm) between each crested philippine violet plant. This gives each plant enough room to grow and thrive.
What is the best soil type for transplanting crested philippine violet?
Crested philippine violet flourishes in well-draining soil. A mix of sand, clay, and loamy soils would be perfect. It helps the plant establish quickly after transplantation.
What should be the depth of the hole for transplanting crested philippine violet?
The hole should be twice the width and the same depth as the root ball, usually about 10 inches (25 cm) deep.
How much water should crested philippine violet receive after transplantation?
Water crested philippine violet thoroughly after transplanting, enough to moisten the root zone. Subsequent watering should be deep but infrequent.
How important is sunlight for crested philippine violet after transplantation?
Crested philippine violet requires full to partial sunlight after transplantation. Make sure to position the plant where it can get at least 6 hours of sunlight daily.
What can I do if my transplanted crested philippine violet wilts or turns yellow?
If crested philippine violet wilts or turns yellow, it might be due to water stress or nutrient deficiency. Establish a regular watering schedule and consider using a balanced fertilizer.
How often should I fertilize crested philippine violet after transplantation?
Apply a slow-release fertilizer once at the time of planting.crested philippine violet usually does not require frequent fertilization.
What should I do to prevent shock in crested philippine violet during transplantation?
To prevent transplant shock, water the plant well before and after transplanting. Also, try to disturb the roots as little as possible during the process.
Do I need to prune crested philippine violet after transplantation?
Pruning is not immediate after transplanting crested philippine violet. Give it some time to adjust to the new environment. After establishing, stem tip pruning can promote bushier growth.



