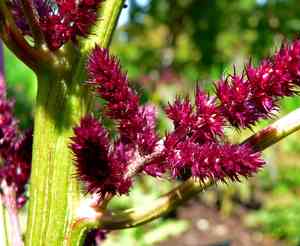
How to Transplant Tumbling saltweed?
The ideal period for transplanting tumbling saltweed is during the resurgence of warmth in mid to late spring, which guarantees vigorous development. Select locations that receive ample sunlight and drain effectively, and when introducing tumbling saltweed to a new environment, proceed with care to avoid stress.
What Preparations are Needed Before Transplanting Tumbling Saltweed?
What is the Ideal Time for Transplanting Tumbling Saltweed?
The best time to move tumbling saltweed is from late April to early June. Moving them during this period encourages strong development, as mild temperatures and plenty of sunlight create perfect conditions for tumbling saltweed to settle in. By planting them then, you give them a head start, benefiting from spring's gentle warmth, which is less stressful than summer's intense heat. This timing also allows tumbling saltweed to fully utilize the growing season, setting the stage for a successful growth cycle.
How Much Space Should You Leave Between Tumbling Saltweed Plants?
Before moving tumbling saltweed, plan to give each plant ample room. Aim to space them approximately 18-24 inches (45-60 cm) apart. This distance is perfect for them to grow without feeling cramped! It's like providing each one with its own small garden plot.
What is the Best Soil Mix for Tumbling Saltweed Transplanting?
For tumbling saltweed to thrive, prepare a well-draining soil enriched with a basic fertilizer. A general-purpose or balanced fertilizer will work well. Ensure it's thoroughly mixed in to give tumbling saltweed the best possible start!
Where Should You Relocate Your Tumbling Saltweed?
Choose a sunny location for your tumbling saltweed where they can receive at least 6 hours of sunlight daily. They appreciate the sun's warmth, so an area with full or partial sun will make them quite content!
What Equipments Should You Prepare Before Transplantation Tumbling Saltweed?
Gardening Gloves
To safeguard your hands while handling soil and plants.
Trowel
For digging small holes and moving young plants.
Shovel or Garden Spade
For extracting plants from the ground and preparing suitable holes for replanting.
Watering Can or Hose
To hydrate the plant before and after relocation, ensuring adequate moisture.
Mulch
To help maintain soil moisture and regulate temperature around the root area after transplanting.
How Do You Remove Tumbling Saltweed from the Soil?
How Do You Remove Tumbling Saltweed from the Soil?
From Ground: Hydrate the tumbling saltweed plant to moisten the soil. Then, dig a wide circle around the plant with a shovel or spade to avoid root damage. Carefully work the tool beneath the root ball to lift the plant from the ground.From Pot: Tip the container on its side and gently tap the sides and bottom to loosen the tumbling saltweed. Grasp the plant's base and carefully slide it out while supporting the soil and root ball.From Seedling Tray: Water the seedlings to ensure the soil holds together. Use a trowel or your fingers to gently lift each tumbling saltweed seedling by its leaves, not its delicate stems.
Step-by-Step Guide for Transplanting Tumbling Saltweed
Preparation
Ensure the soil at the new site is loose and easy to work with. Water the tumbling saltweed in its current spot before moving it to minimize root damage.
Digging Holes
Excavate a hole at the new location slightly larger than the root ball to allow for growth.
Transplanting
Carefully place the tumbling saltweed into the prepared hole at the same soil depth it was previously growing. Backfill the hole with soil and gently firm it around the plant's base.
Watering
Immediately water the tumbling saltweed thoroughly to help settle the soil around the roots and remove air pockets. This also provides essential hydration for recovery.
Mulching
Apply a layer of mulch around the transplanted plant to conserve moisture and protect the roots.
How Do You Care For Tumbling Saltweed After Transplanting?
Monitoring
Regularly inspect the plant for signs of distress, such as wilting or yellowing leaves, and address them promptly.
Watering
Keep the soil around tumbling saltweed moist, especially during the initial weeks, to aid root establishment.
Mulch
Maintain the mulch layer to retain moisture and provide temperature regulation for the roots.
Support
Offer physical support if tumbling saltweed appears weak or is exposed to strong winds until it becomes established.
Troubleshooting Common Issues with Tumbling Saltweed Transplantation.
When is the best time to transplant tumbling saltweed?
Ideally, move tumbling saltweed to a new spot in mid to late spring to take advantage of the active growing season.
What spacing should I use when planting tumbling saltweed?
Place tumbling saltweed 18-24 inches (45-60 cm) apart to ensure adequate room for development.
Why are my transplanted tumbling saltweed plants wilting?
Wilting can indicate shock. Ensure careful handling during transplanting and sufficient watering afterward.
How deep should I plant tumbling saltweed's roots?
Dig a hole so tumbling saltweed's roots are buried at the same depth as they were in the previous pot or location.
Should I water tumbling saltweed immediately after transplanting?
Yes! Watering tumbling saltweed promptly after transplanting helps roots recover and lessens transplant shock.
Can I transplant tumbling saltweed on a hot, sunny day?
Transplant tumbling saltweed on an overcast day or in the late afternoon to prevent excessive heat stress.
Why is my tumbling saltweed not growing after transplanting?
Ensure the soil is fertile, watering is adequate, and no root damage occurred during the transplanting process.
How can I tell if tumbling saltweed has root rot after transplanting?
Examine the roots â a black or mushy texture indicates rot, often due to overwatering or poor drainage.
Is special soil needed when transplanting tumbling saltweed?
While tumbling saltweed isn't overly particular, well-draining soil enriched with organic matter supports a smoother transition.
How can I protect tumbling saltweed from pests after transplanting?
Regularly check for pests. Using organic mulch can deter pests and encourage healthy growth post-transplant.


