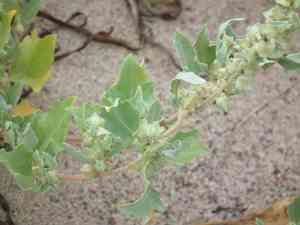
How to Transplant Frosted orache?
Relocate frosted orache between the end of winter's chill and the height of spring, capitalizing on vigorous development in mild temperatures and ample light. Select locations with good drainage, shielded from strong gusts. Should the soil be infertile, improving it before transplantation is recommended.
What Preparations are Needed Before Transplanting Frosted Orache?
What is the Ideal Time for Transplanting Frosted Orache?
The perfect time to move frosted orache is from early spring through late spring. This period offers mild weather, allowing frosted orache roots to settle in cooler soil before summer's heat. Choosing this window ensures frosted orache plants have the best chance to thrive, with ample time for growth and adaptation. It shows a gardener's foresight, giving frosted orache resilience for future seasons, boosting its opportunity to flourish beautifully.
How Much Space Should You Leave Between Frosted Orache Plants?
When getting ready to transplant your frosted orache, imagine each plant having its own personal space. Aim for a distance of 6-12 inches (15-30 cm) between each one. This spacing helps your frosted oraches thrive by giving them plenty of room to spread their leaves and roots.
What is the Best Soil Mix for Frosted Orache Transplanting?
For your young frosted orache, consider the soil a comfortable bed. A mixture rich in organic material works wonders, and a bit of balanced, slow-release fertilizer is like a welcome treat. Aim for soil that drains well to keep the roots happy and healthy.
Where Should You Relocate Your Frosted Orache?
Your frosted oraches love a daily dose of sun, much like sunbathers on a beach. Choose a location where they will receive full sunlight for most of the day. This sunny spot will help them grow strong and produce an abundance of leaves.
What Equipments Should You Prepare Before Transplantation Frosted Orache?
Gardening Gloves
To shield your hands while handling soil and frosted orache.
Shovel or Spade
To excavate the plant without harming its root system.
Garden Trowel
For precise movements and relocating smaller plants.
Pruning Shears
To trim any dead or excess growth prior to transplanting.
Wheelbarrow or Garden Cart
To move the frosted orache and any tools or soil amendments.
Watering Can or Hose
To hydrate the frosted orache before and after its relocation.
Garden Fork
To loosen the soil around the frosted orache if it's being moved from the ground.
How Do You Remove Frosted Orache from the Soil?
How Do You Remove Frosted Orache from the Soil?
From Ground: First, moisten the frosted orache's soil. Then, dig a wide trench around the plant with a shovel or spade, ensuring the root ball stays intact. Carefully work the spade beneath the root ball to lift the plant from its original spot.From Pot: Water the frosted orache thoroughly before starting. Turn the pot sideways and gently tap the bottom to loosen the frosted orache. Support the frosted orache's stem with one hand and carefully pull the pot away with the other.From Seedling Tray: Water the tray to facilitate removal. Use a garden trowel or similar tool to gently separate the frosted orache and its roots from the cell without damage, ensuring roots remain covered in soil.
Step-by-Step Guide for Transplanting Frosted Orache
Preparing the New Site
Dig a hole that is twice as wide and equally deep as the frosted orache's root ball.
Root Ball Care
Gently loosen the outer roots of the root ball to encourage outward growth into the surrounding soil.
Transplanting
Place the frosted orache in the center of the new hole at its original depth. Backfill with soil, firming it around the plant to remove air pockets.
Stabilizing
Stake the frosted orache if it is tall or in a windy area to prevent it from tipping. Use soft ties to secure the plant to the stake without causing harm.
How Do You Care For Frosted Orache After Transplanting?
Immediate Watering
Water the frosted orache generously right after transplanting to settle the soil around its roots and aid recovery from transplant shock.
Monitoring
Keep a close watch on the frosted orache, checking for signs of stress like wilting or discolored leaves, and correct as needed.
Supporting Growth
Stake the frosted orache for extra support if it's top-heavy or to shield it from strong winds until it establishes itself.
Mulching
Apply a layer of organic mulch around the base to retain moisture, suppress weeds, and maintain a consistent soil temperature.
Troubleshooting Common Issues with Frosted Orache Transplantation.
When is the best time to transplant frosted orache seedlings?
Transplant frosted orache seedlings from early to late spring, once frost danger has passed and the soil is workable.
How much space does each frosted orache need when transplanting?
Allow each frosted orache plant ample room to thrive by spacing them 6-12 inches (15-30 cm) apart.
Why is my frosted orache wilting after transplanting?
Wilting can be due to transplant shock. Ensure soil stays moist and provide some shade for recovery.
How deep should the holes be for frosted orache transplants?
Dig holes slightly larger than the root ball to comfortably fit the roots without bending.
What lighting conditions are best for frosted orache post-transplant?
Frosted orache prefers full sun to partial shade. Choose a bright spot protected from harsh afternoon sunlight.
How do I prepare the soil for transplanting frosted orache?
Enrich the soil with compost or well-rotted manure to improve fertility and drainage before planting.
Can I transplant frosted orache during summer or fall?
It's best to stick to early to late spring for better establishment and growth performance.
How often should I water frosted orache after transplanting?
Water regularly to keep the soil consistently moist, especially during the first few weeks after transplanting.
What signs show that frosted orache is ready for transplant?
Ready frosted orache plants have strong stems, healthy leaves, and roots beginning to fill their current container.
How to protect frosted orache transplants from pests?
Monitor regularly and use appropriate netting or organic insecticides if pests appear, ensuring plant health.


