How to Transplant Groundcover milkvetch?
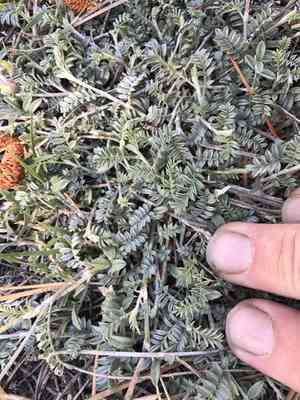
Groundcover milkvetch flourishes when relocated during the energetic resurgence of early spring, benefiting from ideal growing circumstances. Select a bright, adequately drained spot. Verify that the earth is friable to foster robust root expansion for proper settling.
What Preparations are Needed Before Transplanting Groundcover Milkvetch?
What is the Ideal Time for Transplanting Groundcover Milkvetch?
The best time to move groundcover milkvetch, a perennial, is in early spring. This period offers cooler temperatures and ample moisture, aiding root establishment before summer heat. Transplanting then ensures robust growth and increased hardiness, setting the stage for a healthy, flourishing plant.
How Much Space Should You Leave Between Groundcover Milkvetch Plants?
For groundcover milkvetch, position plants 18-24 inches (45-60 cm) apart to allow ample room for development and spreading.
What is the Best Soil Mix for Groundcover Milkvetch Transplanting?
Prepare well-draining soil enriched with compost for groundcover milkvetch. This plant prefers moderately fertile soil, so incorporating a balanced fertilizer with equal parts nitrogen, phosphorus, and potassium can foster healthy initial growth.
Where Should You Relocate Your Groundcover Milkvetch?
Select a sunny location for relocating groundcover milkvetch. This plant thrives in full sun, requiring at least 6 hours of direct sunlight daily. A bright, open site will encourage vigorous development.
What Equipments Should You Prepare Before Transplantation Groundcover Milkvetch?
Gardening Gloves
To safeguard your hands while handling soil and the plant.
Shovel or Spade
For excavating around the plant and its new spot.
Hand Trowel
For more precise digging and managing the root ball.
Watering Can or Hose
To maintain soil moisture during the relocation process.
Pruners
For trimming any dead or damaged roots or stems.
Mulch
To help retain moisture and inhibit weed growth around the plant.
Wheelbarrow
For moving the plant, if it is large.
How Do You Remove Groundcover Milkvetch from the Soil?
How Do You Remove Groundcover Milkvetch from the Soil?
From Ground: First, hydrate the groundcover milkvetch plant to moisten the soil. Next, dig a wide trench around the plant using a shovel or spade, ensuring the plant's root ball remains intact. Carefully work the spade beneath the root ball to lift the plant from its original position.From Pot: Water the groundcover milkvetch plant to facilitate removal. Gently tap around the pot to loosen the soil and invert the pot, carefully extracting the plant by supporting the stem and sliding out the root ball.From Seedling Tray: Water the groundcover milkvetch seedlings thoroughly to make them easier to extract. Use a hand trowel to gently lift each seedling from the tray, ensuring the root ball stays intact.
Step-by-Step Guide for Transplanting Groundcover Milkvetch
Prepare the New Site
Select a suitable location and dig a hole that is twice the width and the same depth as the groundcover milkvetch's root ball.
Amend Soil if Necessary
If the soil at the new site is poor, you might need to improve it with compost or other organic material to enhance its quality.
Water the New Hole
Before placing the groundcover milkvetch in its new spot, water the hole thoroughly to ensure the soil is damp.
Remove the Plant Carefully
Transfer the groundcover milkvetch from its initial location using the appropriate removal method.
Place the Plant in the Hole
Position the groundcover milkvetch in the center of the hole, making sure it sits at the same depth as it was previously.
Backfill the Hole
Carefully refill the hole with soil, gently pressing down to eliminate any air pockets but avoid compacting the soil too firmly.
Water Thoroughly
Water the groundcover milkvetch well after transplanting to help it settle into its new environment.
How Do You Care For Groundcover Milkvetch After Transplanting?
Watering
Keep the soil around the groundcover milkvetch consistently moist, but not waterlogged, for the initial weeks post-transplant to aid in strong root establishment.
Mulching
Apply a layer of mulch around the base of the groundcover milkvetch to retain moisture and suppress weeds, being careful not to pile mulch against the stem.
Monitoring
Observe the groundcover milkvetch for signs of stress, such as wilting or yellowing leaves, and provide extra water or shade if needed.
Pruning
Trim back any damaged or dead stems after transplanting to encourage fresh growth.
Troubleshooting Common Issues with Groundcover Milkvetch Transplantation.
When is the best time to transplant groundcover milkvetch?
Early spring is the optimal period for transplanting groundcover milkvetch to ensure ideal growth conditions.
How should I prepare the soil for groundcover milkvetch?
Loosen the soil to a depth of 6-8 inches (15-20 cm) and remove all weeds.
What is the recommended spacing for planting groundcover milkvetch?
Plant groundcover milkvetch 18-24 inches (45-60 cm) apart to provide sufficient room for growth.
How do I minimize transplant shock for groundcover milkvetch?
Water groundcover milkvetch thoroughly before and after transplanting to lessen transplant shock.
What should I do if the leaves of groundcover milkvetch turn yellow?
Yellow leaves might indicate excessive watering. Ensure proper drainage and adjust irrigation practices.
How deep should I plant groundcover milkvetch seedlings?
Plant groundcover milkvetch seedlings at the same depth they were in their original containers.
How often should I water newly transplanted groundcover milkvetch?
Water groundcover milkvetch deeply twice a week for the first two weeks after transplanting.
What type of mulch is best for groundcover milkvetch?
Use organic mulch like straw or bark to retain moisture and regulate soil temperature for groundcover milkvetch.
How can I prevent root damage when transplanting groundcover milkvetch?
Handle groundcover milkvetch gently and avoid disturbing the roots to prevent transplant shock.
What should I do if groundcover milkvetch isn't thriving after transplanting?
Check soil pH, ensure proper spacing, and adjust watering and light levels for groundcover milkvetch.



