How to Prune Groundcover milkvetch?
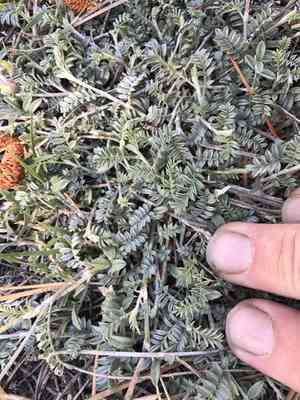
Creeping milkvetch is a low-lying perennial recognized for its sprawling nature and fine leaves. Trim in early spring or late winter to control its dimensions and stimulate robust development. Eliminate deceased or injured stalks and gently sculpt the plant to enhance air movement and light exposure. Consistent trimming lowers the chance of illness and fosters abundant blooms. Always employ sanitized, sharp implements to prevent plant strain and possible contagions.
What Are the Benefits of Pruning Groundcover Milkvetch?
What Are the Benefits of Pruning Groundcover Milkvetch?
Groundcover milkvetch thrives with pruning, maintaining its form and promoting strong development. Pruning encourages robust growth, manages size, boosts flowering, and enhances its overall look. It also helps groundcover milkvetch resist pests and diseases, ensuring healthier progress.
What Is the Best Time for Pruning Groundcover Milkvetch?
What Is the Best Time for Pruning Groundcover Milkvetch?
Pruning or trimming groundcover milkvetch in early spring or late winter is ideal due to its growth cycle and health advantages. During these periods, groundcover milkvetch is dormant, which minimizes plant stress and encourages strong, vigorous growth once the active season begins. Furthermore, pruning at these times can help prevent the spread of diseases and pests more prevalent in warmer months. Early trimming also promotes better flowering and overall health for groundcover milkvetch by allowing ample time for new growth to establish before blooming.
What Tools Do I Need to Prune Groundcover Milkvetch?
Hand Pruners
Perfect for precise cuts on delicate stems of groundcover milkvetch. Hand pruners enable close trimming to maintain healthy growth and shape.
Bypass Pruners
Preferred for clean cuts on the softer branches of groundcover milkvetch. These pruners help prevent damage to plant tissues, reducing disease risk.
Trimming Shears
Useful for shaping and giving groundcover milkvetch an even, tidy appearance. Trimming shears are excellent for managing ground cover without harming the plant.
How to Prune Groundcover Milkvetch
Prepare tools
Ensure your pruning shears are clean and sharp to avoid damaging groundcover milkvetch during cutting.
Inspect plant
Examine groundcover milkvetch thoroughly, focusing on identifying all diseased and withered leaves that require removal.
Prune diseased leaves
Carefully remove any diseased leaves, cutting back to healthy tissue to prevent disease spread.
Remove withers
Trim off any withered leaves at their base, being careful not to harm surrounding healthy growth.
Dispose prunings
Properly dispose of all pruned material to prevent potential contamination or disease reintroduction.
Common Pruning Mistakes with Groundcover Milkvetch
Overpruning
Removing too much of the plant at once can cause stress, hinder growth, and potentially lead to dieback. It's crucial to prune moderately to maintain groundcover milkvetch's health and vigor.
Improper cutting technique
Using dull or dirty tools can damage plant tissue and increase infection risk. Always use sharp, clean pruning shears for clean cuts.
Pruning at incorrect points
Cutting too far from or too close to the node can interfere with proper regrowth. Ensure cuts are made just above a healthy node or bud.
Pruning too frequently
Constant trimming can prevent the plant from establishing itself securely. Allow groundcover milkvetch time to grow between pruning sessions.
Common Pruning Tips for Groundcover Milkvetch
Use clean, sharp tools
Always sanitize pruning shears before and after use to reduce disease spread. Sharp tools ensure clean cuts that heal quickly.
Cut at the right angle
Make cuts at a 45-degree angle to prevent water from accumulating on the cut surface, which can lead to rot.
Focus on removing damaged parts
Start by cutting back any dead, diseased, or damaged stems. This helps prevent disease spread and encourages healthy growth.
Aim for light pruning
Thin out crowded areas to increase air circulation and sunlight penetration, fostering a robust plant structure. Avoid removing more than one-third of the plant at a time.



