How to Transplant Rusby's milkweed?
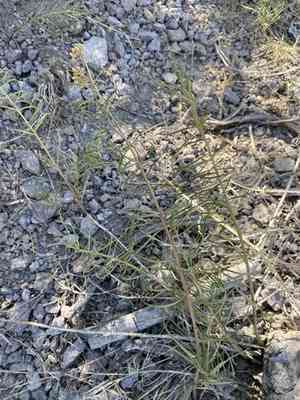
Rusby's milkweed flourishes when relocated from the beginning to the end of spring, benefiting from ideal climatic conditions. Select a bright spot with soil that drains effectively to guarantee robust development. Relocation advice: irrigate generously after moving to minimize stress.
What Preparations are Needed Before Transplanting Rusby's Milkweed?
What is the Ideal Time for Transplanting Rusby's Milkweed?
The optimal period for relocating rusby's milkweed, a perennial, extends from the beginning of early spring through the conclusion of late spring. During this interval, the ground warms, fostering root development and robust growth prior to summer's heat. Transplanting at this time ensures the plant's best health, resilience, and thriving progress.
How Much Space Should You Leave Between Rusby's Milkweed Plants?
Ensure each rusby's milkweed plant is spaced 18-24 inches (45-60 cm) apart to promote healthy development and air circulation.
What is the Best Soil Mix for Rusby's Milkweed Transplanting?
Prepare soil that drains well, mixed with compost or organic material; enrich it with a balanced, slow-release fertilizer to nourish rusby's milkweed.
Where Should You Relocate Your Rusby's Milkweed?
Choose a sunny location for rusby's milkweed, ideally one receiving full sun (at least 6 hours) daily for peak growth.
What Equipments Should You Prepare Before Transplantation Rusby's Milkweed?
Gardening Gloves
To safeguard your hands while handling soil and plants.
Shovel or Spade
For digging and lifting the plant along with its root mass.
Trowel
For smaller, more precise digging tasks or when working with young plants.
Pruning Shears
To trim any damaged or excess roots and foliage.
Watering Can or Hose
For hydrating the plant before and after its relocation.
Mulch
To help retain moisture and protect the plant post-transplant.
Stakes and Ties
To support the plant if it is tall or has dense foliage.
How Do You Remove Rusby's Milkweed from the Soil?
How Do You Remove Rusby's Milkweed from the Soil?
From Ground: Hydrate the rusby's milkweed plant to moisten the soil. Dig a wide trench around the plant using a shovel or spade, ensuring the plant's root ball remains intact. Carefully work the spade beneath the root ball to lift the plant from its original spot.From Pot: Water the rusby's milkweed plant the day prior to transplanting to facilitate removal. Gently tap the pot's sides to loosen the soil. Invert the pot, supporting the plant at its base, and carefully slide the plant out.From Seedling Tray: Water the seedlings a few hours before transplanting. Use a small trowel or similar tool to gently loosen the soil and lift each seedling by its leaves or stem base, taking care not to harm the delicate roots.
Step-by-Step Guide for Transplanting Rusby's Milkweed
Soil Preparation
Prepare the soil in the new site by loosening it with a shovel or trowel to ensure good air circulation and root penetration. Clear any weeds or debris from the area.
Digging the Hole
Excavate a hole that is twice the width and the same depth as the root ball of your rusby's milkweed plant. This extra space will allow for root growth and assist with soil amendments if needed.
Removing the Plant
Follow the appropriate removal procedure based on whether your rusby's milkweed plant originates from the ground, a pot, or a seedling tray. Handle the plant with care to prevent root damage.
Plant Placement
Position the rusby's milkweed plant into the prepared hole, ensuring the top of the root ball is level with the surrounding soil. Adjust the soil beneath the root ball if necessary.
Filling the Hole
Backfill the hole with soil, gently firming it around the root ball to eliminate air pockets. Be careful not to compact the soil too much, as this can hinder root growth.
Water Thoroughly
Water the newly transplanted rusby's milkweed plant extensively to settle the soil around the roots. Ensure the water penetrates deeply to encourage robust root development.
Adding Mulch
Apply a layer of mulch around the plant's base to help retain moisture and regulate soil temperature. Keep the mulch a few inches away from the plant stem to prevent rot.
Providing Support
If your rusby's milkweed plant is tall or has heavy foliage, use stakes and ties to provide support and prevent it from falling over.
How Do You Care For Rusby's Milkweed After Transplanting?
Watering
Keep the soil around the rusby's milkweed consistently moist, but not waterlogged, for the initial weeks post-transplant to aid in strong root establishment.
Monitoring
Observe the plant for any indications of stress, such as wilting or yellowing leaves, and address any issues promptly.
Fertilization
Wait a few weeks before applying any slow-release fertilizer to avoid burning the new roots. Adhere to the recommended amounts and frequencies for optimal results.
Weeding
Keep the area surrounding the rusby's milkweed plant free of weeds, which can compete for water and nutrients.
Protection
If transplanting during hot weather, provide temporary shade to the rusby's milkweed plant to lessen transplant shock. Conversely, shield it from frost if moving it late in the season.
Troubleshooting Common Issues with Rusby's Milkweed Transplantation.
What is the best time to transplant rusby's milkweed?
The ideal time to transplant rusby's milkweed is from early spring to late spring.
How far apart should I space rusby's milkweed?
Space rusby's milkweed plants 18-24 inches (45-60 cm) apart for optimal growth.
How should I prepare the soil for transplanting rusby's milkweed?
Use well-draining soil amended with compost to provide nutrients for rusby's milkweed.
What are common issues when transplanting rusby's milkweed?
Root damage, poor soil, and inadequate watering are common transplanting issues.
How to avoid root damage when transplanting rusby's milkweed?
Gently dig around the roots and avoid disturbing them when moving rusby's milkweed.
Should I water rusby's milkweed immediately after transplanting?
Yes, water rusby's milkweed thoroughly right after transplanting to help establish roots.
What kind of sunlight does rusby's milkweed need?
Plant rusby's milkweed in a location that receives full sun for optimal growth.
How to handle transplant shock in rusby's milkweed?
Water regularly, avoid fertilizer initially, and provide partial shade temporarily.
Can I transplant rusby's milkweed during summer?
It's best to avoid summer; early to late spring is ideal for transplanting rusby's milkweed.
Why are the leaves of rusby's milkweed wilting after transplanting?
Wilting can result from transplant shock; ensure sufficient water and partial shade.



