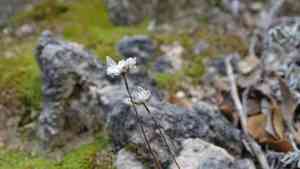
How to Transplant Sea thrift?
The ideal period for relocating sea thrift extends from the invigorating start of spring through the comforting close of summer, promoting vigorous development. Choose a brightly lit location featuring soil that drains effectively, and bear in mind that careful handling safeguards the root system's health.
What Preparations are Needed Before Transplanting Sea Thrift?
What is the Ideal Time for Transplanting Sea Thrift?
The optimal period for moving sea thrift spans from early spring's onset to the height of summer. This timeframe allows sea thrift sufficient opportunity for root establishment and development prior to winter. Transplanting sea thrift then capitalizes on the season's mild conditions, fostering robust health and blooming in the subsequent year. Such timing aligns with nature's cycle, ensuring your sea thrift flourishes with the season's gradual nourishment.
How Much Space Should You Leave Between Sea Thrift Plants?
When preparing to plant your beautiful sea thrift, ensure they have adequate room to thrive! Aim for a spacing of approximately 8-12 inches (20-30 cm) between each plant. This will provide them with the necessary space for ample growth and air circulation.
What is the Best Soil Mix for Sea Thrift Transplanting?
Before planting your sea thrift, prepare a suitable bed using well-draining soil rich in organic material. A light application of a balanced, slow-release fertilizer will give your sea thrift an excellent start. Simply mix it into the soil according to the package instructions!
Where Should You Relocate Your Sea Thrift?
Your sea thrift will thrive in a location that receives full sunlight to partial shade. Choose a spot where they can absorb at least 6 hours of daily sunlight. This will help them grow strong and display their lovely blossoms to the world!
What Equipments Should You Prepare Before Transplantation Sea Thrift?
Gardening Gloves
To safeguard your hands while handling soil and plants.
Hand Trowel
For digging small holes and refining the area where the sea thrift will be moved.
Shovel or Spade
Used for excavating and transporting the sea thrift's root ball.
Watering Can or Hose with Sprinkler Attachment
To hydrate the sea thrift before and after its relocation.
Garden Fork
To loosen the soil surrounding the plant and assist in its removal from its original spot.
Pruning Shears
To trim any damaged roots or foliage prior to transplanting.
Measuring Tape
To ensure accurate planting depth and spacing.
How Do You Remove Sea Thrift from the Soil?
How Do You Remove Sea Thrift from the Soil?
From Ground: First, moisten the soil around the sea thrift plant. Then, dig a wide trench around the plant using a shovel or spade, ensuring the plant's root ball remains intact. Carefully work the spade beneath the root ball to lift the plant from its original position.From Pot: Water the soil in the pot to facilitate easier removal of the sea thrift. Gently tap the pot's sides to loosen the root ball. Tilt the pot sideways and carefully slide the plant out while supporting the stem's base.From Seedling Tray: Water the seedlings in the tray to dampen the soil. Use a hand trowel or a fork to gently lift each sea thrift plant from its compartment, taking care to preserve the root ball and as much soil around the roots as possible.
Step-by-Step Guide for Transplanting Sea Thrift
Preparation
Before extracting the sea thrift from its current spot, ensure the new planting location is ready. The hole should be twice the width of the root ball and of the same depth to prevent planting the specimen too deeply.
Removal
Carefully remove the sea thrift from its initial location, as detailed in the 'removal process' section. Strive to keep as much of the root ball intact as possible.
Placing the Plant
Gently lower the sea thrift into the prepared hole. The top of the root ball should be flush with the surrounding soil surface. Adjust the hole's depth if necessary.
Filling the Hole
Backfill the hole with the excavated soil, gently tamping it down around the sea thrift's root ball to eliminate air pockets without overly compacting the soil.
Watering
Thoroughly water the sea thrift after planting to settle the soil around the roots and aid in shock recovery. Ensure water penetrates deeply to encourage downward root growth.
Mulching
Apply a layer of mulch around the base of the sea thrift to help retain moisture, regulate soil temperature, and reduce weed competition.
How Do You Care For Sea Thrift After Transplanting?
Monitoring
Regularly check the soil moisture level around the sea thrift. The soil should remain slightly damp; adjust watering as needed, especially during the initial growing season as the plant establishes itself.
Pruning
In the first year following transplanting, focus on removing only any dead or damaged foliage to promote new growth.
Support
If required, add a stake or other form of support to help the sea thrift remain upright and stable as it becomes established in its new location.
Observation
Watch for signs of stress, such as wilting leaves or discoloration, and take action like adjusting watering or providing shade if the plant appears to be struggling.
Troubleshooting Common Issues with Sea Thrift Transplantation.
What's the best time to transplant sea thrift?
The ideal planting window for sea thrift is from when spring warms the ground to midsummer's gentle heat.
How far apart should I space sea thrifts when transplanting?
Allow each sea thrift ample room to thrive by leaving 8-12 inches (20-30 cm) between them.
Can I transplant sea thrift under full sun?
Absolutely! Sea thrift flourishes in full sun, but it can also endure partial shade.
Should I water sea thrift immediately after transplanting?
Yes, water sea thrift thoroughly to settle the soil and help its roots recover from the move.
What type of soil is ideal for transplanting sea thrift?
Sea thrift thrives in well-draining soil enriched with organic matter for optimal growth.
How do I prepare sea thrift for transplant?
Gently remove sea thrift from its current location, preserving as much root ball as possible.
How deep should I plant sea thrift's root ball?
Plant the root ball of sea thrift so the top is level with the surrounding soil surface.
Why are my transplanted sea thrifts wilting?
Wilting could indicate shock. Ensure sea thrift has enough water and is protected from strong winds.
Is it necessary to fertilize sea thrift after transplanting?
Feed sea thrift with a balanced fertilizer post-transplant to encourage robust growth, following product directions.
What should I do if the leaves of sea thrift start to brown?
Browning leaves may signal distress; check for proper watering, drainage, and sun exposure adjustments.


