How to Transplant Pale mexican pricklypoppy?
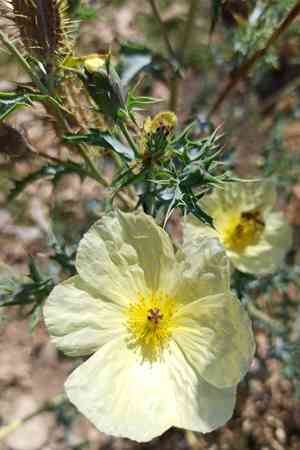
The most favorable period for transplanting pale mexican pricklypoppy is from the mild warmth of late spring into the beginning of summer, a time when its growth vigor is at its highest. Select a location that receives ample sunlight and has soil that drains effectively. Bear in mind, careful manipulation guarantees pale mexican pricklypoppy's prosperous establishment in its new environment.
What Preparations are Needed Before Transplanting Pale Mexican Pricklypoppy?
What is the Ideal Time for Transplanting Pale Mexican Pricklypoppy?
For pale mexican pricklypoppy, the most favorable period for relocation extends from early spring's onset to the brink of summer. Moving pale mexican pricklypoppy during this vigorous growth phase leverages both the mild weather and extended daylight, promoting a smooth adjustment to their new spot. Transplanted at this thriving stage, pale mexican pricklypoppy develops stronger root systems and increased hardiness, setting the stage for a vibrant display of their distinct charm.
How Much Space Should You Leave Between Pale Mexican Pricklypoppy Plants?
When transplanting pale mexican pricklypoppy, ensure they have ample room to flourish! Position plants 18-24 inches (45-60 cm) apart. This provides each one sufficient space to develop robustly!
What is the Best Soil Mix for Pale Mexican Pricklypoppy Transplanting?
For thriving pale mexican pricklypoppy, blend some organic compost into your existing soil before planting. No need for elaborate amendments; any soil that drains well will suffice. A light application of a slow-release, balanced fertilizer is the perfect touch for a strong start!
Where Should You Relocate Your Pale Mexican Pricklypoppy?
Place pale mexican pricklypoppy where they can soak up the sun! Select a location that receives full sunlight for most of the day. They adore absorbing those raysâjust as we do on a bright, sunny day!
What Equipments Should You Prepare Before Transplantation Pale Mexican Pricklypoppy?
Gardening Gloves
To safeguard your hands when handling the pale mexican pricklypoppy with its spiky stems.
Shovel or Spade
To excavate the plant from its original spot and to prepare the new planting hole.
Watering Can or Hose
To thoroughly hydrate the plant before and after its relocation.
Pruning Shears
For trimming any damaged roots or stems.
Garden Fork
To loosen the soil at the new planting location.
Wheelbarrow or Plant Trolley
To move the pale mexican pricklypoppy if it is large or if the new site is distant from its initial position.
Rooting Hormone (optional)
To encourage root development following transplantation.
How Do You Remove Pale Mexican Pricklypoppy from the Soil?
How Do You Remove Pale Mexican Pricklypoppy from the Soil?
From Ground: Hydrate the pale mexican pricklypoppy to moisten the soil surrounding its root system. Dig a wide circle around the plant using a shovel or spade, then carefully work the tool beneath the root ball and lift the plant with a substantial amount of soil still attached to the roots.From Pot: Water the pale mexican pricklypoppy and gently tap the pot's sides to loosen the soil. Tilt the pot horizontally and carefully slide the plant out, supporting the root ball with your other hand to prevent it from breaking apart.From Seedling Tray: Water the seedlings to dampen the soil, which facilitates their removal. Gently extract individual pale mexican pricklypoppy seedlings using a spoon, gardening tool, or your fingers, being careful not to harm the delicate roots.
Step-by-Step Guide for Transplanting Pale Mexican Pricklypoppy
Prepare the Transplant Site
Clear the area of weeds and debris, loosen the soil with a garden fork, and ensure the site is properly leveled.
Dig the Hole
Use a shovel or spade to dig a hole twice as wide as the pale mexican pricklypoppy's root ball and of equal depth, to prevent planting the specimen too deeply.
Remove the pale mexican pricklypoppy
Follow the appropriate removal procedure based on whether the pale mexican pricklypoppy is being taken from the ground, a container, or a seedling tray.
Inspect and Trim
Examine the roots for any indications of damage or disease. Use pruning shears to remove any broken roots, and apply rooting hormone to the cut surfaces if you are using it.
Rehydrate the Roots
Submerge the roots in water for a brief period if they appear dry or stressed from the removal process, to rehydrate them before planting.
Position the pale mexican pricklypoppy
Place the pale mexican pricklypoppy in the center of the hole, gently spreading out its roots. The top of the root ball should be level with the surrounding ground.
Refill the Hole
Carefully backfill the hole with the excavated soil, gently tamping down around the roots to eliminate air pockets.
Water Generously
Water the pale mexican pricklypoppy thoroughly to settle the soil and provide moisture to the roots. This also helps eliminate any remaining air gaps.
How Do You Care For Pale Mexican Pricklypoppy After Transplanting?
Initial Watering
Maintain consistent moisture in the soil around the pale mexican pricklypoppy for the first few weeks, especially during dry spells, to aid root establishment.
Mulching
Apply mulch around the base of the pale mexican pricklypoppy to retain moisture, regulate soil temperature, and suppress weed growth.
Inspect for Pests and Diseases
Regularly check the pale mexican pricklypoppy for any signs of stress, pests, or diseases that might be worsened by the transplanting process.
Pruning
If necessary, lightly prune the pale mexican pricklypoppy to shape it or remove any branches that may have been damaged during the relocation.
Supporting
If the pale mexican pricklypoppy is tall or situated in a windy area, gently stake it to prevent it from being uprooted or leaning.
Fertilizing
After a few weeks, once the pale mexican pricklypoppy has had a chance to settle, you can provide a light application of a balanced, slow-release fertilizer to encourage growth.
Troubleshooting Common Issues with Pale Mexican Pricklypoppy Transplantation.
What's the ideal time to transplant pale mexican pricklypoppy?
Transplant pale mexican pricklypoppy during its peak growth period from mid-spring to early summer for optimal results.
How far apart should I space pale mexican pricklypoppy when transplanting?
Space pale mexican pricklypoppy ideally 18-24 inches (45-60 cm) apart to allow them ample room to flourish.
Why are my transplanted pale mexican pricklypoppy wilting?
Wilting may indicate root shock. Ensure careful handling and sufficient watering after transplant.
How deep should I plant pale mexican pricklypoppy's roots in the soil?
Plant pale mexican pricklypoppy's roots just beneath the soil surface, ensuring they are covered but not excessively deep.
Can I transplant pale mexican pricklypoppy on a hot day?
It's best to avoid hot days. Choose a cool or overcast day to minimize transplant shock.
How do I prepare the soil before transplanting pale mexican pricklypoppy?
Enrich the soil with compost and ensure it drains well before planting pale mexican pricklypoppy.
How much should I water pale mexican pricklypoppy after transplanting?
Water pale mexican pricklypoppy generously after transplanting to aid root establishment but avoid waterlogging.
Is it necessary to prune pale mexican pricklypoppy when transplanting?
Pruning is not typically required, but removing damaged leaves can promote healthy growth post-transplant.
Should I use a fertilizer when transplanting pale mexican pricklypoppy?
A balanced, slow-release fertilizer can be beneficial, but avoid over-fertilizing to prevent root burn.
How do I know if pale mexican pricklypoppy has transplant shock?
Signs include wilting, yellowing leaves, and stunted growth. Keep pale mexican pricklypoppy well-cared for to recover.



