How to Transplant Harelock?
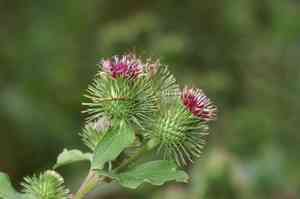
The ideal period for relocating harelock extends from the onset of early spring through the resurgence of late spring, leveraging moderate temperatures and ground heat. Choose a location offering dappled light and damp earth. Careful manipulation is crucial to protect fragile root systems.
What Preparations are Needed Before Transplanting Harelock?
What is the Ideal Time for Transplanting Harelock?
from early to late spring
How Much Space Should You Leave Between Harelock Plants?
To allow harelock sufficient growth room, space them 18-24 inches (45-60 cm) apart. This provides ample area for root and leaf expansion, preventing competition for light and nutrients.
What is the Best Soil Mix for Harelock Transplanting?
Before moving your harelock, prepare soil that drains well and is rich in organic matter. A balanced, slow-release fertilizer will provide a good start. Aim for a neutral to slightly alkaline pH level.
Where Should You Relocate Your Harelock?
Select a spot where your harelock will get full sun to partial shade. An area receiving at least 6 hours of sunlight is ideal, ensuring the plant has the energy needed to thrive post-transplant.
What Equipments Should You Prepare Before Transplantation Harelock?
Gardening Gloves
To shield your hands while handling soil and plants.
Garden Shovel or Spade
For digging up and moving the harelock's root ball.
Watering Can or Hose
To hydrate harelock before and after the transplant process.
Garden Fork
To loosen the surrounding soil, making removal easier.
Pruning Shears
For trimming any dead or excess plant parts prior to transplanting.
Wheelbarrow or Plant Pot
To transport the plant and its soil clump to the new site.
Garden Trowel
To refine the planting hole and backfill soil around harelock's roots once placed.
Tape Measure
To ensure correct spacing between transplanted plants.
Mulch
To help maintain soil moisture around the newly planted area.
How Do You Remove Harelock from the Soil?
How Do You Remove Harelock from the Soil?
From Ground: First, water harelock to moisten the soil. Carefully dig a circular trench around the plant using a shovel or spade, ensuring it's wide enough to avoid root ball damage. Gently work the tool under the root ball and lift harelock from its original spot.From Pot: Saturate the pot's soil for smoother removal. Tilt the pot sideways and gently tap or squeeze its sides to loosen the root ball. Carefully grasp the base of harelock and pull it out with a supportive motion.From Seedling Tray: Moisten the soil in the tray to facilitate extraction. Use a garden trowel to gently loosen the soil around harelock's rootball. Carefully lift harelock from the tray, minimizing root disturbance.
Step-by-Step Guide for Transplanting Harelock
Digging the Hole
The hole should be twice the width of harelock's root ball and of equal depth, allowing roots to spread unhindered.
Preparing harelock
Gently remove any damaged roots with pruning shears. If harelock is root-bound, carefully loosen the root ball with your fingers.
Placement
Position harelock in the center of the hole, ensuring it sits at the same depth as its previous growth. The top of the root ball should align with the surrounding soil surface.
Soil Backfill
Gradually refill the hole with soil, gently firming it down by hand to eliminate air pockets. Avoid over-compacting the soil.
Watering
After transplanting, thoroughly water harelock to settle the soil and remove any remaining air gaps around the roots.
Mulching
Apply a 2 to 3-inch layer of mulch around harelock, keeping it away from the stem to prevent rot and retain moisture.
Support
If harelock is particularly tall or top-heavy, stake harelock for additional support to prevent it from tipping over.
How Do You Care For Harelock After Transplanting?
Watering
Provide harelock with sufficient water, ensuring the soil remains moist but not waterlogged. Do this consistently, especially in the initial weeks post-transplantation.
Staking
Regularly check staking and adjust as needed as harelock grows and strengthens.
Pruning
Periodically inspect harelock for dead or damaged growth, and prune as necessary to encourage healthy development.
Weeding
Keep the area around harelock free of weeds to reduce competition for nutrients and water.
Troubleshooting Common Issues with Harelock Transplantation.
When is the best time to transplant harelock?
Transplant harelock during the optimal period between early and late spring for best establishment.
How far apart should I space harelock when transplanting?
Allow harelock ample space to thrive by planting them 18-24 inches (45-60 cm) apart.
My harelock wilts after transplanting; how can I prevent this?
Ensure harelock's roots stay hydrated. Water immediately after transplanting and apply mulch to retain moisture.
Should I amend the soil when transplanting harelock?
Yes, enrich the planting site with compost to give harelock a robust start in its new location.
How deep should I plant harelock's root ball?
Plant harelock's root ball level with the soil surface to prevent stem rot or drying out.
What's the best way to handle harelock's roots when transplanting?
Gently separate harelock's roots to promote outward growth, but handle with care to avoid damage.
Does harelock need full sunlight after transplanting?
While harelock establishes, it prefers a mix of sun and shade to ease its transition.
How much should I water harelock after transplanting?
Water harelock deeply to settle the soil around the roots, but be careful not to overwater.
Why is my harelock not thriving after transplanting?
Check for proper watering, adequate sunlight, and well-draining soil to improve harelock's condition.
Can I fertilize harelock immediately after transplanting?
It's best to wait a few weeks before fertilizing harelock to avoid stressing its delicate roots.



