How to Transplant Pearl anthurium?
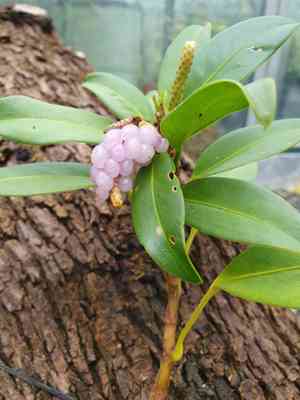
For pearl anthurium, the prime time for root development is in the mild temperatures of late spring through early summer, fostering vigorous expansion. Select a brightly illuminated, ventilated spot away from direct solar exposure, and handle with care to safeguard fragile roots.
What Preparations are Needed Before Transplanting Pearl Anthurium?
What is the Ideal Time for Transplanting Pearl Anthurium?
The optimal period for relocating pearl anthurium spans from late spring to early summer. This timeframe provides a mild yet warm environment, fostering healthy root development and recovery from stress, while increasing daylight hours support vigorous growth. Moving pearl anthurium during this window promotes a strong start in its new location, maximizing its potential to flourish.
How Much Space Should You Leave Between Pearl Anthurium Plants?
Our pearl anthurium prefers ample room to expand. Allow approximately 1-2 feet (30-60 cm) between it and other plants. This ensures sufficient space for growth without competition for resources. Remember, plants also appreciate their personal boundaries!
What is the Best Soil Mix for Pearl Anthurium Transplanting?
It's advisable to prepare your planting area with a blend of peat moss, perlite, and compost. This combination will create the rich, well-draining soil that pearl anthurium favors! Lightly sprinkle a slow-release, all-purpose fertilizer (14-14-14) over the soil to give it a beneficial start.
Where Should You Relocate Your Pearl Anthurium?
Select a location protected from intense afternoon sun! Pearl anthurium thrives in partial shade, so an area receiving morning sunlight and afternoon shade will result in a contented plant.
What Equipments Should You Prepare Before Transplantation Pearl Anthurium?
Trowel
Essential for scooping and moving soil during the relocation process.
Gardening Gloves
To safeguard your hands while handling soil and the plant.
Shovel or Spade
For excavating larger holes when moving the pearl anthurium from its original spot.
Pruning Shears
To neatly trim any impaired roots or foliage.
Watering Can
To provide water to the plant as needed after its relocation.
Organic Compost
To enrich the soil and supply vital nutrients for the plant's development.
Mulch
To aid in retaining soil moisture around the plant following its transplantation.
How Do You Remove Pearl Anthurium from the Soil?
How Do You Remove Pearl Anthurium from the Soil?
From Ground: Begin by hydrating the pearl anthurium plant to moisten the surrounding soil. Next, use a spade to dig a sufficiently wide trench around the plant, being careful not to harm its root system. Once completed, gently lift the plant from its original position with the shovel, aiming to preserve as much of the root ball as possible.From Pot: If the pearl anthurium is currently in a container, water it thoroughly, then invert the pot while supporting the plant's base with your hand. The root ball should slide out. If not, lightly tap the pot's sides and bottom until it releases.From Seedling Tray: For a seedling, use a trowel to carefully scoop the pearl anthurium plant from its tray, keeping the root ball and attached soil intact. Ensure you support the seedling by its root ball, not its stem.
Step-by-Step Guide for Transplanting Pearl Anthurium
Digging the Hole
Excavate a hole that is twice the width and equal in depth to the pearl anthurium plant's root ball. The larger opening allows the roots ample room to spread and grow.
Placing the Plant
Carefully position the pearl anthurium plant in the hole, ensuring the top of the root ball is level with the ground. Fill the hole halfway with soil, then water thoroughly before adding the remaining soil.
Composting
Incorporate compost into the remaining soil. This will supply nutrients to encourage the plant's growth.
Completing the Transplant
Fill the rest of the hole with the soil-compost mixture. Gently firm the soil around the plant's base with your hands to eliminate any air pockets.
Watering
Thoroughly water the pearl anthurium plant immediately after transplanting to help establish robust roots.
How Do You Care For Pearl Anthurium After Transplanting?
Watering
Even though pearl anthurium is a resilient plant, ensure the soil remains consistently moistânot waterloggedâfor the initial few weeks post-transplant to aid in developing a strong root system.
Pruning
Trim away any damaged or diseased foliage and roots after transplanting. This helps the plant direct energy towards new growth.
Mulching
Apply a layer of mulch around your transplanted pearl anthurium to retain soil moisture and help prevent extreme fluctuations in water and temperature.
Monitoring
Keep a close watch on your plant's health, looking for indicators of transplant shock, such as wilting or yellowing leaves.
Troubleshooting Common Issues with Pearl Anthurium Transplantation.
When is the optimal time to transplant pearl anthurium?
The best seasons to relocate pearl anthurium are late summer to early autumn (S3-S4). During these periods, the plant can establish itself before colder months.
What's the proper spacing for pearl anthurium while transplanting?
When transplanting, ensure to leave a gap of 1-2 feet (30-60 cm) between each pearl anthurium. This promotes growth by allowing adequate airflow and sunlight exposure.
What is the preferred soil type for pearl anthurium while transplanting?
Pearl anthurium prefers well-draining soil. Mix regular potting soil with perlite or coarse sand to improve drainage and prevent root rot.
What type of pot should be used for transplanting pearl anthurium?
When transplanting pearl anthurium, choose a pot with good drainage. A container too large can cause root rot, while a small one may restrict growth.
What measures should be taken if pearl anthurium's leaves begin to yellow after transplanting?
Pearl anthurium's yellowing leaves may indicate overwatering or inadequate light. Adjust the watering schedule and ensure pearl anthurium receives optimal indirect light.
How deep should the new pot be for the roots of pearl anthurium to grow sufficiently?
The new pot should be just deep enough to comfortably host the pearl anthurium's root ball. Always ensure the roots have room to spread out.
How should watering be managed after transplanting pearl anthurium?
Water pearl anthurium deeply right after transplanting to settle soil. Thereafter, water sparingly but regularly. Donât allow the soil to dry out completely.
What temperature is fit for pearl anthurium after transplanting?
Pearl anthurium thrives at room temperature, ideally between 65-75°F (18-24°C). Guard against sudden temperature drops, especially in winter, to avoid shocking the plant.
How to promote faster growth in pearl anthurium after transplantation?
To promote growth in pearl anthurium, use a balanced, slow-release fertilizer. Follow the manufacturer's instructions to prevent nutrient burn.
What if pearl anthurium shows no signs of growth after transplantation?
If pearl anthurium shows no signs of growth, ensure you're providing optimal conditions and review care instructions. Root damage during transplanting can delay new growth.



