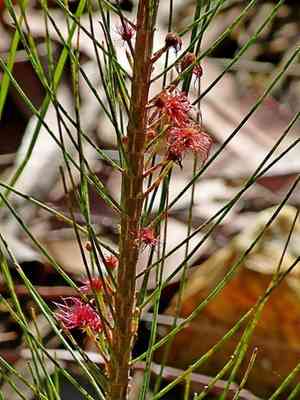
How to Transplant Black she oak?
Black she oak flourishes most effectively when relocated between early and late spring, as this timeframe offers ideal conditions for development. Choose a bright, adequately drained spot to guarantee successful rooting. Think about supplying moderate irrigation after transplanting to facilitate a seamless adjustment.
What Preparations are Needed Before Transplanting Black She Oak?
What is the Ideal Time for Transplanting Black She Oak?
The best period for relocating black she oak, a perennial, is during the peak months of early to mid-spring. This timing allows black she oak to benefit from warm ground temperatures, steady moisture, and reduced stress, fostering strong root development and successful establishment.
How Much Space Should You Leave Between Black She Oak Plants?
Ensure black she oak are spaced 10-15 feet (3-4.5 meters) apart. This provides ample room for growth and promotes good air circulation to minimize disease risk.
What is the Best Soil Mix for Black She Oak Transplanting?
Prepare soil that drains well with a pH ranging from slightly acidic to neutral (5.5-7.0). Incorporate a slow-release fertilizer to enrich the soil and support black she oak as it settles in.
Where Should You Relocate Your Black She Oak?
Black she oak thrives in full sun, so select a location that receives at least 6-8 hours of direct sunlight daily to ensure vigorous growth.
What Equipments Should You Prepare Before Transplantation Black She Oak?
Gardening Gloves
To safeguard your hands while handling soil and plants.
Shovel or Spade
For excavating holes and trenches.
Hand Trowel
For detailed soil tasks and removing the plant from its container or seedling tray.
Watering Can or Hose
To hydrate the plant before and after its relocation.
Wheelbarrow
To move the plant if it is large.
Pruning Shears
To trim any damaged roots or branches during the transplanting process.
Mulch
To help maintain soil moisture around the newly transplanted plant.
Stakes and Ties
To provide support for young or unstable plants.
How Do You Remove Black She Oak from the Soil?
How Do You Remove Black She Oak from the Soil?
From Ground: First, water the black she oak plant to moisten the soil. Then, dig a wide trench around the plant using a shovel or spade, making sure the plant's root ball stays intact. Carefully work the spade beneath the root ball to lift the plant from its original spot.From Pot: Water the black she oak plant thoroughly before removal. Gently tap the pot's sides to loosen the soil. Tilt the pot sideways and carefully extract the plant, supporting the root ball with your hands.From Seedling Tray: Water the seedlings to make the soil easier to manage. Use a hand trowel or your fingers to gently lift each seedling from the tray, taking care not to harm the roots.
Step-by-Step Guide for Transplanting Black She Oak
Site Preparation
Clear the chosen area of weeds and debris. Dig a hole that is twice as wide and the same depth as the black she oak's root ball.
Transplant Placement
Position the black she oak plant into the hole, ensuring the top of the root ball is level with the ground surface.
Backfill and Water
Fill the hole with soil, gently compacting it to remove air pockets. Water the plant thoroughly to help the soil settle around the roots.
Mulching
Apply mulch around the plant's base to retain moisture and suppress weeds. Ensure the mulch does not directly touch the plant's stem.
Staking
If needed, use stakes and ties to support the black she oak plant, especially if it is tall or in a windy location.
How Do You Care For Black She Oak After Transplanting?
Watering
Keep the soil around the black she oak consistently damp, but not waterlogged, for the initial few weeks post-transplant to aid in strong root establishment.
Shading
If the weather is particularly hot or sunny, provide temporary shade to help the plant adapt to its new environment.
Observation
Regularly inspect the plant for indications of stress or disease, such as wilting or discoloration. Address any issues promptly.
Fertilizing
Wait until the plant exhibits new growth before applying any fertilizers. Use a balanced, slow-release fertilizer formulated for perennial plants.
Troubleshooting Common Issues with Black She Oak Transplantation.
When is the best time to transplant black she oak?
The optimal period for relocating black she oak is from early to late spring, ensuring ideal growth.
How far apart should black she oak be spaced?
Space black she oak at least 10-15 feet (3-4.5 meters) apart for healthy development and air circulation.
What soil type is best for black she oak?
Black she oak thrives in well-drained soil; ensure proper drainage to prevent root rot.
How do I prepare the new site for black she oak?
Loosen soil to a depth of 12 inches (30 cm) and incorporate compost for added nutrients.
How should I water black she oak after transplanting?
Water thoroughly immediately after transplanting, and maintain consistent soil moisture without waterlogging.
What should I do about transplant shock in black she oak?
Minimize transplant shock by keeping roots moist and reducing root disturbance during relocation.
How deep should I plant black she oak?
Plant black she oak at the same depth it was previously growing, ensuring the root ball is covered.
Can I fertilize black she oak immediately after transplanting?
Wait a few weeks before fertilizing to allow black she oak to adjust, then use a balanced fertilizer sparingly.
What should I do if black she oak leaves start to yellow?
Ensure proper watering and check soil drainage; yellowing can indicate either excessive or insufficient watering.
Black she oak transplant: Sunny or shaded area?
Black she oak prefers a full sun location, though it can tolerate partial shade once established.


