How to Propagate Black she oak?
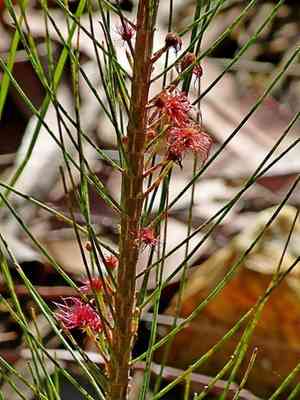
This particular plant is a robust, perennial tree recognized for its capacity to flourish in diverse ground compositions, especially sandy environments. Reproduction is typically achieved via cuttings, with the selection of semi-lignified branches leading to superior root establishment. To foster root growth, apply a rooting stimulant prior to embedding in substrate that drains effectively. Consistent spraying and preserving moisture levels can optimize outcomes.
When Is the Optimal Time to Propagate Black She Oak?
Propagation Method
Cutting
Propagation Period
Autumn,Winter
What Equipment Is Used for Black She Oak Propagation?
Sterilized Pruning Shears
Utilized for taking cuttings from the parent plant. Sterilization prevents the introduction of pathogens, which is vital for the health of black she oak.
Rooting Hormone
Encourages quicker and more vigorous root development from cuttings. Essential for boosting the success rate of propagating black she oak.
Propagation Trays
Offer a controlled environment for cuttings to root. Helps maintain appropriate moisture levels and simplifies handling during the propagation of black she oak.
High-Quality Potting Mix
Supports root growth and supplies vital nutrients. A well-draining mix is especially beneficial for black she oak, ensuring cuttings avoid root rot.
Humidity Dome
Maintains a moist environment around cuttings to reduce water loss and encourage root formation. This is particularly important for black she oak cuttings, which may need regulated humidity to successfully establish roots.
Spray Bottle
Used to mist cuttings, keeping the environment humid without over-saturating. This careful moisture management is crucial for the successful propagation of black she oak.
Heat Mat
Provides consistent warmth from below to stimulate root growth. For black she oak, maintaining a suitable temperature can significantly improve rooting success.
Clean, Sharp Knife
An alternative to pruning shears for more delicate cuttings. Ensures precise cuts, minimizing damage and increasing the chances of successful rooting for black she oak.
How to Propagate Black She Oak?
Propagation Difficulty
Moderately Difficult
How to Care for Your Newly Propagated Black She Oak?
How to Care for Your Newly Propagated Black She Oak?
After transplanting, keep the young black she oak adequately watered but prevent waterlogging. Apply a balanced, slow-release fertilizer to promote robust growth. Mulch around the base to retain soil moisture and inhibit weeds. Prune any damaged or unhealthy branches to foster a strong structure. Monitor for common pests and diseases, and address them promptly if issues arise.
Common Mistakes to Avoid When Propagating Black She Oak
Improper Soil Composition
Using soil that is too nutrient-rich can lead to poor growth. Black she oak prefers sandy or well-drained soils.
Overwatering
Excessive watering can cause root rot and other fungal diseases. This plant thrives in dry to well-drained conditions.
Lack of Sunlight
Placing black she oak in shaded areas can result in weak and elongated growth. Full sun exposure is essential for its development.
Incorrect Seed Treatment
Failing to use the correct methods to scarify or treat seeds can impede germination rates. Black she oak typically requires specific pre-treatment.
Tips For Propagating Black She Oak
Use Well-Drained Soil
Choose a sandy or sandy-loam mix to ensure proper drainage and prevent root rot.
Moderate Watering
Water sparingly to keep the soil slightly moist, but never waterlogged. This mimics the natural dry conditions black she oak prefers.
Provide Full Sun
Ensure the plant receives ample direct sunlight to promote healthy growth and development.
Seed Scarification
Scarify seeds by soaking them in hot water or lightly sanding them to enhance germination rates.


