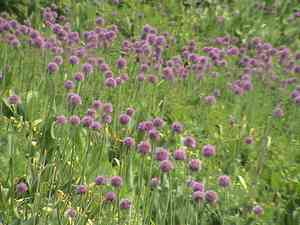
How to Transplant Persian onion?
Persian onion flourishes when relocated from the beginning of spring to its end, or at the commencement of early winter. These periods facilitate superior root development. Select a location receiving full sun to partial shade, featuring soil that drains effectively, for optimal outcomes.
Essential Preparations Before Relocating Persian Onion
Optimal Period for Moving Persian Onion?
The best time to move persian onion is from the start of spring to its end, or during the early part of winter when the plant is inactive. Relocating persian onion at these times allows root establishment before extreme temperatures, ensuring vigorous growth. This timing minimizes plant stress, leading to healthier blooms and improved overall plant vitality.
Required Spacing Between Persian Onion Plants?
Before moving persian onion, ensure a distance of 6-8 inches (15-20 cm) between plants. This spacing provides each plant sufficient room for development, promotes good air circulation, and lowers the risk of disease.
Best Soil Mixture for Persian Onion Relocation?
Prepare well-draining soil with a pH between 6.0 and 7.0 for persian onion. Enhance the soil by adding compost or a balanced, slow-release fertilizer to supply vital nutrients. This ensures your plants get a healthy start.
Ideal New Location for Your Persian Onion?
Select a sunny spot for moving persian onion, as they thrive with ample sun exposure. Aim for at least 6 hours of direct sunlight daily. Adequate sunlight guarantees strong flowering and vibrant development.
Equipment Needed Before Transplanting Persian Onion
Gardening Gloves
To safeguard your hands while handling soil and plants.
Shovel or Spade
For excavating the plant from its original spot and creating a hole in the new site.
Trowel
Useful for more precise digging and adjusting the earth around the plant.
Pruning Shears
To trim any dead or damaged roots during the relocation process.
Watering Can or Hose
For hydrating the plant before and after its transfer.
How to Extract Persian Onion from the Ground?
How to Extract Persian Onion from the Ground?
From Ground: First, moisten the persian onion plant to dampen the soil. Then, dig a wide trench around the plant using a shovel or spade, ensuring the plant's root ball remains intact. Carefully work the spade beneath the root ball to lift the plant from its initial location.From Pot: Begin by lightly watering the persian onion plant to facilitate soil removal. Gently tap the sides and bottom of the pot to loosen the root ball. Invert the pot while supporting the plant with your hand and carefully slide the plant out.From Seedling Tray: Water the persian onion plant to ease its removal. Use a trowel to gently lift the seedlings from the tray, taking care not to harm the delicate roots. If the seedlings are very small, consider using a spoon to lift them.
Step-by-Step Guide for Relocating Persian Onion
Preparation
Ensure all necessary tools are ready. This includes gloves, a shovel or spade, a trowel, pruning shears, and a watering can or hose.
New Hole
Dig a hole in the chosen location that is twice as wide and equally deep as the root ball of your persian onion plant.
Plant Removal
Extract the persian onion plant from its original spot following the steps outlined in the 'removal_process' section.
Root Inspection
Examine the roots. Use pruning shears to trim any dead or damaged roots and gently loosen the root ball if it appears root-bound.
Plant Placement
Position the persian onion plant into the new hole, ensuring the top of the root ball is level with the ground surface.
Soil Adjustment
Backfill the hole with soil, gently pressing down to eliminate air pockets. Ensure the plant is stable but avoid over-compacting the soil.
Watering
Water the plant generously immediately after planting to help settle the soil and remove air pockets around the roots.
Post-Transplant Care for Persian Onion
Watering
Keep the soil around the persian onion consistently moist, but not waterlogged, for the initial few weeks after transplanting to aid in strong root establishment.
Mulching
Apply a layer of mulch around the plant's base to retain moisture and suppress weeds, being careful not to cover the stem.
Shade Protection
If the weather is particularly hot and sunny, provide temporary shade for the first few days to lessen transplant shock.
Monitoring
Regularly check the persian onion for signs of stress, such as wilting or yellowing leaves, and adjust care as needed. Remove any competing weeds to ensure the plant receives adequate nutrients.
Resolving Common Issues with Persian Onion Relocation.
When is the best time to move persian onion?
The ideal time to move persian onion is from early spring to late spring or early winter.
How do I prepare the soil before moving persian onion?
Loosen the soil to a depth of 10 inches (25 cm) and incorporate compost for nutrients.
What spacing is optimal for moving persian onion?
Space persian onion 6-8 inches (15-20 cm) apart to allow ample room for growth.
How deep should I plant persian onion bulbs?
Plant persian onion bulbs approximately 4 inches (10 cm) deep with the pointed end facing upwards.
How do I ensure successful root development for persian onion?
Water thoroughly after planting and maintain consistent moisture until the roots establish.
What should I do if persian onion shows signs of transplant shock?
Provide shade, reduce watering stress, and add a balanced, slow-release fertilizer.
Can I move persian onion during hot weather?
Avoid moving in hot weather; choose cooler periods in early spring or early winter.
Should I mulch around relocated persian onion?
Yes, mulch around persian onion to retain soil moisture and suppress weeds.
How can I handle the delicate roots of persian onion during transplanting?
Handle persian onion gently by the base and avoid damaging the roots while transferring.
How often should I water persian onion after transplanting?
Water persian onion every few days initially, then reduce frequency as the plant establishes.


