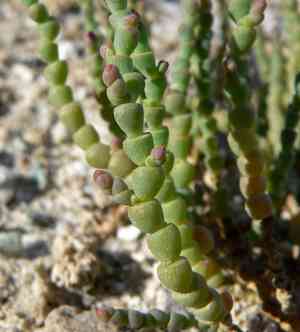
How to Transplant Iodinebush?
The most favorable period for transplanting iodinebush extends from the warmth of late spring into the mildness of early summer, providing the gentle environment essential for root development. Select locations featuring soil that drains effectively, and when moving the plant, account for sufficient room to support its expansion.
What Preparations are Needed Before Transplanting Iodinebush?
What is the Ideal Time for Transplanting Iodinebush?
The perfect time to move iodinebush is as spring ends and summer begins. This period aligns with its natural growth cycle, allowing it to settle into warmer soil. Transplanting now promotes strong root development before summer's peak heat, giving your iodinebush the best start in its new spot. Remember: gentle handling during this shift leads to a strong iodinebush ready to flourish!
How Much Space Should You Leave Between Iodinebush Plants?
When planning to relocate your iodinebush, a good guideline is to provide ample room between each plant. Aim for 24-36 inches (61-91 cm) apart. This ensures every iodinebush has sufficient space to thrive and reach its full size!
What is the Best Soil Mix for Iodinebush Transplanting?
Iodinebush prefers soil that drains well with some grit. Improve your garden bed by mixing sand or gravel into your existing soil. Before planting, give them a good start by incorporating a balanced, slow-release fertilizer to support their growth.
Where Should You Relocate Your Iodinebush?
Your iodinebush loves the sun! Choose a garden spot that receives full sunlight. This will keep your iodinebush happy, allowing them to absorb the rays and flourish in their new home.
What Equipments Should You Prepare Before Transplantation Iodinebush?
Gardening Gloves
To safeguard your hands while handling soil and iodinebush.
Shovel or Spade
For excavating the plant and preparing the new planting site.
Watering Can or Hose
To hydrate the plant prior to and following the transplant.
Wheelbarrow or Garden Cart
For moving the plant if it is large or heavy.
Soil Knife or Trowel
To assist in loosening the soil around the root system.
Pruning Shears
To trim any damaged roots or foliage.
Measuring Tape
To ensure correct spacing between plants during transplantation.
Plant Supports/Stakes
To help support iodinebush if it needs staking after transplant.
How Do You Remove Iodinebush from the Soil?
How Do You Remove Iodinebush from the Soil?
From Ground: First, moisten the soil around the iodinebush plant. Then, use a shovel or spade to dig a wide trench around the plant, ensuring a substantial portion of the root ball remains intact. Carefully work the spade beneath the root ball to lift the plant from its original spot, minimizing root damage.From Pot: Start by watering the iodinebush in its container to make the roots more flexible. Turn the pot on its side and tap the edges to loosen the soil. Gently slide the plant out, supporting it from the base, avoiding pulling the plant by its stems or leaves.From Seedling Tray: Water the seedlings to ensure the soil is damp. Use a soil knife or trowel to loosen the soil around the seedling. Gently hold the seedling by its leaves (not the stem), and lift it from the tray, trying to keep as much soil around the roots as possible.
Step-by-Step Guide for Transplanting Iodinebush
Preparation
Gather all necessary tools and thoroughly water iodinebush before starting the transplant to lessen transplant shock.
Root Ball
Carefully remove iodinebush from its initial location, taking care to preserve the root ball and as much surrounding soil as possible.
Transplant Hole
Dig a hole in the new spot that is twice the root ball's width and the same depth to ensure the iodinebush isn't planted too deep or shallow.
Placement
Gently position iodinebush in the center of the newly dug hole, taking care to spread out the roots if they are clustered or encircling the root ball.
Fill In
Back-fill the hole with the excavated soil, gently tamping down around the iodinebush to remove air pockets without overly compacting the soil.
Watering
After transplanting, water iodinebush generously to help settle the soil around the roots and aid in recovery from transplant shock.
Staking
If iodinebush is top-heavy or known to need support, insert stakes around the plant and loosely tie them for support.
How Do You Care For Iodinebush After Transplanting?
Monitoring
Regularly check on iodinebush to observe its adaptation to the new location and detect any early signs of stress.
Watering
Establish a consistent watering routine, keeping the soil moist to encourage root growth without overwatering, which can cause root rot.
Mulching
Apply a layer of organic mulch around the base of iodinebush to help retain soil moisture and regulate soil temperature.
Pruning
Trim any dead or damaged foliage to redirect iodinebush's energy towards healthy growth and improve air circulation.
Staking
Adjust any stakes or supports as iodinebush grows, ensuring they provide adequate support without restricting growth.
Troubleshooting Common Issues with Iodinebush Transplantation.
When is the best time to transplant iodinebush?
The most favorable period for transplanting iodinebush is late spring to early summer, when it can establish itself effectively.
What's the ideal distance between iodinebush when transplanting?
Space iodinebush plants optimally at 24-36 inches (61-91 cm) apart to ensure sufficient room for development.
How much sun exposure does iodinebush need after transplanting?
After transplanting, iodinebush thrives in full sun, so select a location with maximum daily sunlight.
What soil type is best for iodinebush transplantation?
Transplant iodinebush into well-drained soil; it prefers saline or alkaline conditions typical of its natural environment.
How often do I water iodinebush after transplanting?
Initially, water iodinebush moderately to establish roots, then it is highly drought tolerant once settled.
Can iodinebush tolerate cold temperatures after transplanting?
While iodinebush has some cold hardiness, protect it from frost, especially soon after transplanting.
How do I prepare the site for transplanting iodinebush?
Clear the area of weeds, loosen the soil, and ensure the site receives ample sunshine.
Should I fertilize iodinebush after transplanting?
Typically, iodinebush does not require fertilization; focus on proper soil conditions and spacing instead.
What should I watch out for during iodinebush's first growth season?
Observe iodinebush for signs of stress, such as wilting or discoloration, and adjust care as needed.
How do I know if iodinebush has successfully transplanted?
Successful transplantation is indicated by new growth and the absence of prolonged signs of distress in iodinebush.


