How to Transplant Western giant hyssop?
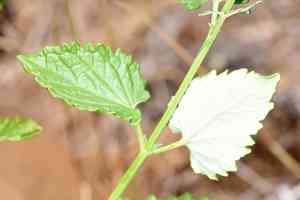
Western giant hyssop flourishes when relocated in mid-spring or early autumn, benefiting from the moderate climate. Confirm its placement in soil that drains effectively and receives abundant sunlight. To reduce shock, provide a generous watering immediately after transplanting.
What Preparations are Needed Before Transplanting Western Giant Hyssop?
What is the Ideal Time for Transplanting Western Giant Hyssop?
Western giant hyssop is best moved in mid to late spring or mid fall. These periods offer moderate temperatures and sufficient moisture, lessening transplant shock. This timing allows western giant hyssop to establish roots prior to the strain of summer heat or winter cold, fostering strong growth and longevity.
How Much Space Should You Leave Between Western Giant Hyssop Plants?
When relocating western giant hyssop, ensure plants are spaced 18-24 inches (45-60 cm) apart. This spacing provides each plant ample room to grow without crowding, promoting good air circulation and robust development.
What is the Best Soil Mix for Western Giant Hyssop Transplanting?
Prepare well-drained, sandy loam or loamy soil for western giant hyssop. To enrich the soil, incorporate compost or a balanced base fertilizer; this supplies essential nutrients and encourages strong root growth.
Where Should You Relocate Your Western Giant Hyssop?
Select a sunny location for planting western giant hyssop, as it flourishes best in full sun. Ensure the site receives at least 6-8 hours of daily sunlight to help the plant grow vigorously and produce its beautiful blooms.
What Equipments Should You Prepare Before Transplantation Western Giant Hyssop?
Gardening Gloves
To shield your hands while handling soil and the plant.
Trowel
To excavate holes and furrows around the plant and its new spot.
Shovel
To lift larger plants or dig bigger excavations.
Watering Can
To hydrate the plant before and after its relocation.
Pruning Shears
To trim any damaged or dead roots and foliage.
Wheelbarrow
If moving the plant a greater distance, a wheelbarrow aids in safe transport.
How Do You Remove Western Giant Hyssop from the Soil?
How Do You Remove Western Giant Hyssop from the Soil?
From Ground: First, moisten the western giant hyssop plant to dampen the soil. Then, dig a wide trench around the plant using a shovel or spade, ensuring the plant's root ball remains intact. Carefully work the spade beneath the root ball to lift the plant from its original spot.From Pot: Thoroughly water the western giant hyssop plant. Gently tilt the pot and tap its sides to loosen the soil. Carefully slide the plant out, supporting the root ball with your hand.From Seedling Tray: Water the seedlings initially. Use a trowel or your fingers to gently lift the western giant hyssop seedlings from the tray, taking care not to harm the delicate roots.
Step-by-Step Guide for Transplanting Western Giant Hyssop
Hole Preparation
Dig a hole in the new site twice as wide and deep as the root ball of your western giant hyssop plant.
Soil Inspection
Confirm the soil drains well and is free of large stones or debris.
Plant Placement
Position the western giant hyssop in the prepared hole, ensuring the top of the root ball is level with the ground surface.
Backfill the Hole
Refill the hole with soil, gently pressing it down to eliminate any air pockets.
Water Thoroughly
Water the western giant hyssop generously to help settle the soil around its roots.
Mulch Application
Apply a layer of mulch around the plant's base to retain moisture and suppress weeds.
How Do You Care For Western Giant Hyssop After Transplanting?
Watering
Keep the soil around the western giant hyssop consistently moist, but not waterlogged, for the initial weeks post-transplant to aid in strong root establishment.
Monitoring
Regularly check the western giant hyssop for signs of stress, such as wilting or yellowing leaves, and adjust care as needed.
Protection
If relocating during hot weather, provide temporary shade using a cloth or screen to lessen transplant shock.
Maintenance
Remove any weeds that emerge around the western giant hyssop and watch for pests that might exploit the plant's vulnerable state.
Troubleshooting Common Issues with Western Giant Hyssop Transplantation.
When is the best time to transplant western giant hyssop?
The optimal time to relocate western giant hyssop is mid to late spring or mid fall.
How far apart should I space western giant hyssop plants?
Space western giant hyssop plants 18-24 inches (46-61 cm) apart for ideal growth.
How do I prepare the soil for transplanting western giant hyssop?
Loosen the soil to about 10-12 inches (25-30 cm) deep and mix in compost.
What size should the planting hole be for western giant hyssop?
Dig a hole twice as wide and as deep as the plant's root ball.
How can I minimize transplant shock for western giant hyssop?
Water thoroughly before and after transplanting, and consider using a root stimulator.
What kind of soil does western giant hyssop prefer?
Western giant hyssop thrives in well-draining soil, preferably sandy or loamy with a neutral pH.
Should I fertilize western giant hyssop immediately after transplanting?
Wait a few weeks before fertilizing to let western giant hyssop establish; avoid fertilizers high in nitrogen.
How much water does western giant hyssop need after transplanting?
Keep the soil consistently moist but not waterlogged for the first few weeks.
Is mulching helpful for western giant hyssop after transplanting?
Yes, applying a 2-inch (5 cm) layer of mulch helps retain moisture and control weeds.
How should I handle western giant hyssop if transplanting on a windy day?
Avoid transplanting on windy days to prevent stress; if unavoidable, provide temporary wind protection.



