How to Transplant Japanese horse-chestnut?
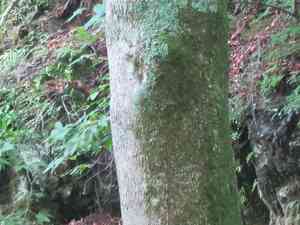
The ideal period for relocating japanese horse-chestnut is as late spring's warmth transitions into the mild embrace of early summer, allowing roots to establish in cool, damp earth prior to more intense heat. Select a shaded location with soil that drains effectively. Roots flourish with minimal disruption, so proceed cautiously.
What Preparations are Needed Before Transplanting Japanese Horse-chestnut?
What is the Ideal Time for Transplanting Japanese Horse-chestnut?
The optimal period for relocating japanese horse-chestnut is the transition from late spring to early summer. This timeframe provides an excellent balance of warm soil and moderate temperatures, fostering root development before the peak summer heat. Moving japanese horse-chestnut then leverages longer daylight hours and the post-spring growth surge, ensuring a robust start in its new spot. Shifting japanese horse-chestnut during this window allows ample time for acclimatization and the growth of strong roots, preparing it for a vibrant display in subsequent seasons.
How Much Space Should You Leave Between Japanese Horse-chestnut Plants?
For japanese horse-chestnut, aim for a separation of approximately 5-6 feet (1.5-1.8 meters) between each specimen. This grants them sufficient room to expand without crowding. It's an easy guideline to remember!
What is the Best Soil Mix for Japanese Horse-chestnut Transplanting?
Your japanese horse-chestnut thrives in well-drained soil with a rich, humus-filled top layer. Incorporate a foundational fertilizer before planting to supply the essential nutrients this plant requires for a successful beginning.
Where Should You Relocate Your Japanese Horse-chestnut?
Select a site that receives full sun to partial shade. Japanese horse-chestnut appreciates sunlight, but excessive exposure can be detrimental. Observe the area for several days to confirm the appropriate balance.
What Equipments Should You Prepare Before Transplantation Japanese Horse-chestnut?
Spade or Shovel
These implements are crucial for excavating the japanese horse-chestnut from its original spot and preparing the new planting cavity.
Gardening Gloves
To safeguard your hands while handling the soil and the plant.
Gardening Fork
Useful for loosening the soil at the new site and around the japanese horse-chestnut roots, facilitating easier spreading.
Watering Can or Hose
Necessary for hydrating the plant both prior to and following transplantation.
Wheelbarrow
To move the plant from its initial location to the new planting area without causing undue stress or harm.
Organic Matter or Compost
To enrich the soil at the new site and supply the japanese horse-chestnut with vital nutrients.
How Do You Remove Japanese Horse-chestnut from the Soil?
How Do You Remove Japanese Horse-chestnut from the Soil?
From Ground: Begin by moistening the soil surrounding the japanese horse-chestnut to simplify digging and minimize root damage. Next, using a spade or shovel, excavate a circular trench around the plant, ensuring to dig deep enough to get beneath the root ball. Carefully work the spade under the root ball and lift the plant free from the ground.From Pot: Hydrate the japanese horse-chestnut, then gently tilt the pot sideways, supporting the main stem with one hand. Carefully jiggle the pot off or cut it if it's a disposable container. Avoid pulling the plant by its stem, as this can cause harm.From Seedling Tray: Lightly water the tray to soften the soil. Gently grasp the japanese horse-chestnut by its leaves (never the stem), then push up the base of the plant cell with a pencil or similar tool so that the plant and root ball emerge. Again, prevent stem damage.
Step-by-Step Guide for Transplanting Japanese Horse-chestnut
Preparation
Prepare the new site by digging a hole that is twice the size of the root ball. Loosen the soil within and around the hole using a gardening fork. Improve the soil with organic matter or compost.
Transplanting
Position the japanese horse-chestnut in the hole, ensuring the top of the root ball is level with the surrounding soil surface. Backfill the hole halfway with soil, then water to eliminate air pockets. Once the water has drained, fill the remainder of the hole with soil.
Watering
Water the japanese horse-chestnut generously to aid its establishment in its new location and reduce transplant shock.
How Do You Care For Japanese Horse-chestnut After Transplanting?
Watering
Ensure the soil around the japanese horse-chestnut remains consistently damp for a few weeks post-transplant. Avoid overwatering by checking soil moisture; it should feel moist but not saturated.
Monitoring
Closely observe your japanese horse-chestnut for indications of transplant shock, such as yellowing foliage or wilting. Some initial wilting is normal, but if it persists beyond a week, the tree may need additional attention.
Protection
Consider applying a layer of mulch around the base of your japanese horse-chestnut to help retain moisture and suppress weed growth.
Troubleshooting Common Issues with Japanese Horse-chestnut Transplantation.
What is the best time to transplant japanese horse-chestnut?
The optimal period to transplant japanese horse-chestnut is from late summer to early fall (S3-S4). This allows the plant sufficient time to establish roots before winter.
How much distance should I keep between each transplant of japanese horse-chestnut?
Space japanese horse-chestnut approximately 5-6 feet (1.5-1.8 meters) apart. This provides each plant ample room to spread and supports healthy development.
Why is my transplanted japanese horse-chestnut not showing any signs of new growth?
Japanese horse-chestnut may require time to settle into its new environment. Water adequately but avoid waterlogging. Excessive watering can hinder new growth and potentially kill the plant.
The leaves of my transplanted japanese horse-chestnut are turning yellow, what is the problem?
Yellowing leaves could signal water stress, either too much or too little. Adjust your watering schedule. If the issue continues, inspect for pests or diseases.
Can I transplant japanese horse-chestnut into a pot instead of in my garden?
Yes. However, ensure the pot is deep and wide enough for root expansion. Provide drainage holes to prevent waterlogging, which can harm roots.
What type of soil do I need for transplanting japanese horse-chestnut?
Japanese horse-chestnut prefers well-drained loamy soil. Ensure the soil is rich in organic matter, as this will promote the plant's overall growth and health.
How often should I water my newly transplanted japanese horse-chestnut?
Water japanese horse-chestnut thoroughly immediately after transplanting. Afterward, water every 2 to 3 days during the initial weeks, or when the top 1 inch (2.5 cm) of soil becomes dry.
My transplanted japanese horse-chestnut has wilted, what could be the cause?
Wilting might indicate transplant shock. Keep the soil moist, provide shade for a couple of weeks, and refrain from fertilizing until the plant recovers.
Should I prune japanese horse-chestnut after transplanting?
It's best to avoid severe pruning immediately after transplanting. However, you can remove dead or damaged branches to redirect energy towards new growth.
Should I fertilize japanese horse-chestnut immediately after transplanting?
Resist the urge to fertilize initially while the roots are establishing. Begin a mild feeding regimen a few weeks after transplanting once new growth is observed.



