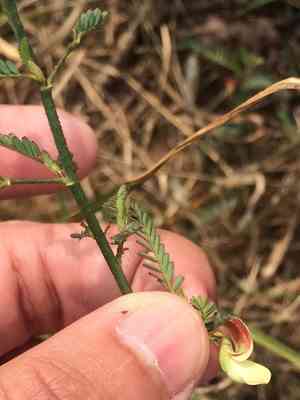
How to Transplant Indian jointvetch?
Relocate indian jointvetch during early spring, as the ground becomes active, to ensure vigorous development. Select a bright spot that retains sufficient dampness. Should it be necessary, gradually introduce it to the new environment to prevent transplant stress.
What Preparations are Needed Before Transplanting Indian Jointvetch?
What is the Ideal Time for Transplanting Indian Jointvetch?
The perfect time for moving indian jointvetch is in the revitalizing period of early to mid-spring. This timeframe allows indian jointvetch to benefit from mild temperatures and increased daylight, promoting optimal growth after relocation. Transplanting indian jointvetch then encourages strong root development before summer heat, crucial for its health and vigor. By choosing this interval, you help indian jointvetch flourish, utilizing the season's gentle weather and soil conditions favorable for growth.
How Much Space Should You Leave Between Indian Jointvetch Plants?
When arranging your indian jointvetch, aim for a comfortable separation of 12-24 inches (30-61 cm). This will provide your plants with ample room to thrive without competing for essential nutrients or sunlight.
What is the Best Soil Mix for Indian Jointvetch Transplanting?
For your indian jointvetch, prepare soil that drains well and is rich in organic matter. Before planting, incorporate a balanced, slow-release fertilizer to give your indian jointvetch an excellent start. A pH level of approximately 6.0-7.5 is ideal for these plants.
Where Should You Relocate Your Indian Jointvetch?
Select a sunny location for your indian jointvetch that receives at least 6 to 8 hours of direct sunlight daily. Full sun promotes more robust growth and a healthier plant, so find a bright, cheerful spot in your garden for transplanting.
What Equipments Should You Prepare Before Transplantation Indian Jointvetch?
Gardening Gloves
To safeguard your hands while handling soil and the plant.
Shovel or Spade
Crucial for excavating and relocating indian jointvetch.
Hand Trowel
Useful for managing smaller plants or refining planting holes.
Watering Can
To hydrate indian jointvetch before extraction and after replanting.
Pruning Shears
For trimming any damaged or overly long roots.
Wheelbarrow or Garden Cart
Aids in transporting the plant and soil.
Rooting Hormone (optional)
Can stimulate root development post-transplant.
Mulch
To help maintain soil moisture around indian jointvetch after transplanting.
How Do You Remove Indian Jointvetch from the Soil?
How Do You Remove Indian Jointvetch from the Soil?
From Ground: Check the moisture level of the soil around indian jointvetch and water if dry. Using a shovel or spade, dig a wide circle around indian jointvetch to avoid damaging its root system. Gently pry beneath the root ball to lift indian jointvetch from the ground.From Pot: Water indian jointvetch thoroughly beforehand. Invert the pot and tap the bottom to loosen indian jointvetch. Support the plant by its base and carefully pull it out, ensuring the soil and roots remain intact.From Seedling Tray: Water the seedlings to make the soil pliable. Use a hand trowel or a fork to carefully lift indian jointvetch from the tray, taking care not to harm the roots.
Step-by-Step Guide for Transplanting Indian Jointvetch
Excavating Hole
Choose an area that best suits indian jointvetch's requirements. Dig a hole twice as wide as the root ball and the same depth to allow roots to spread easily.
Preparing the Plant
Examine indian jointvetch's roots and trim any broken or dead sections with pruning shears. If roots are tightly matted, gently separate them. Optionally, dip in rooting hormone to encourage growth.
Placing the Plant
Position indian jointvetch in the center of the hole. Ensure the plant sits at the same depth as it was originally, with the top of the root ball level with the ground surface.
Backfilling
Carefully fill in around indian jointvetch with the excavated soil. Gently firm the soil to eliminate air pockets, but avoid compacting it excessively.
Watering
Give indian jointvetch a thorough watering to settle the soil and hydrate the roots. Ensure the soil becomes moist but not waterlogged.
Mulching
Apply a layer of mulch around indian jointvetch to help retain soil moisture and regulate temperature, being careful to keep it away from the plant's stem to prevent rot.
How Do You Care For Indian Jointvetch After Transplanting?
Monitoring
Keep a close watch on indian jointvetch's health, looking for signs of stress such as wilting or discoloration.
Settling Assistance
Gently press down the soil if it appears to settle too much after watering, to remove any air gaps around the roots.
Additional Watering
Water indian jointvetch as needed to keep the soil consistently moist, especially during the initial establishment period.
Support Structures
If indian jointvetch is tall or susceptible to wind damage, use stakes or other supports to keep it upright as its roots become established.
Troubleshooting Common Issues with Indian Jointvetch Transplantation.
When is the best time to transplant indian jointvetch?
Relocate indian jointvetch during early to mid-spring when the soil is warm and manageable.
How far apart should I plant indian jointvetch seedlings?
Space indian jointvetch seedlings 12-24 inches (30-60 cm) apart to ensure proper growth and air circulation.
What are the signs indian jointvetch needs transplanting?
If indian jointvetch seems overcrowded or its growth is stunted, it may be ready for relocation.
How often should I water indian jointvetch after transplanting?
Keep the soil consistently moist, especially the first few weeks post-transplant, without overwatering.
What soil is best for transplanting indian jointvetch into?
Use a well-draining, nutrient-rich loam or sandy loam soil for optimal results with indian jointvetch.
How deep should the hole be for transplanting indian jointvetch?
Dig a hole deep enough to accommodate the root ball without bending the roots of indian jointvetch.
Can I transplant indian jointvetch on a rainy day?
Moving indian jointvetch on a cloudy or drizzly day can lessen transplant shock and conserve moisture.
Should I fertilize indian jointvetch during transplanting?
Add a balanced, slow-release fertilizer at transplanting to encourage healthy establishment of indian jointvetch.
How can I reduce transplant shock in indian jointvetch?
Avoid disturbing the roots and water thoroughly after transplanting to mitigate shock in indian jointvetch.
What should I do if indian jointvetch starts wilting after transplant?
Ensure indian jointvetch is receiving adequate water and shade from intense sun while it establishes.


