How to Transplant Muskroot?
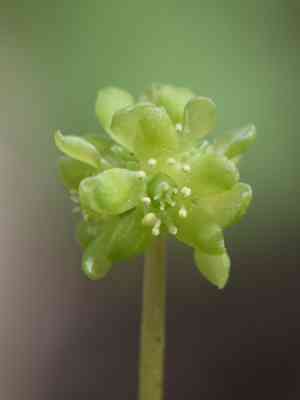
Relocate muskroot during the peak of spring's warmth to ensure vigorous development. Select a site offering shade and damp earth. Should the setting be a wooded area with abundant foliage, enhance the connection by incorporating humus during the transplantation process.
Necessary Preparations Before Relocating Muskroot
When is the Best Time to Move Muskroot?
The ideal time for moving muskroot is in early spring, as the ground begins to warm. During this period of renewal, muskroot develops stronger roots. Transplanting then allows muskroot to benefit from the entire upcoming growing season, promoting a smooth adjustment and healthier development. Remember, careful handling and proper soil preparation are crucial for a successful move.
What Distance Should Be Maintained Between Muskroot Plants?
When selecting a new spot for your muskroot, aim to position each plant approximately 6-8 inches (15-20 cm) apart. This provides each individual ample room to thrive without becoming overcrowded.
What is the Optimal Soil Mixture for Muskroot Transplantation?
Your muskroot will flourish in soil that is rich, moist, and drains effectively. Prior to transplanting, enrich your garden bed with compost and a balanced, slow-release fertilizer to give your muskroot a strong start.
Where Should Your Muskroot Be Replanted?
Select a location where your muskroot will receive filtered sunlight or partial shade. They do not tolerate excessive direct sun. Consider placing them under a tree or on the north side of a structure to shield them from intense rays.
Equipment Required Before Transplanting Muskroot
Gardening Gloves
To safeguard your hands while handling soil and the plant.
Shovel or Spade
For excavating the muskroot from its original spot and preparing a new planting hole.
Garden Fork
To loosen and aerate the soil around the plant's root system.
Watering Can or Hose
To hydrate the muskroot both before and after its relocation.
Pruning Shears
To trim any damaged roots or foliage.
Wheelbarrow or Garden Cart
For transporting the muskroot and soil to and from the new planting site.
Measuring Tape
To accurately determine the spacing between planting holes and ensure uniform placement.
How to Extract Muskroot from the Ground
How to Extract Muskroot from the Soil?
From Ground: Start by watering the muskroot plant to moisten the soil. This facilitates easier removal with minimal root damage. Next, carefully use a shovel or spade to dig a wide circle around the plant, ensuring a substantial portion of the root ball is preserved. Gently slide the spade beneath the root ball and carefully lift the muskroot from the ground.From Pot: First, water the muskroot in its container to lessen transplant shock. Gently tap the pot's sides to loosen the soil. Invert the pot while supporting the muskroot with your other hand and carefully slide the plant out. If the plant is stuck, you can use a garden knife to separate it from the pot.From Seedling Tray: Water the tray to keep the roots hydrated. Use a garden fork or a dibber to carefully lift each muskroot seedling from its cell, taking care not to harm the delicate roots or stem.
Step-by-Step Instructions for Transplanting Muskroot
Preparation
Ensure the new planting area has been cleared of weeds and is well-aerated. Measure adequate spacing for the muskroot to flourish without competition from nearby plants.
Hole Excavation
Dig a hole that is twice as wide and the same depth as the muskroot's root ball. Loosen the soil at the bottom of the hole with a garden fork to improve root penetration.
Prepare the Plant
Before placing muskroot in the new hole, gently untangle any circling roots to encourage outward growth. Trim any broken or excessively long roots.
Placement
Position the muskroot in the center of the hole, making sure the top of the root ball is level with the surrounding soil surface.
Filling the Hole
Carefully backfill the hole with the excavated soil, gently firming around the root ball to remove air pockets. Water generously to further settle the soil around the roots.
Final Touches
Add a layer of mulch around the base of the muskroot to retain moisture and suppress weed growth, keeping it away from the direct stem area to prevent rot.
Post-Transplant Care for Muskroot
Watering
Provide the muskroot with consistent moisture during the initial weeks after transplant to aid new root establishment. Ensure proper drainage to prevent waterlogging.
Monitoring
Observe the plant's leaves and stem for indications of transplant shock, such as wilting or yellowing, and take necessary actions like adjusting watering or providing shade, if symptoms persist.
Support
If the muskroot is a taller variety or in a windy location, stake the plant to prevent it from leaning or being uprooted.
Mulching
Maintain the mulch layer to regulate soil temperature and moisture levels. Replenish as needed without allowing it to touch the plant's stem.
Resolving Common Issues with Muskroot Transplantation.
What is the best time to transplant muskroot?
The optimal period is mid to late spring, utilizing the mild weather for transplantation.
How far apart should I space muskroot when transplanting?
Position muskroot with a comfortable distance of 6-8 inches (15-20 cm) to ensure ample room to flourish.
Why are my transplanted muskroot wilting after planting?
Wilting may indicate stress from relocation. Ensure sufficient water, indirect sunlight, and avoid excessive handling.
Should I fertilize muskroot immediately after transplanting?
Refrain from fertilizing; allow muskroot to acclimate to its new environment and use pre-enriched soil instead.
Can I transplant muskroot on a hot, sunny day?
Avoid the stress of heat; choose a cool, overcast day to give muskroot a comfortable start.
Why is muskroot not thriving after transplantation?
Check the soil's moisture and pH, and ensure you're not planting too deep or too shallow.
How much should I water muskroot post-transplant?
Water gently to settle the soil around the roots, keeping it moist but not saturated.
Is it OK to transplant muskroot during flowering?
For a smooth transition, move muskroot before or after flowering to avoid additional stress.
How do I prepare the soil for transplanting muskroot?
Use well-draining soil, rich in organic matter to create a nurturing bed for muskroot's roots.
What should I do if muskroot's leaves turn yellow post-transplant?
Yellow leaves may signal distress; re-evaluate watering practices and inspect for signs of pests or disease.



