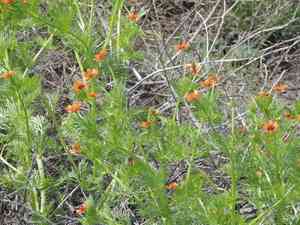
How to Transplant Pheasant's eye?
For pheasant's eye, the ideal period for relocation spans from the onset of spring through the beginning of summer, facilitating vigorous development. Select a location featuring permeable earth and dappled sunlight. Exercise delicate care to preserve the root system's soundness throughout the procedure.
What Preparations are Needed Before Transplanting Pheasant's Eye?
What is the Ideal Time for Transplanting Pheasant's Eye?
The optimal period for relocating pheasant's eye spans from the thawing of the ground to the initial budding of flowers. During this interval, moderate temperatures and ample soil moisture create perfect conditions for root development, which is crucial for the vitality and expansion of pheasant's eye. By transplanting within this timeframe, you offer pheasant's eye the best opportunity to adapt to its new location, ensuring robust growth. Remember, this gentle season provides a balance between cool and warm, giving pheasant's eye the gentle yet invigorating climate it needs to thrive.
How Much Space Should You Leave Between Pheasant's Eye Plants?
When transplanting pheasant's eye, maintain a close spacing of under 12 inches (30 cm) between them. This provides each plant sufficient room to grow and thrive without becoming overcrowded. Proper spacing also guarantees adequate air circulation for their health!
What is the Best Soil Mix for Pheasant's Eye Transplanting?
For thriving pheasant's eye plants, incorporate organic material like compost into well-draining soil. Prior to planting, add a balanced, slow-release fertilizer to provide them with a nourishing start. This preparation will create an inviting environment for root establishment.
Where Should You Relocate Your Pheasant's Eye?
Locate a sunny spot in your garden for pheasant's eye as they love soaking up the sun! A position that receives at least 6 hours of direct sunlight daily will keep pheasant's eye radiating with vibrant blooms. Remember, sunshine is their greatest ally!
What Equipments Should You Prepare Before Transplantation Pheasant's Eye?
Gardening Gloves
To safeguard your hands while handling soil and plants.
Trowel
For excavating small holes and moving pheasant's eye from a container or seedling tray to the ground.
Spade or Shovel
To carefully dig out pheasant's eye plants from the ground with minimal root disturbance.
Watering Can or Hose
To hydrate pheasant's eye before and after transplanting, ensuring sufficient moisture.
Pruning Shears
To trim any damaged roots or stems prior to transplanting.
Wheelbarrow or Garden Cart
For transporting pheasant's eye and soil amendments if required.
Mulch
To apply around the base of pheasant's eye after transplanting to help retain soil moisture.
How Do You Remove Pheasant's Eye from the Soil?
How Do You Remove Pheasant's Eye from the Soil?
From Pot: Begin by watering the pheasant's eye in its pot to moisten the soil, making it easier to work with. Gently invert the pot and tap the bottom to help dislodge the plant. Hold the plant's base and carefully ease it out, aiming to keep the root ball as intact as possible.From Seedling Tray: Water the seedlings thoroughly before transplanting. Use a trowel or your fingers to carefully lift each pheasant's eye seedling from its compartment, taking care not to harm the delicate root system.From Ground: Water the pheasant's eye deeply to soften the earth. Use a spade to dig a generous circle around the plant. Gently pry the soil to gradually loosen the root ball, then lift the pheasant's eye from the ground with as much of the root system as possible.
Step-by-Step Guide for Transplanting Pheasant's Eye
Digging The New Hole
Use a trowel or shovel to excavate a hole that is as deep as the pheasant's eye's root ball and twice as wide.
Inspecting The Roots
Examine the pheasant's eye's root ball for any circling or girdling roots and gently separate them. Trim any damaged roots with pruning shears.
Placing The Plant
Position the pheasant's eye into the new hole, ensuring it sits at the same depth it was previously growing. The stem's base should be level with the surrounding soil surface.
Refilling The Hole
Gently backfill the hole with the excavated soil, lightly patting it down to ensure contact between the soil and the root ball without excessive compaction.
Watering
Thoroughly water the pheasant's eye after planting to settle the soil around the roots and eliminate air pockets.
Mulching
Apply a layer of mulch around the base of the pheasant's eye to help retain moisture, regulate soil temperature, and prevent weed competition.
How Do You Care For Pheasant's Eye After Transplanting?
Routine Watering
After transplanting pheasant's eye, ensure consistent watering to keep the soil uniformly moist, being careful not to overwater and cause waterlogging.
Support Structures
If the pheasant's eye is a staking variety, install plant supports like stakes or hoops to maintain its structure as it grows.
Monitoring for Pests
Be vigilant for the presence of pests or diseases and address them promptly with organic or chemical solutions suitable for pheasant's eye.
Seasonal Care
Be aware of temperature fluctuations, especially frost, and provide protection for pheasant's eye as needed, particularly if it's a perennial or biennial.
Troubleshooting Common Issues with Pheasant's Eye Transplantation.
When is the best time to transplant pheasant's eye?
The optimal period for moving pheasant's eye is from early to late spring, ensuring a gentle start.
How far apart should I space pheasant's eye when transplanting?
Place each pheasant's eye less than 12 inches (30 cm) apart to allow ample room for growth.
What happens if pheasant's eye gets transplanted in very hot weather?
Transplanting in extreme heat can stress pheasant's eye, leading to wilting or shock. Aim for cooler days.
Can pheasant's eye handle transplanting during bloom?
Transplanting while in bloom is not ideal for pheasant's eye, as it may distress the plant and hinder flowering.
Why are my transplanted pheasant's eye plants wilting?
Wilting after transplant may indicate root damage or insufficient watering. Ensure soil is moist and roots are intact.
How should I prepare the soil for pheasant's eye transplant?
Enrich the soil with organic matter; ensure it's well-drained and loose to welcome pheasant's eye's roots.
What's the proper depth for transplanting pheasant's eye?
Dig a hole that's as deep as the root ball and twice as wide to comfortably accommodate pheasant's eye.
Should I water pheasant's eye immediately after transplanting?
Yes, providing pheasant's eye with a thorough watering post-transplant helps settle the soil and reduces transplant shock.
How do I protect transplanted pheasant's eye from strong sunlight?
Use a shade cloth or position pheasant's eye in partial shade to mitigate intense sun exposure initially.
Is it necessary to fertilize pheasant's eye right after transplanting?
Wait a few weeks before fertilizing, as pheasant's eye's roots need time to recover from the transplant stress.


