Boost Growth: How and When to Repot Your Kimberley queen fern Plant
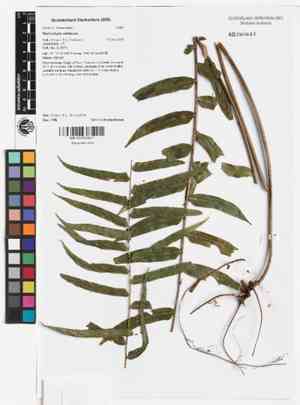
1
Repotting a Kimberley queen fern is best done in spring or winter when its growth is less vigorous.
2
This fern flourishes in soil that drains well and is abundant in organic material.
3
Select a new container that is merely 5-7 cm (2-3 inches) wider in diameter than its present one.
Determining the Optimal Time to Replant Kimberley queen fern
Indicators your fern requires a different container
Your Kimberley queen fern may signal a need for a new container if you observe roots coiling within the pot or emerging from the drainage openings. The plant might also appear top-heavy or oversaturated due to its roots outgrowing the current space.
Ideal periods for transplanting
The most suitable times for transplanting your Kimberley queen fern are during the spring or winter. In these seasons, the plant's growth is less vigorous, simplifying handling and ensuring a smoother transition to a new pot.
Selecting the Perfect Container and Substrate for Kimberley queen fern
Choosing the appropriate pot size and material
When choosing a new pot for your Kimberley queen fern, select one that is 5-7 cm (2-3 inches) wider in diameter than the existing pot. This provides ample room for growth without overwhelming the plant. Opt for pots made from breathable materials like terracotta or ceramic, which help prevent waterlogging.
Crafting the ideal soil mixture
The best substrate for Kimberley queen fern is a well-draining blend enriched with organic matter. A combination of peat moss, perlite, and pine bark works effectively. This mix retains moisture without becoming soggy, keeping the fernâs roots healthy and thriving.
Step-by-Step Procedure for Replanting Kimberley queen fern
Carefully extracting your fern from its current container
To replant your Kimberley queen fern, begin by lightly moistening the soil to facilitate removal. Gently tilt the plant sideways and carefully pull it from the pot, supporting the base to protect the roots.
Inspecting and pruning the roots
Once the fern is out of the pot, examine the roots for any signs of decay or damage. Trim away any dead or soft roots using sterilized shears. If the roots are densely packed, consider gently loosening them to encourage outward growth.
Positioning the fern in the new container
Place a layer of the prepared soil mix at the bottom of the new pot. Position the fern in the center, ensuring the root ball sits slightly below the pot's rim. Fill in the gaps around the roots with more soil, pressing gently to secure the plant.
Final actions after replanting
After placing your Kimberley queen fern in its new pot, water it thoroughly until water drains from the bottom. This helps settle the soil and eliminates any air pockets. Place the pot in a shaded location for a few days to allow the fern to adjust to its new environment.
Post-Replanting Care for Kimberley queen fern
Adjustments to the watering schedule
Following replanting, your Kimberley queen fern may require a modified watering routine. Ensure the soil remains consistently moist but not waterlogged. You might need to water more frequently initially until the plant establishes itself in its new pot.
Monitoring light and humidity levels
The fern prefers indirect light and high humidity. After replanting, monitor the plant carefully and keep it away from direct sunlight. Consider using a humidity tray or a humidifier to maintain optimal humidity levels around your fern.



