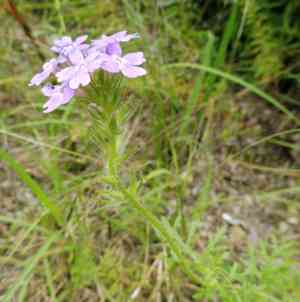
Boost Growth: How and When to Repot Your Dakota mock vervain Plant
1
Transplanting your Dakota mock vervain during spring or winter is best for its development.
2
Dakota mock vervain thrives in a container only 2-3 cm (1 inch) wider than its current one.
3
Employ a sandy, well-draining soil blend to guarantee your Dakota mock vervain flourishes.
Reasons to Re-pot Dakota Mock Vervain
Indicators for a Pot Change: Recognizing when your plant has outgrown its current container
Observing your Dakota mock vervain can reveal its need for a new container. Common indicators include roots emerging from drainage holes, the plant becoming top-heavy or appearing stunted, and soil drying out more quickly than usual. These signs suggest the plant has exceeded its current pot and requires more room to continue thriving.
Advantages of Timely Re-potting: How re-potting can boost plant development and health
Re-potting isn't solely about providing your Dakota mock vervain with a larger home; it offers several benefits. Notably, it revitalizes the soil, supplying fresh nutrients and improved aeration. New soil can help prevent root diseases and promote healthier, more vigorous growth. Additionally, a bigger pot allows roots more space to expand, enabling the plant to reach its full potential.
Choosing the Appropriate Pot and Growing Medium
Selecting the optimal pot size and material for Dakota mock vervain
When choosing a new pot for your Dakota mock vervain, aim for one that is only 2-3 cm (1 inch) wider in diameter than the current one. This size ensures the plant has sufficient room to grow without being overwhelmed by too much soil, which can retain excessive moisture. Material-wise, terracotta pots are excellent as they are porous and allow better moisture regulation, vital for preventing root rot.
The ideal soil blend for flourishing Dakota mock vervain
The correct soil mix is crucial for the health of your Dakota mock vervain. Using a well-draining, sandy soil mix is perfect. You can create a suitable blend by combining standard potting soil with sand or perlite to enhance drainage. This mix helps prevent waterlogging, which can lead to root rot and other fungal issues.
The Correct Method for Re-potting
Step-by-Step Instructions: Safely removing your plant from its old container
Begin by watering your Dakota mock vervain a day prior to re-potting. This step facilitates the removal process. Gently tap the sides of the pot to loosen the soil. Hold the plant at its base and carefully slide it out. If it resists, use a small spade or knife to loosen the soil around the edges.
Root Care During Re-potting: How to properly handle and trim roots
Once out of the pot, inspect the roots of your Dakota mock vervain. Trim away any dead or decaying roots with clean, sterile scissors. If the root ball is densely packed, gently separate the roots. This action encourages new growth and ensures better soil penetration.
Transplanting: Securing Dakota mock vervain in its new location
Place a layer of fresh soil in the bottom of the new pot. Position your Dakota mock vervain in the center and fill around it with more soil, pressing lightly to eliminate air pockets. Ensure the plant sits at the same depth as it did in its previous pot. Water lightly to settle the soil and secure the plant.
Aftercare Advice Following Re-potting
Initial Irrigation: How much and how often to water after re-potting
After re-potting, it's crucial not to overwater your Dakota mock vervain. Give it a light watering immediately after re-potting to help settle the soil. Thereafter, water moderately, allowing the topsoil to dry out between waterings. Overwatering can lead to root rot, especially in a newly re-potted plant.
Adapting to a New Setting: Light and placement considerations
Post-re-potting, your Dakota mock vervain may require some time to adjust. Place it in a location with ample indirect light. Direct sunlight can be too intense initially and could shock the plant. Monitor it closely during the first few weeks for any signs of stress, such as wilting or yellowing leaves.


