How to Prune Tasmanian waratah?
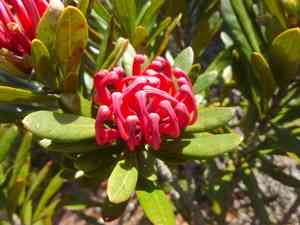
The Tasmanian waratah, recognized for its vivid crimson blossoms and architectural appeal, thrives with early spring pruning. Eliminate any deceased or compromised branches to foster vigorous development. Perform a gentle trim to sculpt the plant, preserving an unobstructed core for improved air movement. Consistent removal of spent flowers can boost blooming. This schedule aligns with its inherent growth pattern, encouraging sturdy vitality and more abundant floral presentations. Pruning additionally reduces the likelihood of pests and illnesses, guaranteeing a resilient, visually appealing specimen.
What Are the Benefits of Pruning Tasmanian Waratah?
What Are the Benefits of Pruning Tasmanian Waratah?
Tasmanian waratah thrives with pruning, leading to more robust growth and a desirable form. Regular trimming boosts tasmanian waratah's overall vitality and promotes abundant blooms, keeping the plant appealing and well-structured.
What Is the Best Time for Pruning Tasmanian Waratah?
What Is the Best Time for Pruning Tasmanian Waratah?
Trimming tasmanian waratah in early spring is optimal as it aligns with the plant's natural growth cycle. During this period, tasmanian waratah is emerging from winter dormancy and entering a vigorous growth phase. Early spring pruning helps shape the plant and removes any winter-damaged branches, fostering healthier growth and more vibrant flowers. Additionally, pruning before the flowering season ensures you don't disrupt the plant's blooming cycle, which typically occurs later in spring or early summer. This timing also helps prevent the spread of diseases and pests that might appear in warmer months.
What Tools Do I Need to Prune Tasmanian Waratah?
Hand Pruners (Secateurs)
Perfect for making clean cuts on small stems and branches up to 1/2 inch thick. Essential for routine care and deadheading tasmanian waratah.
Bypass Pruners
Recommended for precise, clean cuts on living wood, minimizing plant tissue damage and reducing disease risk.
Loppers
Useful for thicker branches, typically up to 1 1/2 inches in diameter, found on mature tasmanian waratah plants. Provides extra leverage for easier cutting.
Pruning Saw
Necessary for cutting through larger branches that hand pruners or loppers cannot manage. Ensures a clean cut on thicker wood and supports overall plant health.
Gloves
Crucial for protecting hands from thorns and rough bark during pruning. Ensures safety and comfort.
Disinfectant (e.g., Isopropyl Alcohol)
Important for sterilizing tools between cuts to prevent disease spread, especially in tasmanian waratah.
How to Prune Tasmanian Waratah
Inspection
Carefully examine tasmanian waratah for any diseased leaves, withered leaves, dead branches, and diseased branches. Use sharp, sterilized pruning tools to avoid spreading disease.
Remove diseased leaves
Trim away any diseased leaves at their base, ensuring proper disposal to prevent contamination.
Remove withered leaves
Cut away any withered leaves where they meet the main stem or branch, making clean cuts to encourage healthy regrowth.
Remove dead branches
Identify and prune dead branches by cutting back to a point where healthy wood is present. Look for signs of life such as green tissue or new buds.
Remove diseased branches
Locate diseased branches and cut them back well into healthy wood, avoiding cutting into the affected areas. Ensure to sterilize tools between cuts to prevent the spread of disease.
Common Pruning Mistakes with Tasmanian Waratah
Incorrect Technique
Improper cutting methods, such as tearing instead of cleanly cutting branches, can harm tasmanian waratah and make it susceptible to disease.
Over-Pruning
Removing too much foliage at once can stress tasmanian waratah, hindering its ability to photosynthesize and potentially leading to poor health.
Under-Pruning
Neglecting to prune tasmanian waratah sufficiently can result in excessive growth that may impede airflow and sunlight penetration, making the plant more vulnerable to pests and diseases.
Not Pruning Dead or Diseased Wood
Failing to remove dead or diseased branches can allow problems to spread, compromising the overall health of tasmanian waratah.
Improper Tool Maintenance
Using dull or dirty tools can cause poor cuts and introduce pathogens to tasmanian waratah.
Pruning at the Wrong Time
Although season advice is excluded, pruning too early or too late can impact tasmanian waratah's ability to bloom and recover properly.
Common Pruning Tips for Tasmanian Waratah
Use Sharp, Clean Tools
Sharp tools create clean cuts that heal faster. Always sterilize tools before use to prevent disease spread.
Prune for Shape
Focus on maintaining an attractive shape that allows for adequate airflow and light penetration. This helps tasmanian waratah grow vigorously and bloom profusely.
Remove Competing Shoots
Thin out competing shoots to reduce overcrowding, ensuring energy is directed towards the healthiest branches.
Cut at the Right Angle
Make cuts at a 45-degree angle away from buds or branches to encourage proper healing and new growth.
Target Dead or Diseased Wood
Regularly remove any dead or diseased branches to prevent pathogen spread and maintain the overall health of tasmanian waratah.
Moderate Pruning
Prune moderately, avoiding the removal of more than one-third of the plant at a time to minimize stress on tasmanian waratah.
Encourage Airflow
Ensure that the center of tasmanian waratah is slightly open to improve airflow, which reduces the likelihood of fungal diseases.



