How to Propagate Tasmanian waratah?
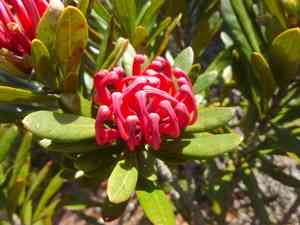
The Tasmanian waratah is a striking indigenous Australian bush prized for its vivid crimson blossoms. To propagate Tasmanian waratah via cuttings, choose wood that is semi-hardened and possesses a minimum of three nodes, then apply rooting stimulant to facilitate quicker root formation. Maintain the cuttings in a damp yet adequately drained environment, situated in a protected spot with diffused illumination. This technique guarantees flourishing development, preserving the brilliant attributes of the Tasmanian waratah.
Optimal Period for Propagating Tasmanian Waratah
Propagation Type
Cutting
Propagation Season
Spring,Summer
Tools Required for Tasmanian Waratah Propagation
Pruning Shears
Utilized for gathering healthy cuttings from tasmanian waratah. Sharp, sterilized blades guarantee clean cuts, minimizing disease risk and fostering superior root development.
Rooting Hormone
Applied to the severed ends of tasmanian waratah cuttings to aid in root formation. Especially helpful given tasmanian waratah's tendency for slower root establishment.
Propagation Trays
Offer a controlled setting for positioning tasmanian waratah cuttings. Improves moisture retention and root aeration, vital for initial root growth.
Humidity Dome
Placed over propagation trays to sustain elevated humidity levels around tasmanian waratah cuttings, preventing dehydration and encouraging root development.
Heat Mat
Employed to maintain consistent soil temperature, facilitating quicker root development of tasmanian waratah cuttings. Perfect for plants needing stable warmth for successful propagation.
Sterile Potting Mix
A well-draining, sterile potting medium reduces the chance of fungal diseases and promotes robust root growth for tasmanian waratah.
Misting Bottle
Keeps tasmanian waratah cuttings damp without over-saturating. Fine misting helps maintain necessary humidity and prevents drying out.
Labels and Markers
Ensures clear identification of tasmanian waratah cuttings, assisting in tracking propagation progress and managing various growth stages.
How to Propagate Tasmanian Waratah?
Propagation Type
Moderately Difficult
Post-Propagation Care for Your Tasmanian Waratah
How to Care for Your Newly Propagated Tasmanian Waratah?
Tasmanian waratah needs consistent watering to keep the soil moist but not waterlogged. Ensure placement in an area with filtered light, avoiding direct sun. Once established, tasmanian waratah benefits from a balanced fertilizer during the growing season. Prune annually to maintain shape and encourage vigorous growth. Monitor for pests and diseases, treating promptly if necessary.
Common Errors to Avoid When Propagating Tasmanian Waratah
Overwatering
Excessive irrigation of tasmanian waratah can lead to root rot and other fungal infections, significantly decreasing the likelihood of successful propagation.
Using Poor Soil
Employing soil that lacks proper drainage or nutrients can impede root development and overall plant health.
Incorrect Light Exposure
Providing too much or too little sunlight can stress the plant, impacting its ability to root and grow.
Ignoring Pests
Failing to monitor and control pests can inflict severe damage on the plant during its vulnerable propagation stage.
Improper Cutting Techniques
Using dull or contaminated tools for cuttings can introduce diseases and prevent successful rooting.
Advice for Propagating Tasmanian Waratah
Well-Draining Soil
Utilize a mix that ensures excellent drainage to prevent waterlogging and encourage healthy root growth.
Optimal Watering
Maintain a balanced watering schedule, ensuring the soil remains moist but not waterlogged.
Right Light Conditions
Position tasmanian waratah in a spot where it receives bright, indirect sunlight to foster healthy growth.
Pest Monitoring
Regularly inspect for pests and take prompt action using appropriate treatment methods to safeguard the plant.
Clean Cutting Tools
Always use sterile and sharp tools when taking cuttings to prevent disease transmission and ensure clean cuts for better rooting.



