How to Prune Shaved sedge?
Careful trimming of shaved sedge, recognized for its thick, grassy look, is advantageous. In early spring, reduce the majority of the leaves to soil level to stimulate fresh development. Throughout the colder months, eliminate any lifeless or compromised portions to preserve the plant's well-being. Trimming these specimens aids in managing their expansion and boosts their aesthetic value. Always employ sanitized, keen implements to prevent disease. Refer to respected gardening manuals to guarantee precise maintenance suited to shaved sedge's distinct requirements.
Advantages of Trimming Shaved Sedge
Advantages of Trimming Shaved Sedge
Shaved sedge thrives with trimming, promoting robust development and preserving its form. Regular trimming helps manage its dimensions, fosters healthy growth, and boosts its resilience to pests and illnesses, resulting in a more vigorous and appealing plant.
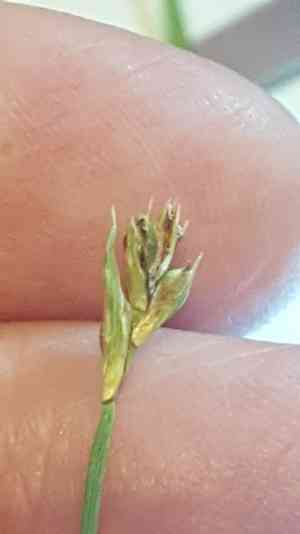
Optimal Period for Trimming Shaved Sedge
Optimal Period for Trimming Shaved Sedge
Trimming shaved sedge in early spring and winter is ideal as it allows the plant to recuperate before its active growth phase. During these periods, shaved sedge is typically dormant or growing slowly, reducing plant stress and minimizing disease risk. Early spring trimming can also improve shaved sedge's shape and stimulate new, healthy growth. Ensuring cuts are made when the plant is not actively growing helps maintain its health and durability.
Tools Required for Trimming Shaved Sedge
Hand Pruners
Useful for precise cutting of small stems and foliage of shaved sedge to maintain its shape and remove dead or damaged blades.
Grass Shears
Perfect for efficiently cutting back the foliage of shaved sedge, especially at the end of the growing season or to neaten its appearance.
Loppers
Can be utilized for cutting thicker stems or for more extensive trimming tasks where greater leverage is required.
Method for Trimming Shaved Sedge
Identification
Carefully examine shaved sedge for any diseased or withered leaves, noting their position.
Sanitization
Disinfect your pruning shears or scissors with alcohol or a bleach solution to prevent the spread of disease.
Trimming diseased leaves
Begin by removing diseased leaves. Cut them back to healthy tissue, making clean cuts close to the base without harming nearby healthy parts.
Trimming withered leaves
Next, remove any withered leaves by cutting them at the base. Ensure your cuts are clean and precise to avoid damaging the plant.
Cleanup
Gather all pruned material and dispose of it properly. Clean your tools again to maintain hygiene and prevent future disease spread.
Common Trimming Errors with Shaved Sedge
Excessive Trimming
Some gardeners tend to remove too much foliage, which can stress shaved sedge and hinder its growth.
Incorrect Tool Usage
Using dull or dirty tools can cause damage to the plant and make it vulnerable to diseases.
Ignoring Dead Foliage
Failing to remove dead or damaged leaves can lead to decay and attract pests.
Random Trimming
Cutting without a clear strategy often results in an uneven and unhealthy plant structure.
Trimming Too Close to the Base
Cutting too close to the ground can impair the plant's ability to recover and produce new growth.
General Trimming Advice for Shaved Sedge
Utilize Sharp, Clean Tools
Ensure your pruners or shears are sharp and sterilized to make clean cuts and minimize disease risk.
Remove Dead or Damaged Foliage
Regularly trim away any dead or damaged leaves to maintain the overall health of shaved sedge.
Trim with Intent
Always have a clear plan before you start trimming to ensure you maintain the plant's natural shape and encourage healthy growth.
Moderate Trimming
Cut back only what is necessary, typically no more than one-third of the foliage, to avoid stressing the plant.
Cut at an Angle
Make angled cuts to prevent water from accumulating on the cut surface, which helps to minimize the risk of rot.


