How to Prune Caribbean sedge?
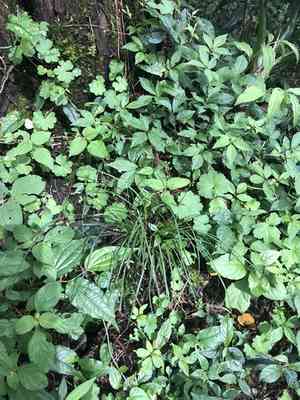
Caribbean sedge, an attractive grass-like perennial, flourishes in humid conditions. To ensure peak health and aesthetic appeal, perform trimming in early spring or during winter. Eliminate withered or compromised leaves to stimulate fresh development and sustain the plant's robustness. Cut back to soil level if the plant's density becomes excessive. Trimming improves air movement and lowers the chances of pest outbreaks. Always employ sanitized, keen implements to avert illness.
What Are the Benefits of Pruning Caribbean Sedge?
What Are the Benefits of Pruning Caribbean Sedge?
Trimming caribbean sedge promotes robust development and helps maintain its form. It fosters healthy, thick foliage, which can enhance the plant's resistance to pests and diseases.
What Is the Best Time for Pruning Caribbean Sedge?
What Is the Best Time for Pruning Caribbean Sedge?
Trimming caribbean sedge in early spring and winter is ideal as it aligns with the plant's dormant phase, minimizing stress and enabling healthier regrowth during the active growing season. Early spring pruning helps revitalize the plant before new growth begins, while winter pruning removes any dead or damaged foliage from the previous season. This timing supports caribbean sedge's overall health, encouraging a strong structure and optimal flowering or fruiting cycles.
What Tools Do I Need to Prune Caribbean Sedge?
Bypass Pruners
Perfect for making clean cuts on individual stems and grass-like leaves, crucial for preserving the health and look of caribbean sedge.
Shears
Useful for shaping and reducing the size of caribbean sedge when it becomes overgrown, helping to keep it tidy and manageable.
Gloves
Essential for protecting hands from sharp edges and potential irritants when handling caribbean sedge, ensuring safe and comfortable pruning.
Rake
Helps collect trimmed foliage and debris around caribbean sedge, ensuring a clean and healthy growing environment.
How to Prune Caribbean Sedge
Inspect
Examine caribbean sedge's foliage to pinpoint any diseased or withered leaves that require removal. Look for signs of discoloration, spots, or dryness.
Tool selection
Select appropriate pruning tools such as sharp scissors or hand pruners for precise cuts. Ensure tools are disinfected to prevent disease transmission.
Cut diseased leaves
Use the pruners to carefully remove any diseased leaves, cutting as close to the base of the affected leaf as possible without harming healthy tissue.
Remove withered leaves
Trim away withered leaves, again cutting close to the base. Ensure all dead material is removed to encourage healthy new growth.
Dispose properly
Properly discard all removed material away from healthy plants to prevent any potential diseases from spreading. Clean tools after use.
Common Pruning Mistakes with Caribbean Sedge
Over-Pruning
Cutting back too much foliage can stress caribbean sedge, diminishing its ability to photosynthesize and recover.
Improper Tool Use
Using dull or dirty tools can result in jagged cuts that are susceptible to infection and can hinder the plant's healing process.
Incorrect Pruning Height
Pruning too close to the base can damage the plant's crown, which is vital for new growth.
Pruning During Wet Conditions
Trimming plants when they are wet can spread diseases and fungal infections more easily due to increased moisture levels.
Ignoring Damaged or Diseased Parts
Failing to remove damaged or diseased stems can allow pathogens to spread and negatively impact overall plant health.
Common Pruning Tips for Caribbean Sedge
Sanitize Tools
Always ensure pruning shears and other tools are clean and sharp to make precise cuts and prevent the spread of disease.
Remove Dead Growth
Start by removing any dead or yellowing foliage to improve air circulation and reduce disease risks.
Cut Above Nodes
Make cuts just above a node or healthy leaf to encourage new growth and maintain a compact shape.
Moderate Pruning
Only trim a small portion of the plant at a time, roughly one-third of the total foliage, to avoid stressing caribbean sedge.
Angle Cuts
Make cuts at a 45-degree angle to prevent water from settling on cut surfaces, which can lead to rot.


