How to Prune Livid sedge?
Livid sedge, a perennial resembling grass, flourishes in damp, low-light conditions. Trim in early spring or during winter to stimulate fresh development and preserve its form. Eliminate withered or compromised foliage and cut back to soil level if it becomes too large. Early trimming deters ailments and insects while fostering a thick, vigorous look. Consistent pruning aids in controlling its expansion and guarantees strong growth. Always employ sharp, sanitized implements to lessen harm and the potential for disease.
Advantages of Trimming Livid Sedge
Advantages of Trimming Livid Sedge
Livid sedge benefits from trimming by encouraging robust development and preserving its form. This action helps enhance overall look and vitality by eliminating dead or damaged foliage, lessening the chance of pests and diseases, and ensuring optimal light penetration.
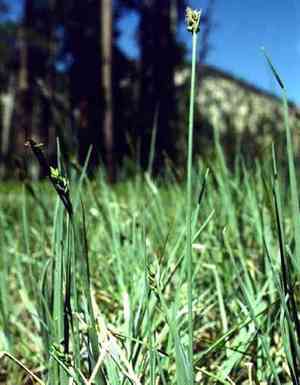
Optimal Period for Trimming Livid Sedge
Optimal Period for Trimming Livid Sedge
Trimming livid sedge in early spring or winter allows the plant to recuperate prior to its active growth phase. Early spring pruning removes dead or damaged leaves accumulated over winter, facilitating better air circulation and sunlight, which fosters healthier growth during warmer months. Winter trimming helps manage the plant's shape and size, reducing the burden of frost-damaged parts and preparing it for new growth. These seasons are ideal as they align with livid sedge's natural dormant period, minimizing stress on the plant and promoting strong development in the subsequent growing season.
Necessary Tools for Trimming Livid Sedge
Hand Pruners
Perfect for small, precise cuts required for livid sedge's smaller, delicate stems. They ensure a clean cut, promoting healthy regrowth.
Shears
Useful for trimming larger clusters of livid sedge to maintain its shape and remove dead or damaged foliage. They allow for quick and efficient cuts.
Gloves
Crucial for protecting your hands during trimming. While livid sedge isn't particularly thorny, gloves offer general protection from dirt and minor cuts.
Pruning Saw
Helpful if livid sedge grows exceptionally large or intertwined with other plants. Provides ease in cutting through thicker, tough stems.
Garden Fork
Assists in dividing and transplanting livid sedge by prying apart dense root clumps, which is important for the plant's health and spreading.
How to Trim Livid Sedge
Sanitize tools
Clean and disinfect trimming shears to prevent disease spread.
Identify areas
Examine livid sedge to locate diseased leaves and withered leaves needing removal.
Cut diseased leaves
Trim diseased leaves close to the base, ensuring complete removal to prevent further spread.
Remove withered leaves
Cut withered leaves at their base to maintain plant health and appearance.
Dispose properly
Dispose of the trimmed leaves away from the garden area to avoid contamination and disease recurrence.
Common Trimming Errors with Livid Sedge
Over-pruning
Cutting back too much of the plant can stress livid sedge, potentially inhibiting growth and leading to plant decline.
Wrong technique
Using dull or dirty trimming tools can damage the stems and introduce diseases. Incorrectly cutting leaves closer to the base rather than above the joint can leave the plant more susceptible to infection.
Clumping
Not thinning out clumps properly can lead to overcrowding, which restricts airflow and increases the risk of disease and pest infestations.
Timing
Trimming livid sedge at the wrong times can stunt its growth. Make sure to trim when the plant is not actively growing to avoid unnecessary stress.
General Trimming Advice for Livid Sedge
Use sharp tools
Always use sharp and clean trimming shears or scissors to make clean cuts, which promote faster healing and reduce the risk of disease.
Thin out clumps
Regularly thin out the crowded sections to improve air circulation, which helps prevent fungal diseases and encourages healthy growth.
Remove damaged growth
Cut away any dead, damaged, or diseased foliage to prevent the spread of issues and promote vigorous new growth.
Clean cuts
Make precise cuts just above a joint or node without leaving stubs. This careful technique encourages optimal regrowth and prevents the plant from becoming prone to infections.


