How to Prune Lesser panicled sedge?
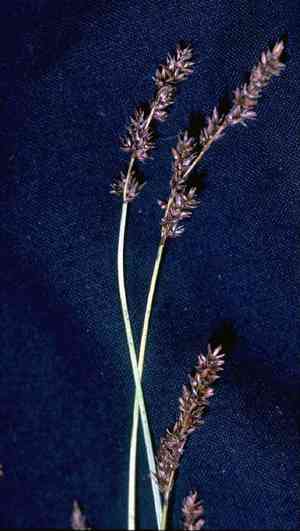
This enduring sedge flourishes in marshy environments, featuring blade-like foliage and aggregated flower spikes. For lesser panicled sedge, optimal trimming involves severing aged leaves in early spring or throughout its winter resting phase to stimulate fresh development. Precision in timing is crucial: perform pruning once the threat of severe freezes has subsided to prevent harm. Consistent elimination of deceased or discolored leaves sustains vitality and vigor, simultaneously lowering the likelihood of illness. Trimming improves the plant's visual appeal and fosters thicker, more resilient growth.
What Are the Benefits of Pruning Lesser Panicled Sedge?
What Are the Benefits of Pruning Lesser Panicled Sedge?
Trimming lesser panicled sedge encourages robust development and helps maintain its desired form. Strategic cuts enhance light penetration and air flow, promoting a strong structure and preventing excessive growth. This targeted approach fosters a healthier, neater plant appearance.
What Is the Best Time for Pruning Lesser Panicled Sedge?
What Is the Best Time for Pruning Lesser Panicled Sedge?
The optimal periods to prune lesser panicled sedge are in early spring before new growth begins, or during winter when the plant is dormant. Trimming in early spring allows for the removal of winter damage before the new growing season, thereby stimulating healthy development and vigorous growth. Pruning in winter, while the plant is inactive, minimizes stress and prevents sap loss, which helps maintain the plant's health. Avoiding the active growing season and flowering periods ensures that the plant's ability to photosynthesize and reproduce is not compromised. These recommended seasons align with the natural lifecycle of lesser panicled sedge, allowing for recovery and regrowth in time for the peak growing phase.
What Tools Do I Need to Prune Lesser Panicled Sedge?
Hand Pruners
Lesser panicled sedge's grass-like foliage requires sharp, precise cuts to prevent tearing. Hand pruners are well-suited for this, allowing for targeted trimming of dead or overgrown leaves.
Grass Shears
For shaping and thinning the clumps of lesser panicled sedge, grass shears are ideal. Their design is especially useful for cutting grasses close to the ground without damaging the plant's base.
Long-Handled Loppers
If lesser panicled sedge has some tougher, thicker culms or if accessibility is difficult, long-handled loppers offer the leverage needed to make clean cuts without straining the gardener's back.
How to Prune Lesser Panicled Sedge
Clean tools
Before pruning lesser panicled sedge, clean and sterilize pruning shears or scissors to prevent the spread of disease. Use a solution of one part bleach to nine parts water to wipe down the blades.
Inspect
Inspect lesser panicled sedge for diseased or withered leaves, examining the plant from the base to the tips to ensure no affected areas are missed.
Trim diseased leaves
Using the sterilized shears, carefully trim off diseased leaves at the base of the leaf stem, ensuring to cut at a point where healthy tissue begins.
Trim withered leaves
Remove withered leaves by trimming them at their base as well, cutting as close to the ground as possible without damaging new shoots or the crown of lesser panicled sedge.
Dispose
Dispose of all removed diseased and withered leaves promptly and away from lesser panicled sedge to minimize the risk of disease spread and to deter pests.
Common Pruning Mistakes with Lesser Panicled Sedge
Over-pruning
Removing too much foliage from lesser panicled sedge can weaken the plant, leading to reduced vigor and sparse growth. It is essential not to remove more than one-third of the living plant tissue at any given time.
Cutting back too early or late
Pruning lesser panicled sedge at the incorrect time during its lifecycle may cause stress and inhibit growth. Since timing information is excluded, focus on the plant's condition as an indicator.
Inadequate tools
Using dull or dirty pruning tools on lesser panicled sedge can result in jagged cuts that are more susceptible to disease and pest infestation. Always use sharp, clean cutting implements.
Pruning blindly
Random or indiscriminate cuts may harm lesser panicled sedge rather than help it. Each cut should be made with a purpose, whether to remove dead material, shape the plant, or encourage new growth.
Ignoring plant structure
Failing to consider the natural growth habit and structure of lesser panicled sedge while pruning can result in an unattractive appearance and potentially damage the plant's health.
Common Pruning Tips for Lesser Panicled Sedge
Selective thinning
Target dead or weak stems of lesser panicled sedge for removal, which helps to increase light penetration and air circulation without overly reducing the plant's foliage.
Maintain natural form
When pruning lesser panicled sedge, aim to retain the plant's natural shape to enhance its aesthetic and health. Avoid over-shaping or creating artificial forms unless it is a specific gardening goal.
Cut to a Node
When trimming back live portions of lesser panicled sedge, make cuts just above a node or junction where new growth can emerge. This helps stimulate healthy regrowth.
Sanitation
After each use or when moving between plants, clean the pruning tools to prevent the spread of pathogens to lesser panicled sedge. A solution of 1-part bleach to 9-parts water can be used to sanitize the tools.
Mindful disposal
Dispose of the removed material properly, especially if it contains any diseased or pest-infested parts, to avoid contaminating lesser panicled sedge or other nearby plants.


