Lesser panicled sedge (Carex diandra)
Also known as: Lesser Panicled Sedge
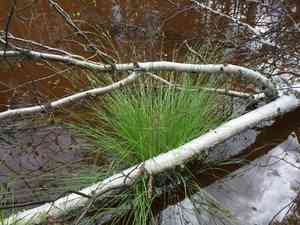
Lesser panicled sedge is a perennial wetland plant that adapts to various soil types and sunlight conditions. It thrives in environments with abundant water, such as marshes, fens, bogs, wet meadows, and the shallow areas of ponds and lakes.
In This Article
Attributes of Lesser panicled sedge
Lifespan
Perennial
Plant Type
Grass
Plant Height
30 cm to 91 cm
Spread
20-40 cm
Leaf Color
Green
Flower Size
0.3-0.5 cm
Flower Color
White Yellow Green Brown
Images of Lesser panicled sedge
Quickly Identify Lesser panicled sedge
1
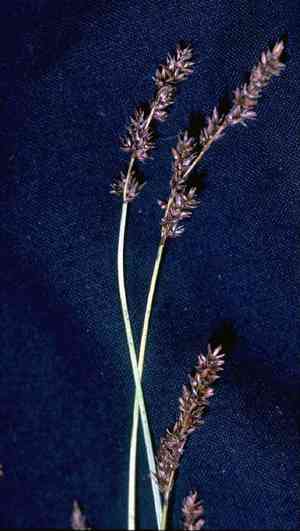
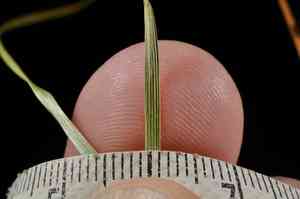
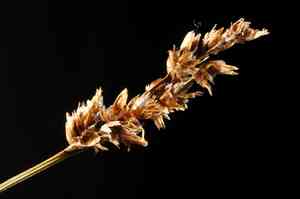
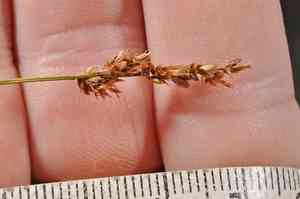
Carex diandra can be identified by its slender, grass-like leaves and distinctive flowering spikes that produce small, brownish seed heads. The plant typically grows in wetland areas and forms dense clumps.
Scientific Classification of Lesser panicled sedge
Phylum
Vascular plants
Class
Monocotyledons
Order
Poales
Family
Sedge
Genus
True sedges
Species
Lesser panicled sedge
Planting and Growing of Lesser panicled sedge
Care Difficulty
Easy
Watering Schedule
Every 4 days
Sunlight Requirements
Partial sun
Sunshine Duration
6-10 hours
Ideal Temperature
50-70℉
Soil Type
Potting Mix, Peat Mix
Soil pH
6.5-7.5
Fertilizer Type
Balanced
Pruning Season
Spring, Summer
Pruning Area
Branches, Leaves
Pruning Frequency
2 times a year
Repotting Season
Spring
Pot Type
Plastic, Ceramic
 How to Water Lesser panicled sedge?
For Carex diandra, ensure that the soil remains consistently moist, almost on the verge of being damp, but not waterlogged. Each watering session should allow about 250ml of water, ensuring it reaches the roots without leaving standing water.
What are the symptoms of an underwatered Lesser panicled sedge?
›
What should I do if my Lesser panicled sedge is not getting enough water?
›
What are the symptoms of an overwatered Lesser panicled sedge?
›
How to save an overwatered Lesser panicled sedge?
›
 What Are the Sunlight Requirements for Lesser panicled sedge?
Partial sun allows Carex diandra to perform photosynthesis efficiently without overheating, promoting lush growth and increased foliage health.
More About Sunlight Requirements Techniques→
Optimal environment?
›
Solutions for ideal lighting?
›
Benefits of ideal conditions achieved?
›
 What Is the Ideal Temperature Range for Lesser panicled sedge?
The ideal temperature range for growing Carex diandra is between 50°F and 70°F. This range allows the plant to thrive by providing optimal conditions for photosynthesis and nutrient uptake. The moderate climate in this range helps maintain the delicate balance required for healthy growth and development.
 What Soil is Best for Lesser panicled sedge?
Carex diandra thrives in soils that retain moisture well. The ideal soil for this plant maintains a consistent level of moisture, preventing drying out, which helps in sustaining the plant’s lush growth and active health. This plant requires a nutrient-rich soil to supply the essential minerals needed for its robust growth. Rich, fertile loam provides a perfect environment for nutrient uptake, leading to vibrant foliage and healthy root systems. Good aeration is key for Carex diandra’s roots to breathe and grow effectively. Loamy and sandy loam soils facilitate this, enhancing soil drainage and keeping roots healthy and free from rot.
 How to Fertilize Lesser panicled sedge?
For Carex diandra, it's crucial to use a balanced fertilizer with an N-P-K ratio of 10-10-10. Apply liquid fertilizer at a rate of one teaspoon per gallon of water to ensure that the nutrients are easily absorbed by the plant roots. This ensures healthy growth without overloading the plant with excess nutrients that can cause more harm than good.
 How to Prune Lesser panicled sedge?
Start by assessing the overall growth of the Carex diandra. Identify dead or discolored leaves that need to be removed. This grass-like plant typically flourishes with a tidy trim that encourages bushy growth and maintains health. Carefully prune any brown or wilted leaves close to the base. This allows for new, healthy growth and prevents disease spread. Be cautious not to damage healthy leaves during the process as it can affect the plant's appearance. Trim around the edges of the Carex diandra to maintain a neat, rounded shape. This not only enhances the aesthetic appeal but also promotes better air circulation, reducing the risk of fungal infections.
More About Pruning Techniques→
 How to Propagate Lesser panicled sedge plant?
1
Select healthy and viable seeds for propagation. Clean the seeds to remove any debris or fungal spores. Soak them overnight to encourage quicker germination, and plant them in seed trays filled with a well-draining soil mix. Ensure the seeds are covered lightly with soil.
2
Carefully dig up the mature plant and use a sharp spade to divide the root clump into several parts. Ensure each section has adequate roots and foliage to sustain growth. Transplant these sections into prepared soil, and water them thoroughly.
3
Once seedlings have developed a strong root system, transplant them to their permanent location outdoors or into larger pots. Ensure to harden them off by gradually exposing them to outdoor conditions over a week. Plant them at the same depth as they were in the propagation trays.
 How to Repot Lesser panicled sedge plant?
1
Carex diandra needs repotting when you notice roots growing out of the drainage holes or a noticeable decrease in its growth rate. Also, if the soil becomes compacted, it is time to refresh the plant’s living conditions to encourage healthier growth.
2
The ideal pot for Carex diandra should have adequate drainage holes. Opt for a container that is slightly larger than the current one to give roots room to expand. Using a pot that ensures proper airflow prevents root rot and supports the plant's overall well-being.
3
A well-draining, moisture-retentive soil mix is essential. The soil should maintain consistent moisture without becoming waterlogged. This benefits the plant by providing stability in its nutrients, allowing roots to breathe while retaining necessary hydration.
Learn More About Lesser panicled sedge Diseases
Anthracnose
Bacterial Leaf Spot
Bacterial Soft Rot
Bacterial Wilt
Damping-off
Downy Mildew
Drought Stress
Fusarium Wilt
Gray Mold
Leaf Spot
Mosaic
Nutrient Deficiency
Nutrient Toxicity
Powdery Mildew
Root Rot
Root-knot Nematode
Rusts
Sooty Mold
Spider Mites
Temperature Stress
Thrips Damage
White Mold


