How to Propagate Blackbrush acacia?
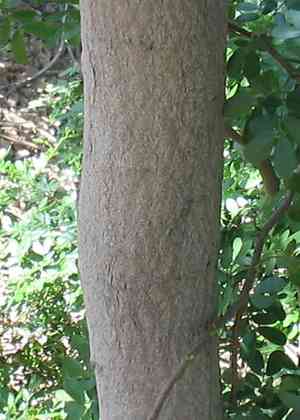
This woody plant, indigenous to chaparral areas, flourishes in adequately drained substrates and withstands arid conditions once mature. Reproduction is typically accomplished via cuttings. To improve the likelihood of successful rooting, dip semi-hardwood cuttings in a rooting stimulant prior to placing them in a damp propagation medium. A consistently warm setting aids root formation for blackbrush acacia, along with shielding from intense sunlight and frequent misting to preserve moisture levels. Relocate juvenile plants to bigger pots once root growth is apparent, taking care to handle fragile roots gently.
When Is the Optimal Time to Propagate Blackbrush Acacia?
Propagation Type
Cutting
Propagation Season
Spring,Summer
What Equipment Is Used in Blackbrush Acacia Propagation?
Sharp pruning shears
Crucial for obtaining clean, healthy cuttings from blackbrush acacia. Precise, clean cuts prevent disease and harm to both the parent plant and the cuttings. This ensures smooth cut surfaces, boosting rooting potential and reducing stress on the cuttings.
Rooting hormone powder
Encourages quicker and more dependable root formation in blackbrush acacia cuttings. Dipping the cut end of the cuttings into the rooting hormone before planting significantly increases the likelihood of successful root growth. This is especially helpful for blackbrush acacia, which can sometimes be difficult to root.
Sterile potting mix
Offers a clean, pathogen-free environment for the new roots of blackbrush acacia cuttings to develop. The sterility of the potting mix is vital to avoid introducing diseases that could harm vulnerable cuttings. It should also drain well to support the moderate water needs of blackbrush acacia.
Propagation trays
Used to hold blackbrush acacia cuttings in a stable environment, promoting consistent growth conditions. These trays help organize cuttings neatly and maintain the necessary humidity and temperature to encourage rooting.
Plastic dome or cover
Helps maintain ideal humidity around blackbrush acacia cuttings, essential for their survival until roots can establish. Consistent humidity prevents delicate cuttings from drying out and aids in faster establishment of new roots.
Heat mat (optional)
While not strictly required, providing bottom warmth can greatly enhance the rooting success of blackbrush acacia cuttings, particularly in cooler settings. The heat promotes faster growth and root development, creating a more favorable environment for the cuttings to thrive.
How to Propagate Blackbrush Acacia?
Propagation Type
Moderately Difficult
How to Care for Your Newly Propagated Blackbrush Acacia?
How to Care for Your Newly Propagated Blackbrush Acacia?
Once blackbrush acacia cuttings have rooted, gradually introduce them to less humid conditions by removing the plastic cover over several days. When established, transplant them into individual pots or a permanent spot in well-draining soil under full sun to partial shade. Water regularly until fully established, then reduce frequency, as blackbrush acacia is drought tolerant. Periodically check for pests and diseases and treat as needed to ensure healthy growth.
Common Errors to Avoid When Propagating Blackbrush Acacia
Using incorrect soil type
When propagating blackbrush acacia, using soil that retains too much moisture can lead to root rot. It's crucial to use well-draining soil as blackbrush acacia is adapted to arid environments, where waterlogging is uncommon.
Overwatering
Gardeners often make the mistake of overwatering blackbrush acacia during propagation. This species is drought-resistant, and excessive water can hinder root development, potentially leading to fungal diseases.
Improper pruning
Pruning blackbrush acacia too aggressively when trying to encourage new growth can stress the plant. Excessive removal of foliage reduces the plantâs ability to photosynthesize effectively.
Ignoring pests
Neglecting to check for or manage pests during the early stages of propagation can lead to infestations that compromise the overall health and viability of blackbrush acacia.
Planting depth
Planting seeds or cuttings too deeply can inhibit blackbrush acacia's ability to sprout effectively. This typically results from a misconception that deeper planting provides more stability.
Tips For Propagating Blackbrush Acacia
Use sandy, well-draining soil
For successful propagation, ensure the use of a sandy, well-draining soil mixture. This mimics blackbrush acacia's natural habitat and promotes healthy root development without water retention that could cause rot.
Moderate watering
Water blackbrush acacia moderately to mimic the natural arid conditions it thrives in. Allow the soil to dry out between watering sessions, which encourages strong root growth.
Gentle pruning
Prune blackbrush acacia gently to stimulate growth. Removing only dead or overextended branches helps maintain the plantâs energy for developing new growth areas during propagation.
Pest monitoring
Regularly monitor for pests during the propagation phase. Early detection and treatment prevent pests from stressing or damaging blackbrush acacia, allowing for healthier growth.
Shallow planting
Ensure that seeds or cuttings are planted shallowly. This increases the chances of successful sprouting and establishment, as it provides the necessary exposure to light and air needed for initial growth.



