How to Propagate Cape star-violet?
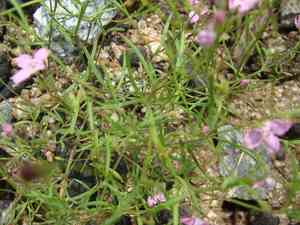
Streptocarpus is a unique botanical specimen characterized by its star-shaped purple blossoms and dense growth pattern. For successful propagation, guarantee a substrate with good drainage and steady hydration levels to achieve peak germination. Gently conceal the seeds and sustain a moderate climate to foster robust development. Consistent observation and defense against insects will additionally contribute to the thriving progress of nascent plants.
Optimal Period for Cape Star-violet Propagation
Propagation Method
Seeding
Propagation Period
Spring
Tools Required for Cape Star-violet Propagation
Seed Tray
Seed trays are crucial for planting seeds, offering a controlled setting for sprouting. For cape star-violet, shallow trays are perfect for even distribution and preventing overcrowding.
Seed Compost
Utilizing premium seed compost is vital as it supplies essential nutrients and proper drainage. This guarantees cape star-violet seeds have an excellent beginning by providing a fertile and well-drained medium.
Heating Mat
A heating mat establishes a warm, consistent temperature, which aids cape star-violet germination. It ensures uniform sprouting and lowers the risk of fungal diseases by stabilizing soil temperature.
Humidity Dome
A humidity dome helps maintain the high moisture levels needed for cape star-violet seed germination. This creates a microenvironment that prevents soil from drying out and boosts germination rates.
Water Mister
A water mister is essential for gently watering cape star-violet seeds and young seedlings. It delivers moisture without disturbing the soil, preventing seed displacement.
Labels and Markers
Labels and markers are important for identifying cape star-violet during the germination process. Knowing where seeds have been sown helps in monitoring progress and managing plant care effectively.
Fine Mesh Sieve
A fine mesh sieve is used to cover cape star-violet seeds with a thin layer of compost or sand. This ensures seeds are lightly covered, aiding proper germination while preventing drying out or being washed away.
Transparent Plastic Wrap
Transparent plastic wrap can be used as an alternative to a humidity dome to maintain moisture levels. It ensures that the seeds stay adequately moist until germination occurs.
How to Propagate Cape Star-violet?
Propagation Type
Simple
How to Care for Your Newly Propagated Cape Star-violet?
How to Care for Your Newly Propagated Cape Star-violet?
Once cape star-violet seeds have sprouted and seedlings have developed several true leaves, transfer them into individual pots with a similar well-draining soil mix. Position the pots in a spot with bright, indirect light. Water the plants consistently, allowing the top inch of soil to dry out between waterings. Fertilize them monthly during the growing season with a balanced, water-soluble fertilizer diluted to half strength. Monitor for pests and diseases, and ensure good air circulation around the plants to prevent fungal issues.
Common Mistakes to Avoid When Propagating Cape Star-violet
Overwatering
Excessive moisture can lead to root rot, hindering successful propagation and potentially killing the plant.
Improper Soil Mix
Using soil that retains too much moisture or drains poorly can suffocate roots and impede growth.
Insufficient Light
Lack of adequate light can result in weak, leggy growth, reducing the plant's ability to establish strong roots.
Incorrect Cutting Technique
Taking cuttings from unhealthy or unsuitable parts of the plant can lead to rooting failure.
Tips For Propagating Cape Star-violet
Use Well-Draining Soil
Ensure the soil mix has good drainage properties to avoid waterlogging. A mix containing sand or perlite can improve drainage.
Water Sparingly
Keep the soil slightly moist but not waterlogged. Allow it to dry out slightly between waterings to prevent root rot.
Provide Adequate Light
Place the cuttings in a bright, indirect light location to promote strong, healthy growth.
Select Healthy Cuttings
Choose healthy, disease-free stems for cuttings, ideally with a few sets of leaves, to ensure better rooting success.



