How to Propagate Prairie phlox?
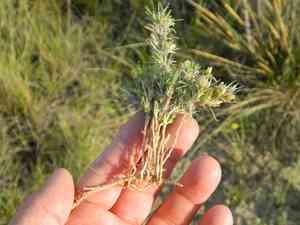
Prairie phlox flourishes in porous, sandy substrates and needs ample sunlight for peak development. Reproduction is mainly achieved by seeding. Confirm that seeds are planted in a warm setting and gently blanketed with earth. Keep the soil damp yet prevent saturation. After sprouts appear, progressively introduce them to external elements by lessening greenhouse protection. Adequate spacing is vital to prevent excessive density. Consistently check for infestations and ailments, guaranteeing the seedlings' vigorous progression.
Optimal Time for Prairie Phlox Propagation
Propagation Method
Seeding
Propagation Period
Spring
Tools for Prairie Phlox Propagation
Seed Tray
Utilized for planting seeds, offering a regulated setting for germination. Ensures consistency and ease of handling for prairie phlox seedlings.
Seedling Heat Mat
Maintains a steady soil temperature, boosting germination rates for prairie phlox. Recommended for guaranteeing ideal warmth during the germination phase.
Vermiculite
Functions as a fine growing medium or soil covering to retain moisture and establish an optimal environment for prairie phlox seedling development.
Spray Bottle
Delivers a gentle mist to keep the soil damp without disturbing the delicate prairie phlox seeds. Crucial for maintaining appropriate moisture levels during germination.
Humidity Dome
Covers the seed tray to preserve moisture and create a humid atmosphere, vital for the initial stages of prairie phlox seed germination.
Plant Labels
Used to mark planting dates or seed varieties, ensuring proper identification and tracking of prairie phlox seedlings for effective management.
Sterile Potting Mix
Provides a pathogen-free medium for planting prairie phlox seeds, reducing the risk of disease transmission and promoting robust seedling growth.
Light Source
Supplementary grow lights to ensure sufficient light exposure for prairie phlox seedlings, especially in environments lacking natural sunlight, supporting robust growth.
Propagating Prairie Phlox
Propagation Type
Simple
Caring for Newly Propagated Prairie Phlox
Caring for Newly Propagated Prairie Phlox
Once the seedlings have developed their initial true leaves, transfer them into individual containers filled with nutrient-rich, well-draining soil. Gradually introduce them to outdoor conditions by exposing them to direct sunlight for increasing durations daily. After they are hardened off, plant them in a sunny spot with well-drained soil. Water consistently during their establishment phase but avoid overwatering. Apply mulch around the base to retain moisture and suppress weeds. Regularly inspect for pests and diseases, and prune as necessary to encourage bushier growth and remove any damaged or diseased parts.
Common Errors to Avoid When Propagating Prairie Phlox
Overwatering
Excessive irrigation can lead to root rot and fungal infections, which can be detrimental to prairie phlox's health and impede its propagation success.
Poor Soil Drainage
Utilizing soil that drains inadequately can cause water accumulation around the roots, resulting in root suffocation and diminished plant vigor.
Insufficient Light
Providing inadequate light can result in weak and leggy growth, making it difficult for prairie phlox to establish strong roots during propagation.
Incorrect Cutting Techniques
Taking cuttings that are either too small or damaged can reduce the chances of successful rooting, compromising the propagation process.
Unsterilized Equipment
Using unsterilized tools can introduce pathogens to the plant, increasing the risk of diseases that can impede prairie phlox's growth.
Tips for Propagating Prairie Phlox
Use Well-Draining Soil
Ensure the soil mixture drains effectively to prevent water from stagnating around the roots, fostering a healthy root environment.
Moderate Watering
Water the cuttings moderately, keeping the soil moist but not waterlogged to avoid root rot.
Provide Adequate Light
Place prairie phlox in a location where it can receive bright, indirect sunlight to encourage robust growth and root development.
Healthy Cuttings
Select healthy, disease-free stems and use a sterile, sharp tool to take cuttings, ensuring that each cutting has several leaf nodes for optimal rooting.
Humidity Control
Maintain high humidity around the cuttings by covering them with a plastic dome or placing them in a propagator to enhance moisture retention and root formation.



