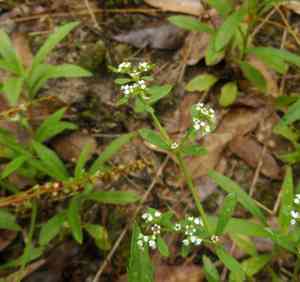
How to Propagate Drummond's nailwort?
Drummond's nailwort is a hardy, enduring plant that flourishes in arid, sandy substrates typical of its natural environments. To achieve successful propagation, disperse seeds in a substrate with good drainage, maintaining a steady, slightly moist condition. Abrading the seed coat and a short period of cold treatment can enhance the rate of sprouting. It is crucial to position the seeds on the soil's surface to ensure adequate light penetration. This approach fosters robust root growth and more vigorous specimens.
Optimal Period for Propagating Drummond's Nailwort
Propagation Type
Sowing
Propagation Season
Spring
Tools Required for Drummond's Nailwort Propagation
Seed Trays
Seed trays offer a controlled, well-draining environment for seed sowing. They ensure even spacing and adequate moisture and light for drummond's nailwort's seeds, promoting uniform germination and development.
Fine Seed Starting Mix
A fine seed starting mix is vital for drummond's nailwort, ensuring good contact between soil and seed, which aids successful germination. This sterile, lightweight mix prevents damping-off and other soil-borne illnesses.
Spray Bottle
A spray bottle helps maintain consistent moisture levels without disturbing drummond's nailwort's delicate seeds. It ensures the surface remains moist, which is crucial for seed germination and root establishment.
Heat Mat
Utilizing a heat mat can stabilize seed tray temperatures, encouraging faster and more consistent germination of drummond's nailwort's seeds, especially in cooler climates or seasons.
Plant Labels
These labels assist in tracking different seed varieties and sowing dates. For drummond's nailwort, labeling ensures accurate identification and care routines throughout the propagation phase.
Transparent Cover or Dome
A transparent cover or dome retains humidity and warmth, creating a mini-greenhouse effect for drummond's nailwort. This is essential for maintaining the microclimate needed for successful germination.
How to Propagate Drummond's Nailwort?
Propagation Type
Easy
Caring for Your Newly Propagated Drummond's Nailwort
Caring for Your Newly Propagated Drummond's Nailwort
Post-germination, gradually introduce drummond's nailwort seedlings to increased sunlight. Transplant them to an outdoor spot with good drainage. Water moderately, keeping the soil slightly moist but not waterlogged. Ensure ample air circulation to prevent fungal issues. Apply a balanced, diluted fertilizer sparingly to support growth.
Common Errors to Avoid When Propagating Drummond's Nailwort
Overwatering
Excessive moisture can lead to root rot, severely hindering the plant's growth and potentially causing its demise.
Using Poor Soil
Soil lacking proper drainage can cause water accumulation, increasing the risk of root diseases and stunted development.
Incorrect Light Conditions
Placing the plant in insufficient or excessive sunlight can result in poor growth, leaf scorching, or etiolation.
Neglecting Soil pH
Failing to monitor and adjust soil pH can lead to nutrient deficiencies, impacting the plant's overall health and propagation success.
Improper Cutting Technique
Damaging the plant during cutting or using dull tools can introduce infections and diseases, reducing the likelihood of successful propagation.
Tips For Propagating Drummond's Nailwort
Ensure Proper Drainage
Utilize a well-draining soil mix to prevent water from accumulating around the plant's roots.
Monitor Watering
Water the plant sparingly, ensuring the soil is moist but not saturated.
Maintain Optimal Light
Provide bright, indirect light to encourage healthy growth while preventing leaf burn.
Check Soil pH
Regularly test the soil pH and adjust it to remain within the optimal range for drummond's nailwort.
Use Clean, Sharp Tools
Always use sterilized, sharp tools to make clean cuts, reducing infection risk and promoting quicker rooting.


