How to Propagate Cape tulip?
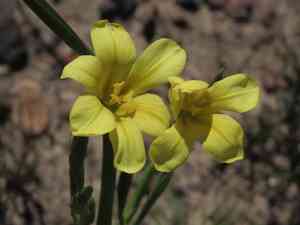
Cape tulip thrives when reproduced via its underground storage organs. Cultivators ought to gently remove these from mature specimens, making sure a sound portion of the tuber remains intact. Embed these segments in adequately draining earth enriched with some decomposed material to foster vigorous development. Placing them in an environment that emulates their natural setting, featuring ample sunlight and moderate hydration, improves their prospects for successful rooting and flowering.
Optimal Period for Cape Tulip Propagation
Propagation Method
UtilizeTheTubers
Propagation Period
Spring
Equipment for Cape Tulip Propagation
Gloves
These are vital for handling cape tulip's tubers, safeguarding hands from potential irritants on the tuber's surface and ensuring a secure propagation process. Gloves also aid in maintaining cleanliness and preventing the spread of pathogens among plants.
Sharp knife or scalpel
Used precisely to divide cape tulip's tubers. A clean, sharp knife ensures smooth cuts, minimizing damage to the tubers and promoting quicker recovery and rooting. This tool's accuracy is crucial for ensuring that each section of the tuber has a part of the crown necessary for successful regeneration.
Potting mix
A well-draining, fertile potting mix is suitable for cape tulip, providing the right balance of moisture retention and aeration. A good potting mix promotes effective root development and support, crucial for the newly propagated tubers.
Pots or propagation trays
These containers are used for placing the cut tubers of cape tulip. They should have adequate drainage holes to prevent waterlogging, which is detrimental to tuber health. The size of the pots should accommodate the growth of tubers without being excessively large, which could retain unnecessary moisture.
Labeling materials
Labels and markers are invaluable for recording details such as the date of propagation and specific tuber characteristics. This practice is important for monitoring growth progress and maintaining organization, especially when propagating multiple specimens of cape tulip.
Watering can or mist sprayer
Used to provide gentle and controlled watering, essential for keeping the tuber environment moist but not overly wet. Proper watering tools help prevent the disruption of newly planted tubers, ensuring optimal moisture levels for root development in cape tulip.
How to Propagate Cape Tulip?
Propagation Type
Easy
Caring for Your Newly Propagated Cape Tulip
Caring for Your Newly Propagated Cape Tulip
Post-propagation, continue to water cape tulip sparingly, only when the top layer of soil feels dry. Provide partial to full sunlight, ensuring that the plants are not exposed to extreme midday heat. Monitor and protect from pests and diseases, and feed biannually with a balanced, slow-release fertilizer to support robust growth.
Common Mistakes to Avoid When Propagating Cape Tulip
Overwatering
Excessive moisture can lead to root rot or fungal infections in cape tulip, as its natural habitat has periods of dryness. Overwatering can hinder the plant's ability to establish a healthy root system during propagation.
Deep Planting
Planting bulbs or seeds of cape tulip too deeply can prevent proper sprouting or cause the bulbs to rot. This affects the plantâs ability to emerge and grow effectively.
Ignoring Bulb Health
Using damaged or diseased bulbs for propagation is a critical oversight. This mistake reduces the chances of successful growth and may introduce pathogens into the soil, affecting overall plant health.
Tips For Propagating Cape Tulip
Proper Soil Preparation
Ensuring that the soil has good drainage is crucial for the healthy growth of cape tulip. Mix in sand or fine gravel to improve soil texture and aeration, mimicking its indigenous soil conditions.
Shallow Planting
Planting the bulbs of cape tulip at the right depth encourages successful sprouting. The bulbs should be planted just below the soil surface, allowing for adequate exposure to warmth and light, which stimulates growth.
Healthy Bulb Selection
Choosing firm and disease-free bulbs or seeds is essential for effective propagation. Inspect bulbs for signs of rot or damage before planting to ensure robust growth and development.



